It’s mainly the size of the biggest part for transport/storage, that is smaller with an inflatable. Weight isn’t a plus, my inflatable weights 3.8 kg. Box and top plate adds weight as well. You can build a lighter board if you shape it from foam, depending on the size.
If you build one, think about how to set it up easily, mine is a bit too complicated to assemble. If you inflate it, the opening in the board gets bigger.
1 Like
That’s crazy. My inflatable I have designed only weighs 2.4kg (without box). There’s no way to get a foam-carbon board that light. Once I add box it will still be lighter than a comparative size carbon board and with the added benefit of being able to fit in a standard suitcase for travelling.
Good to hear I’m wrong in this point, so it’s just my inflatable that is too heavy. Can you share your source so other people can get a light one too? Board only from carbon will not be 2.4 kg but if you add the box and deck plate you will probably get to at least 7kg and that’s possible for a short laminated board. The inflatable might have more volume though.
6kg short laminated board inkluding lid(s).
And i could have saved 1kg, cause i guess i did 1 Layer too much, and laminating with hand i needed plenty of Epoxy. I am sure, with Vacuum i would have saved 1kg
Update:
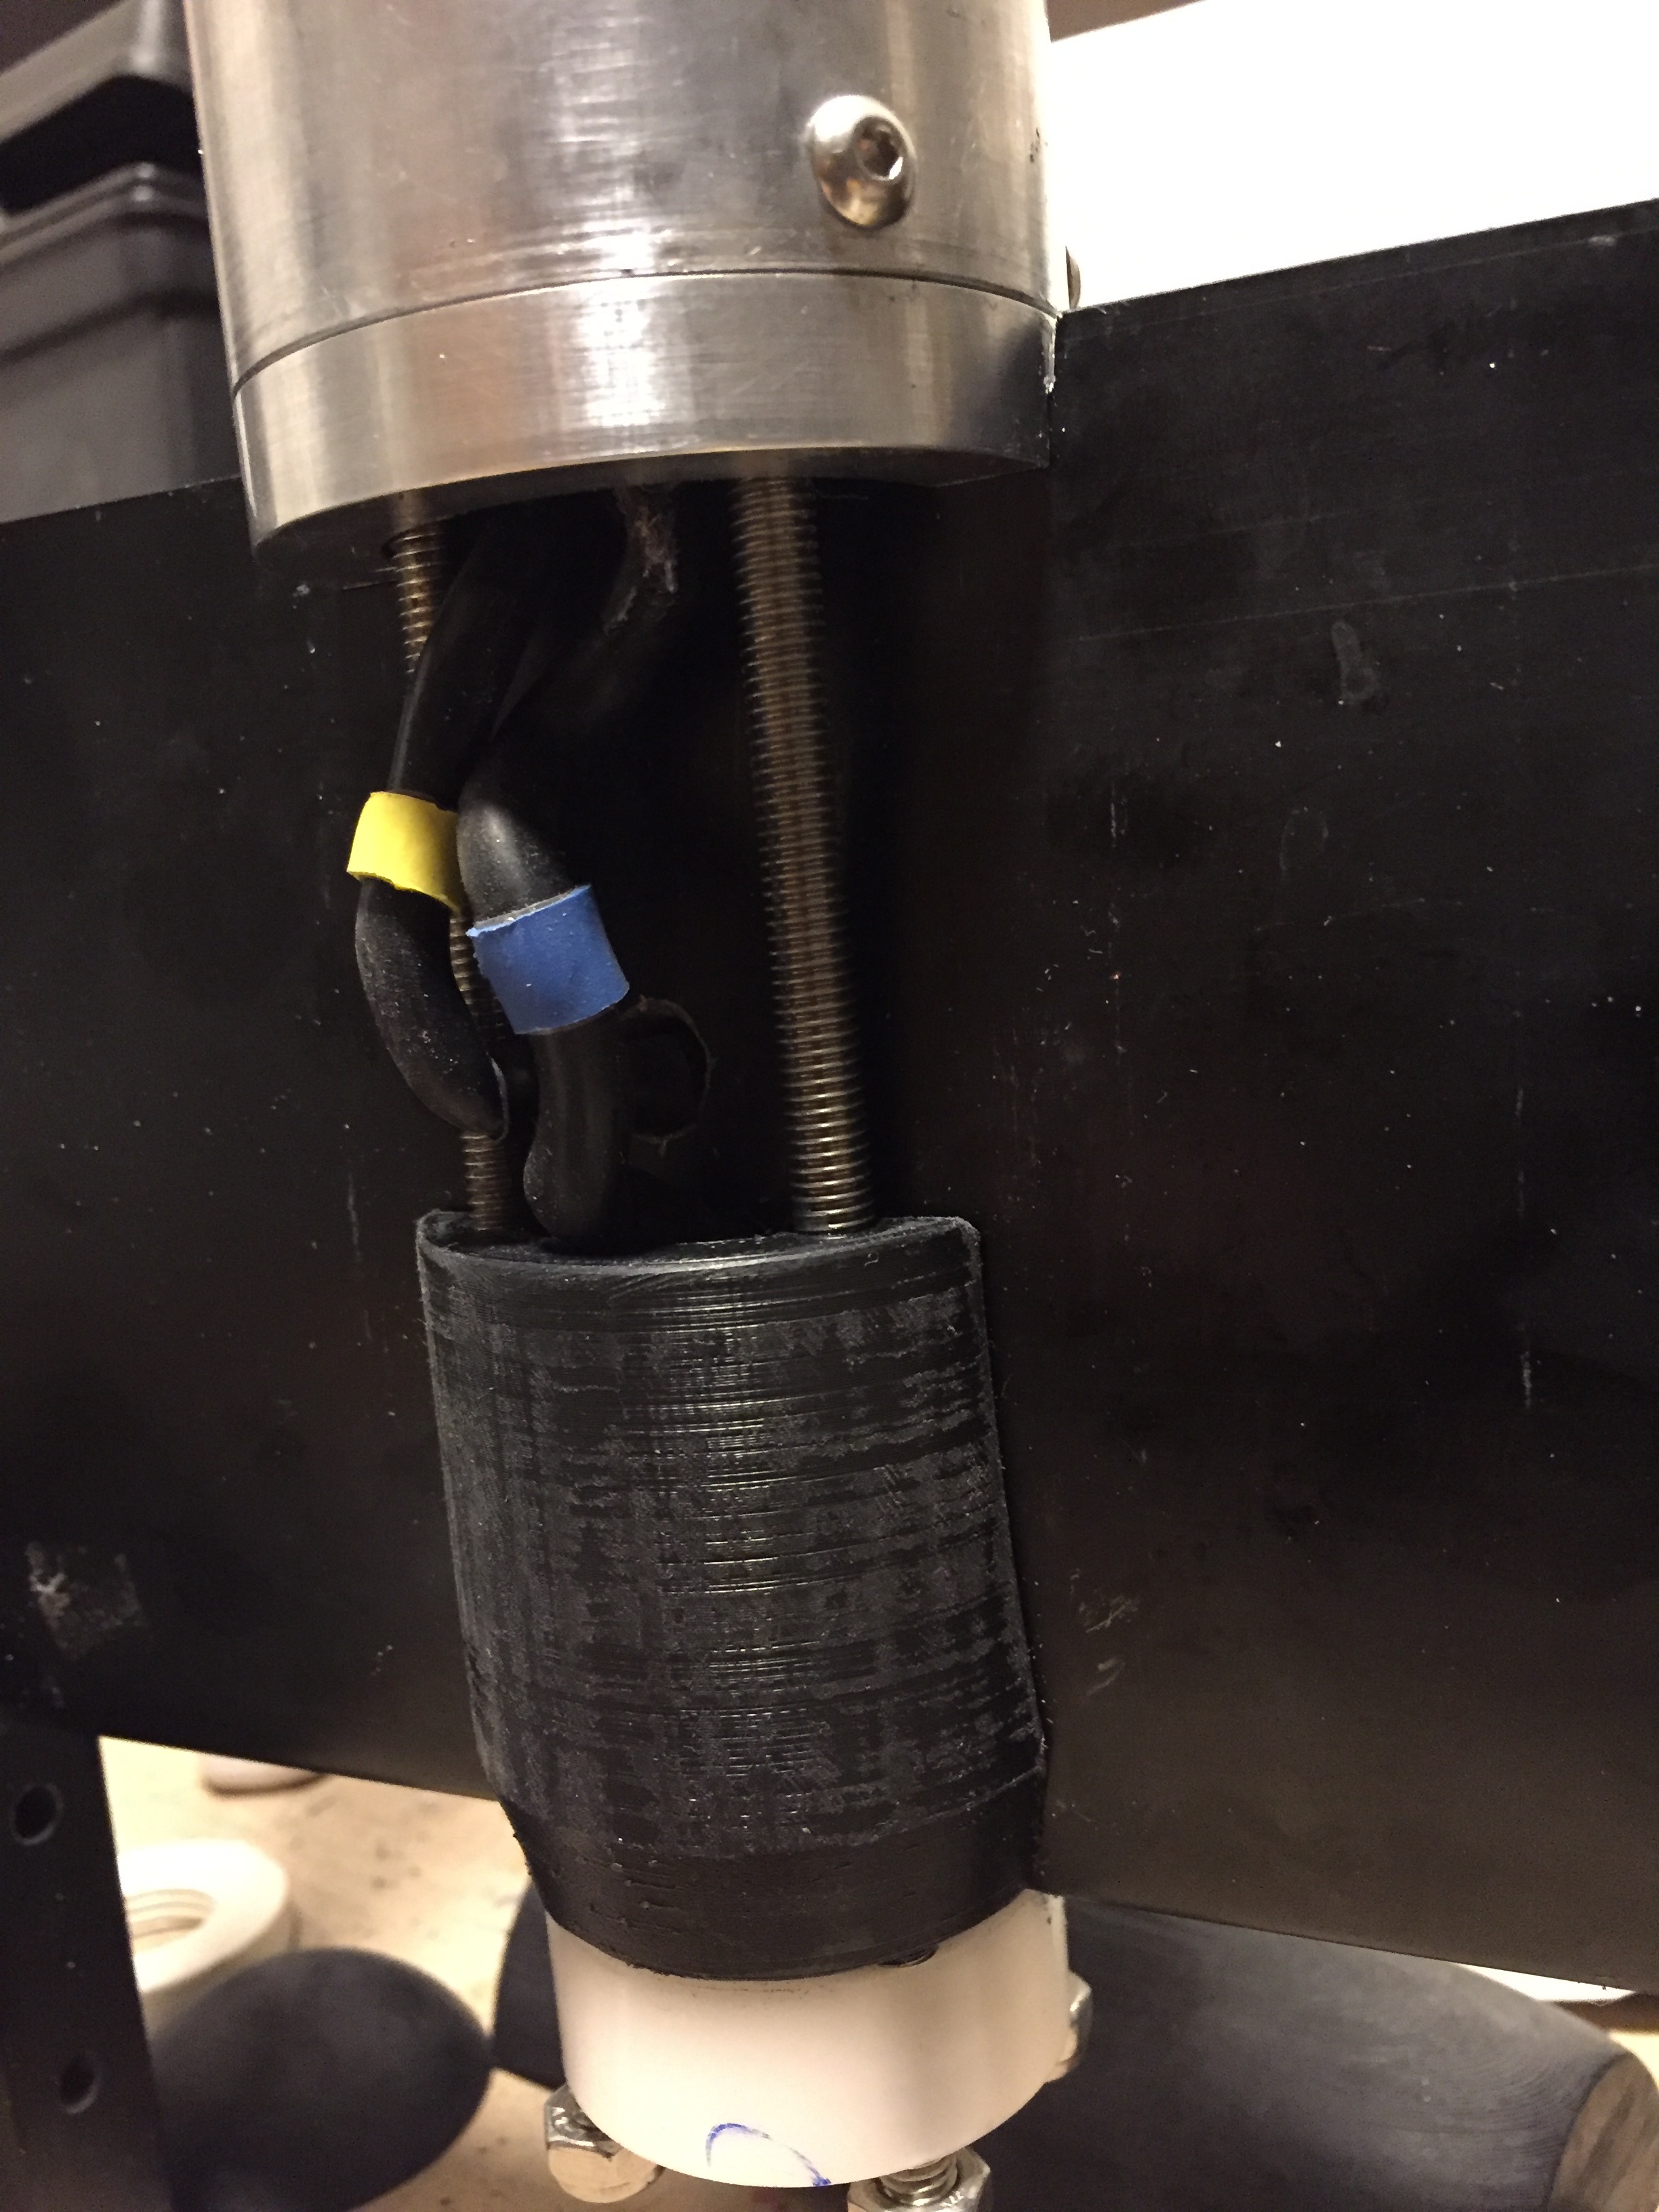
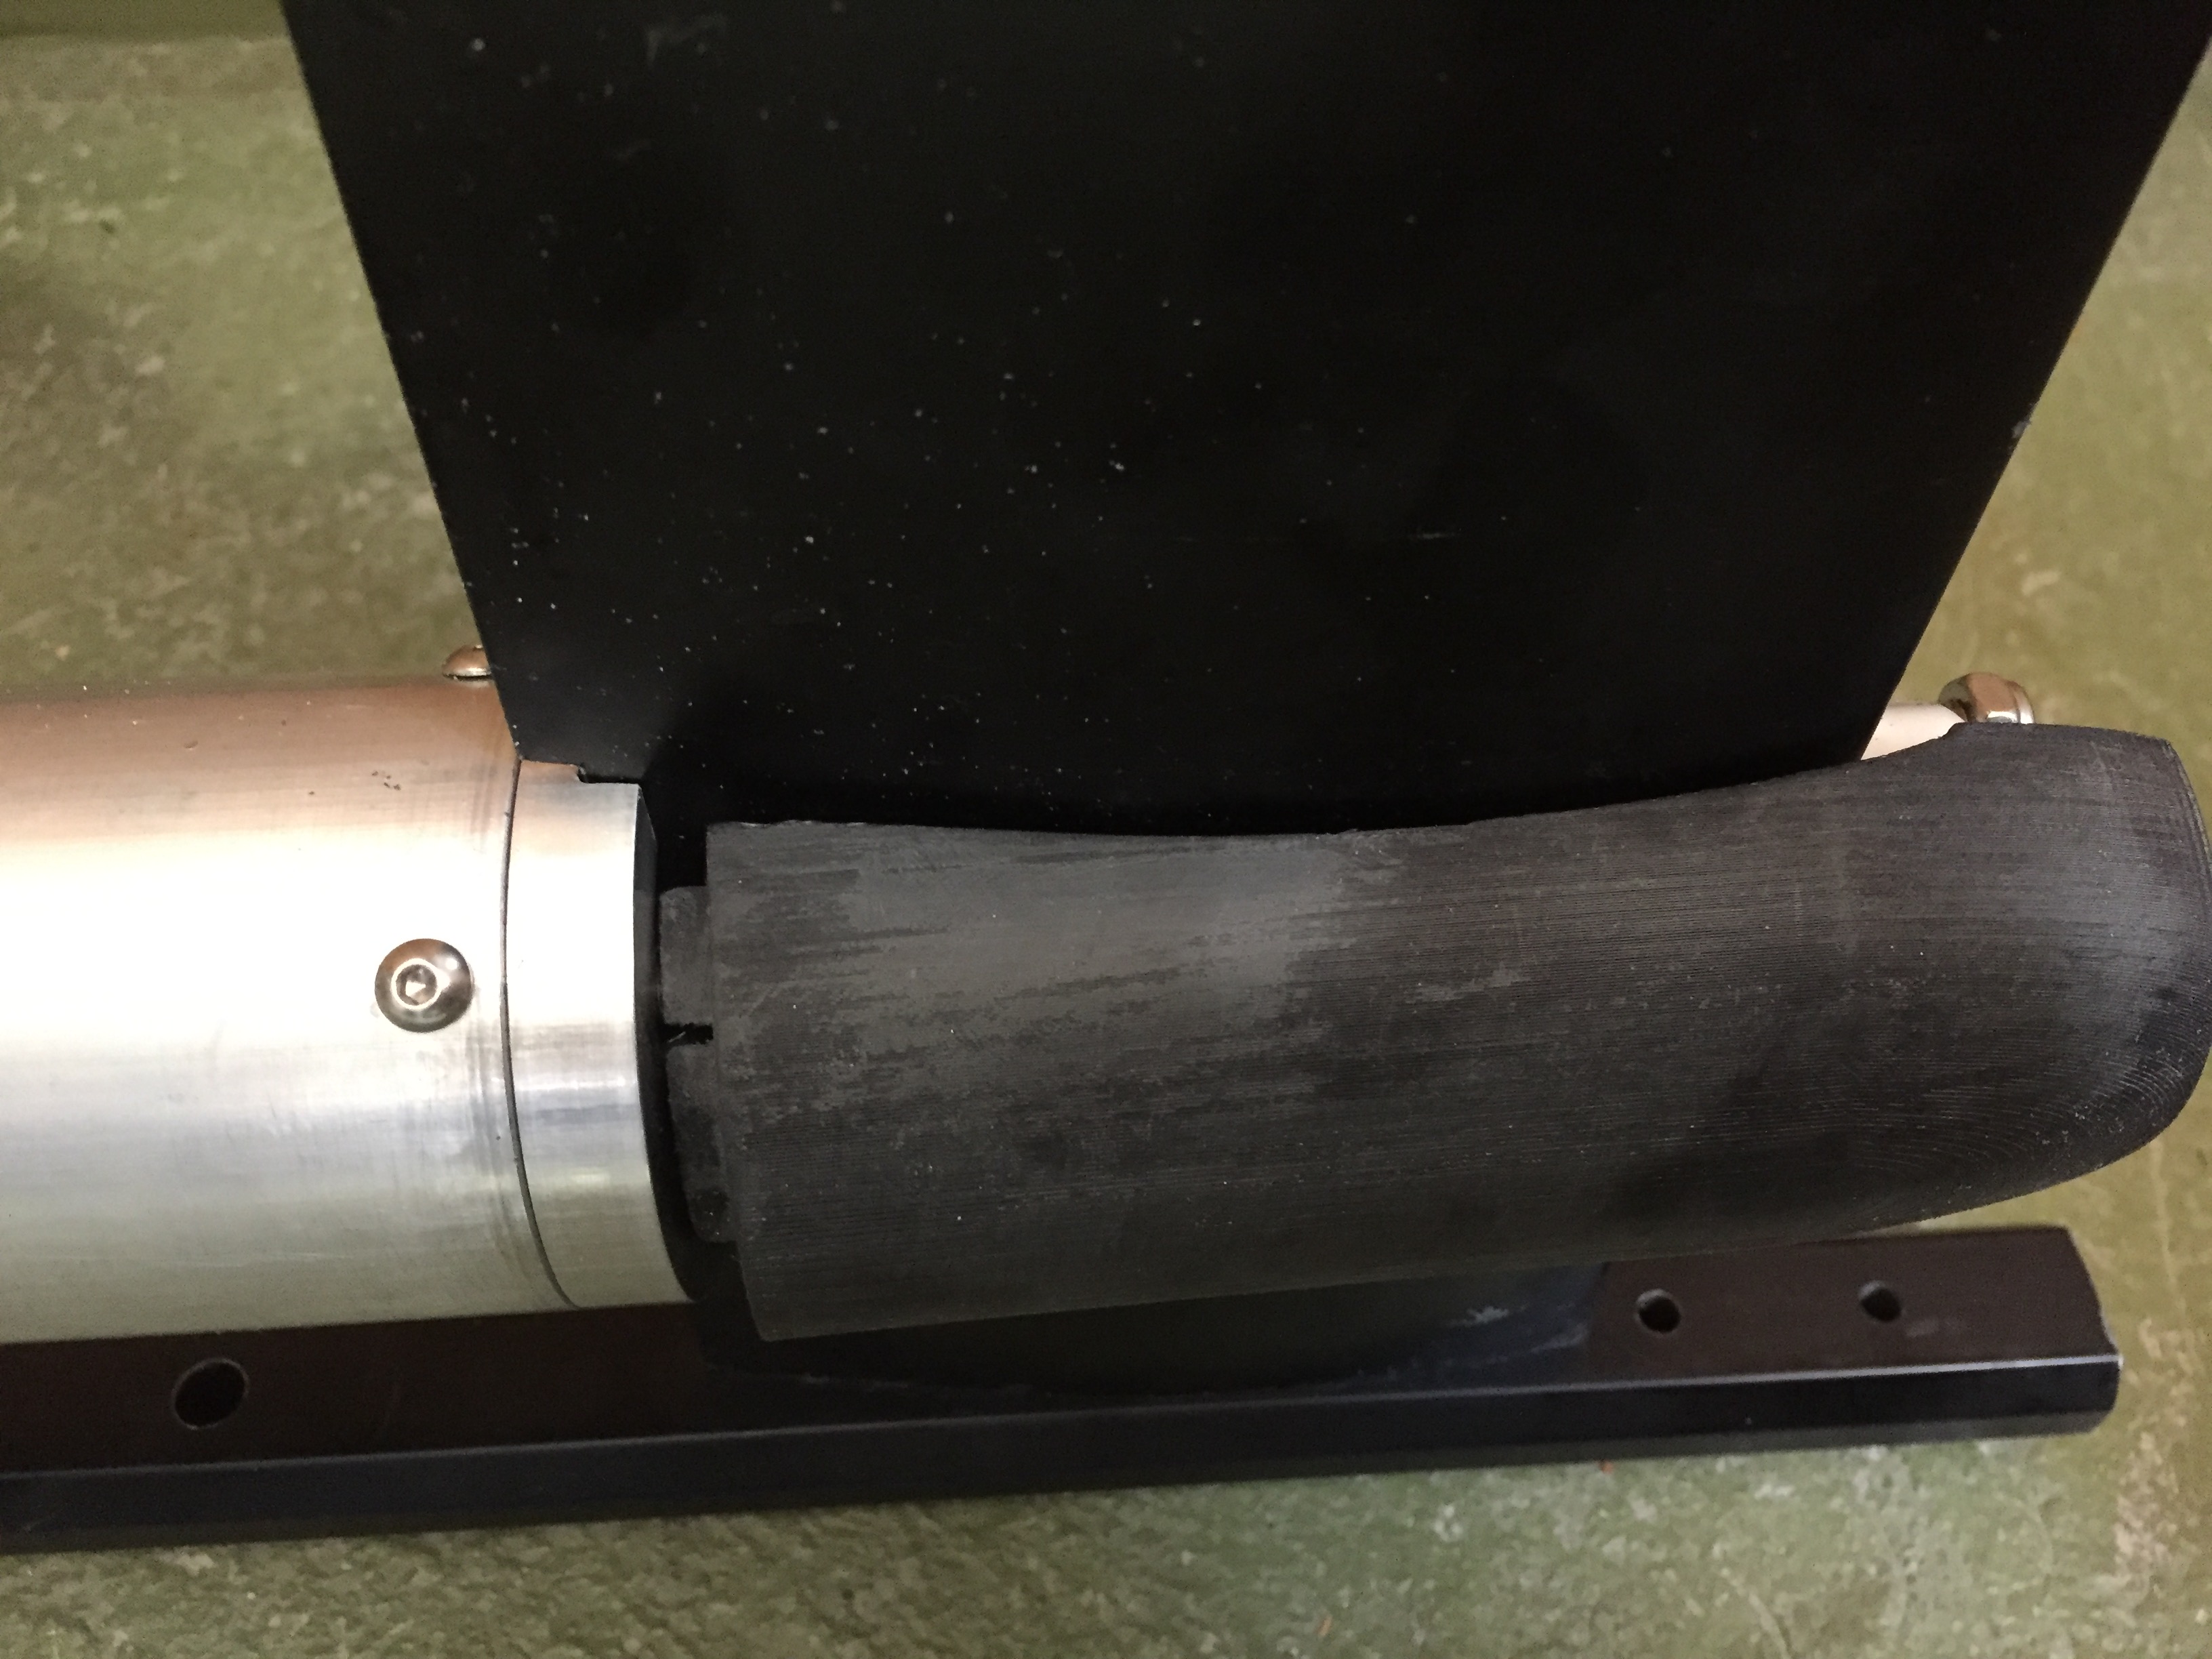
The mast clamp didn’t last, I fell on the pod, the cable tie broke and then the printed mast clamp was the next weak link:

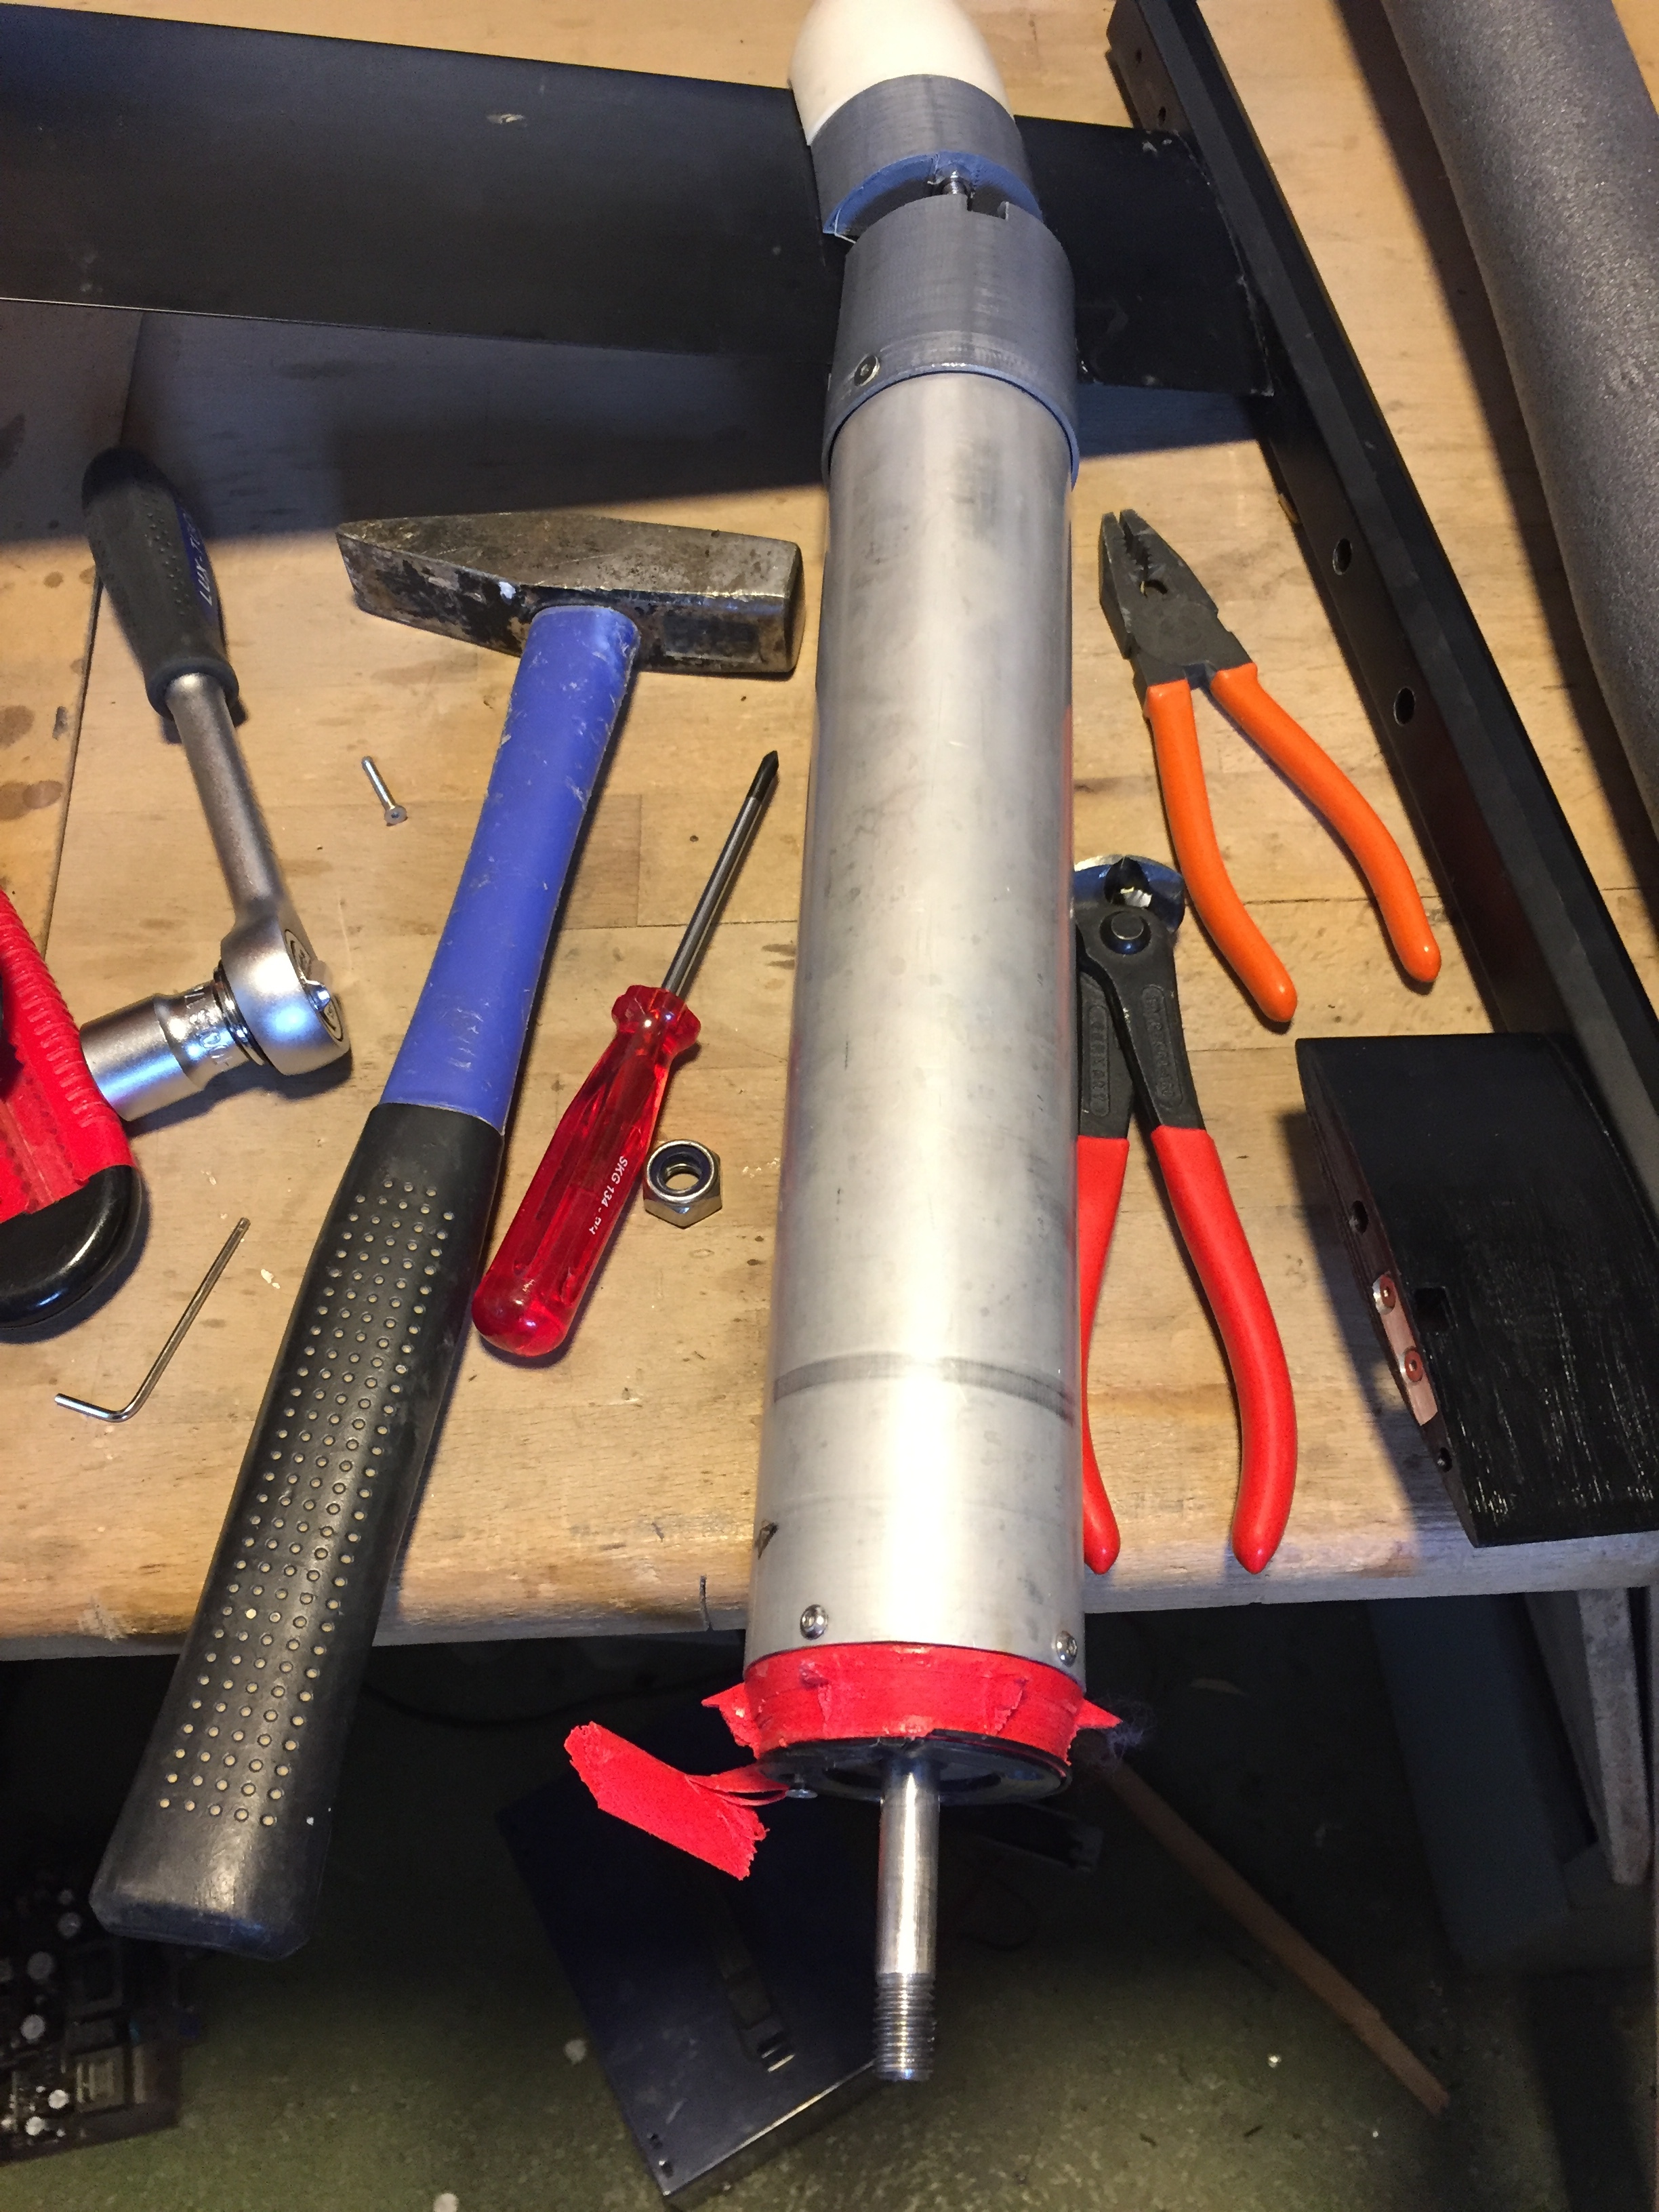
The duct broke as well, it was the old one from ASA-X without carbon reinforcement.
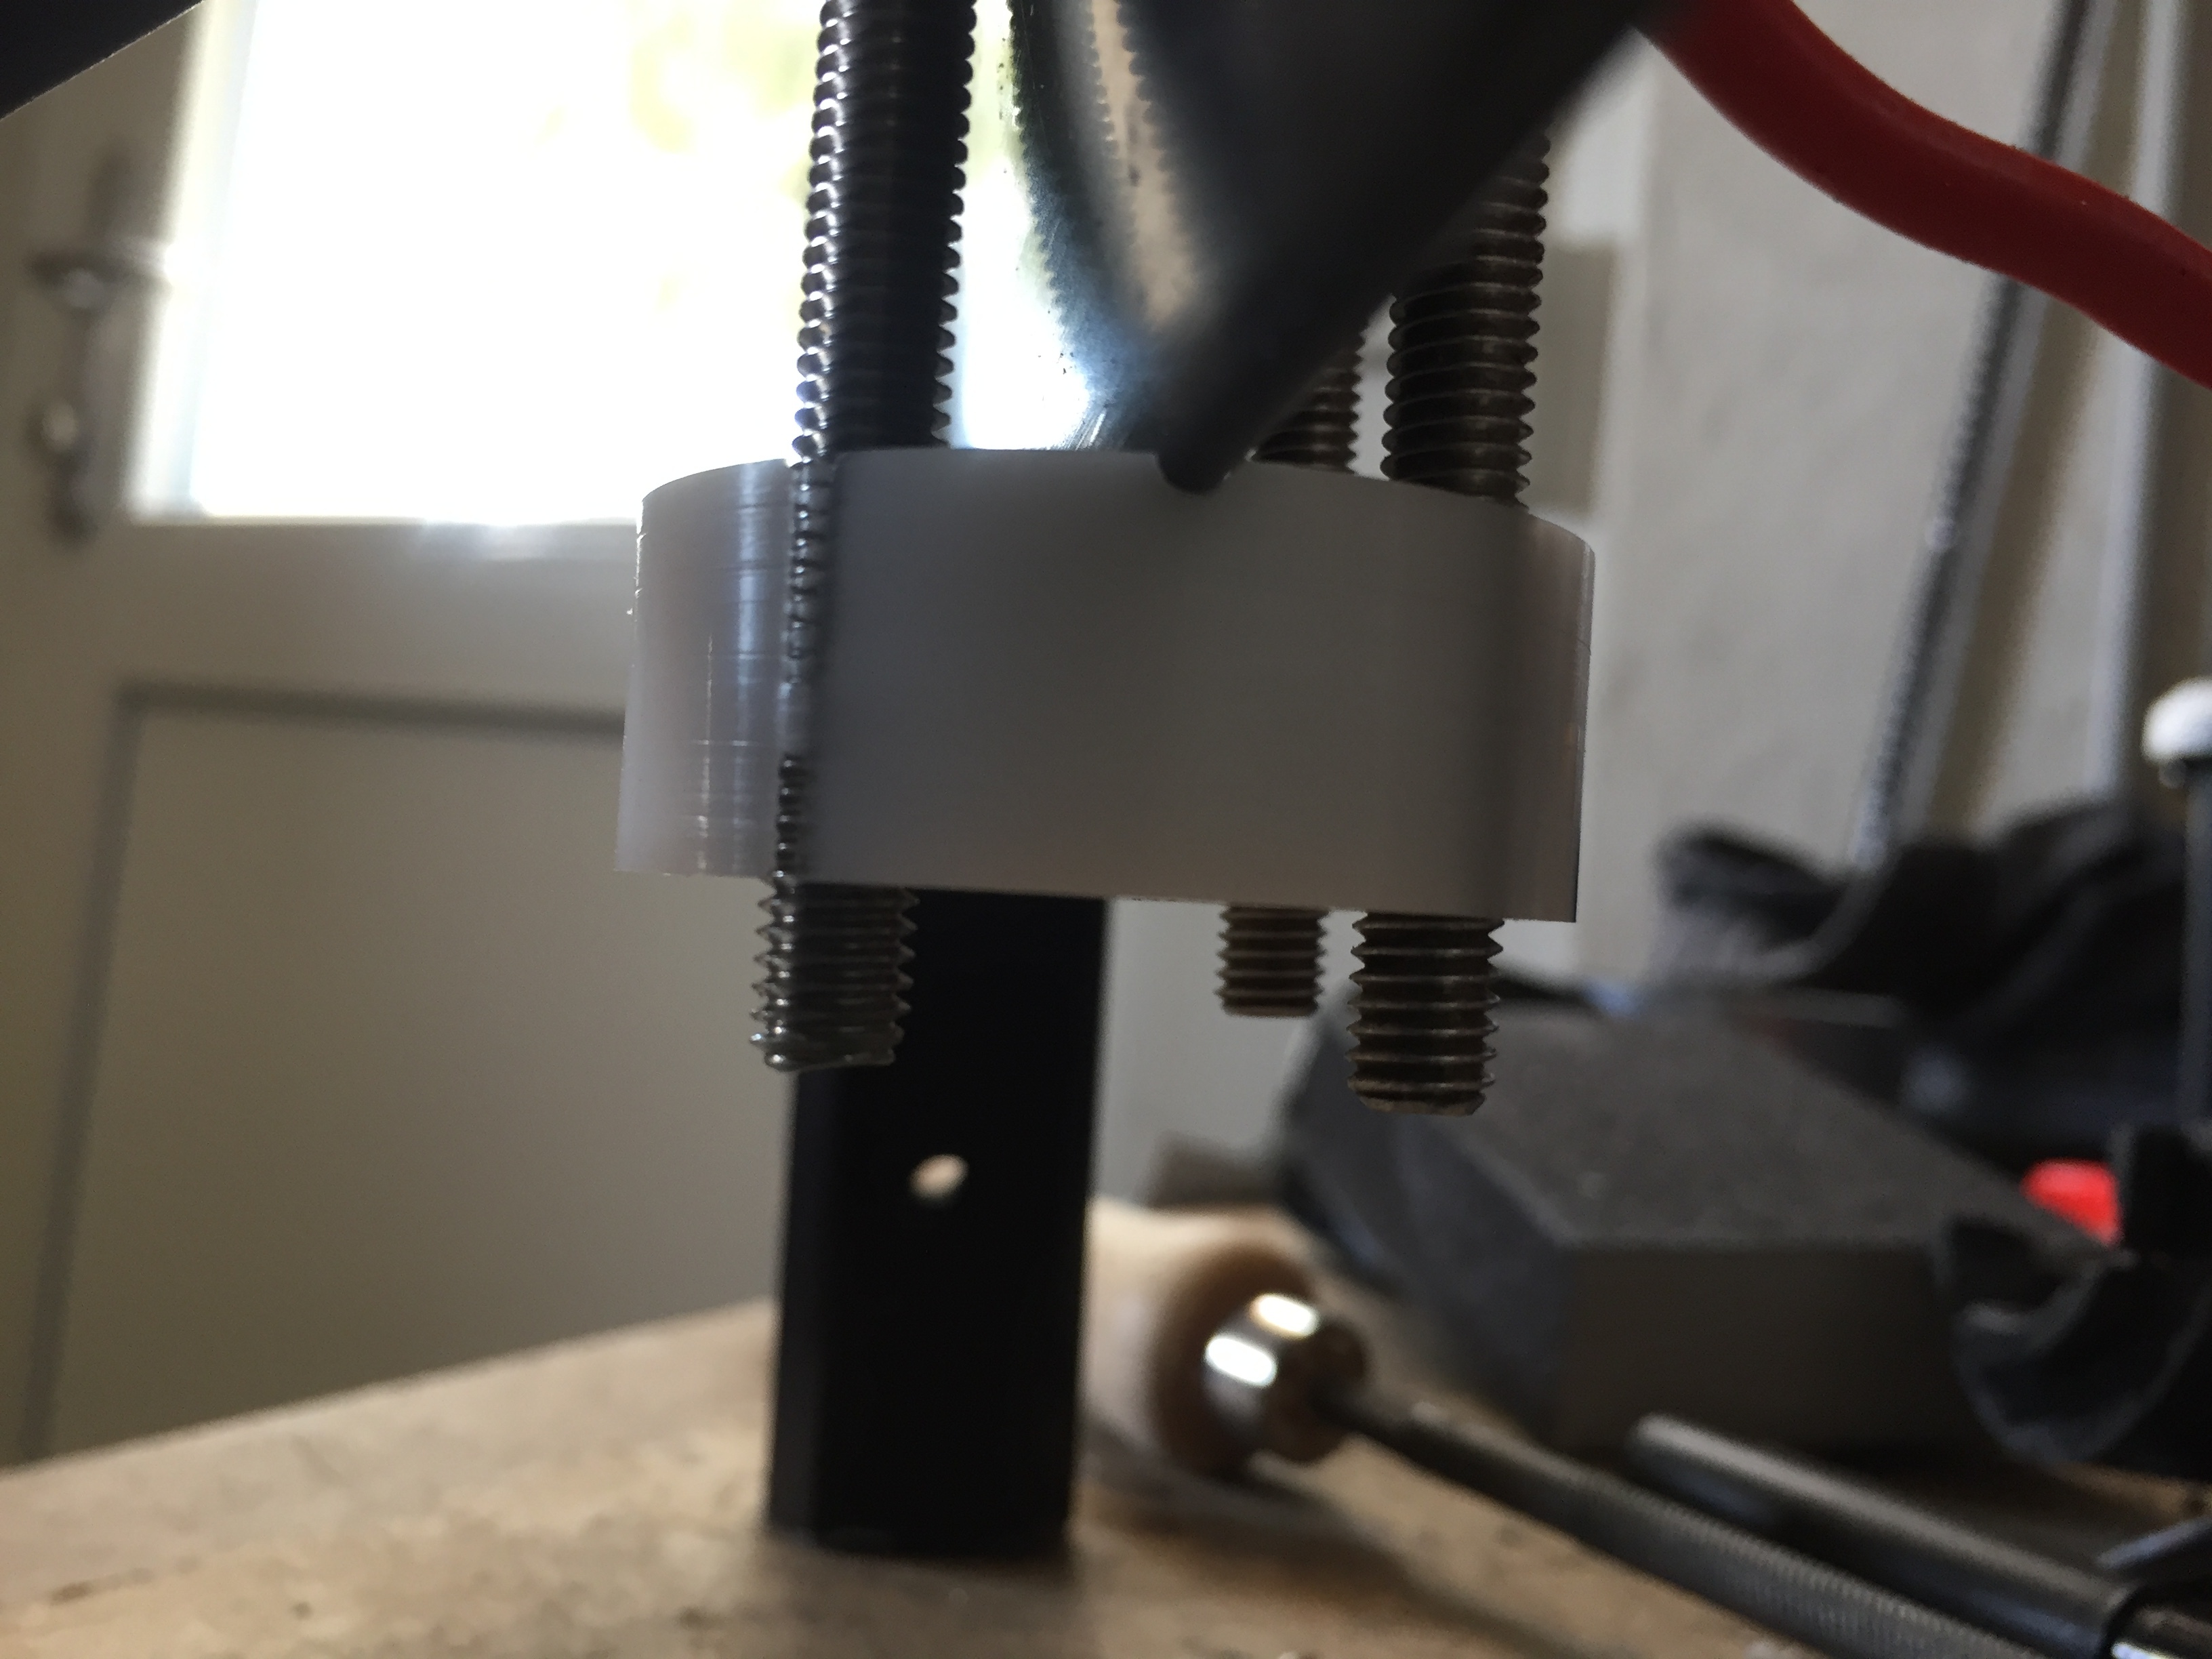
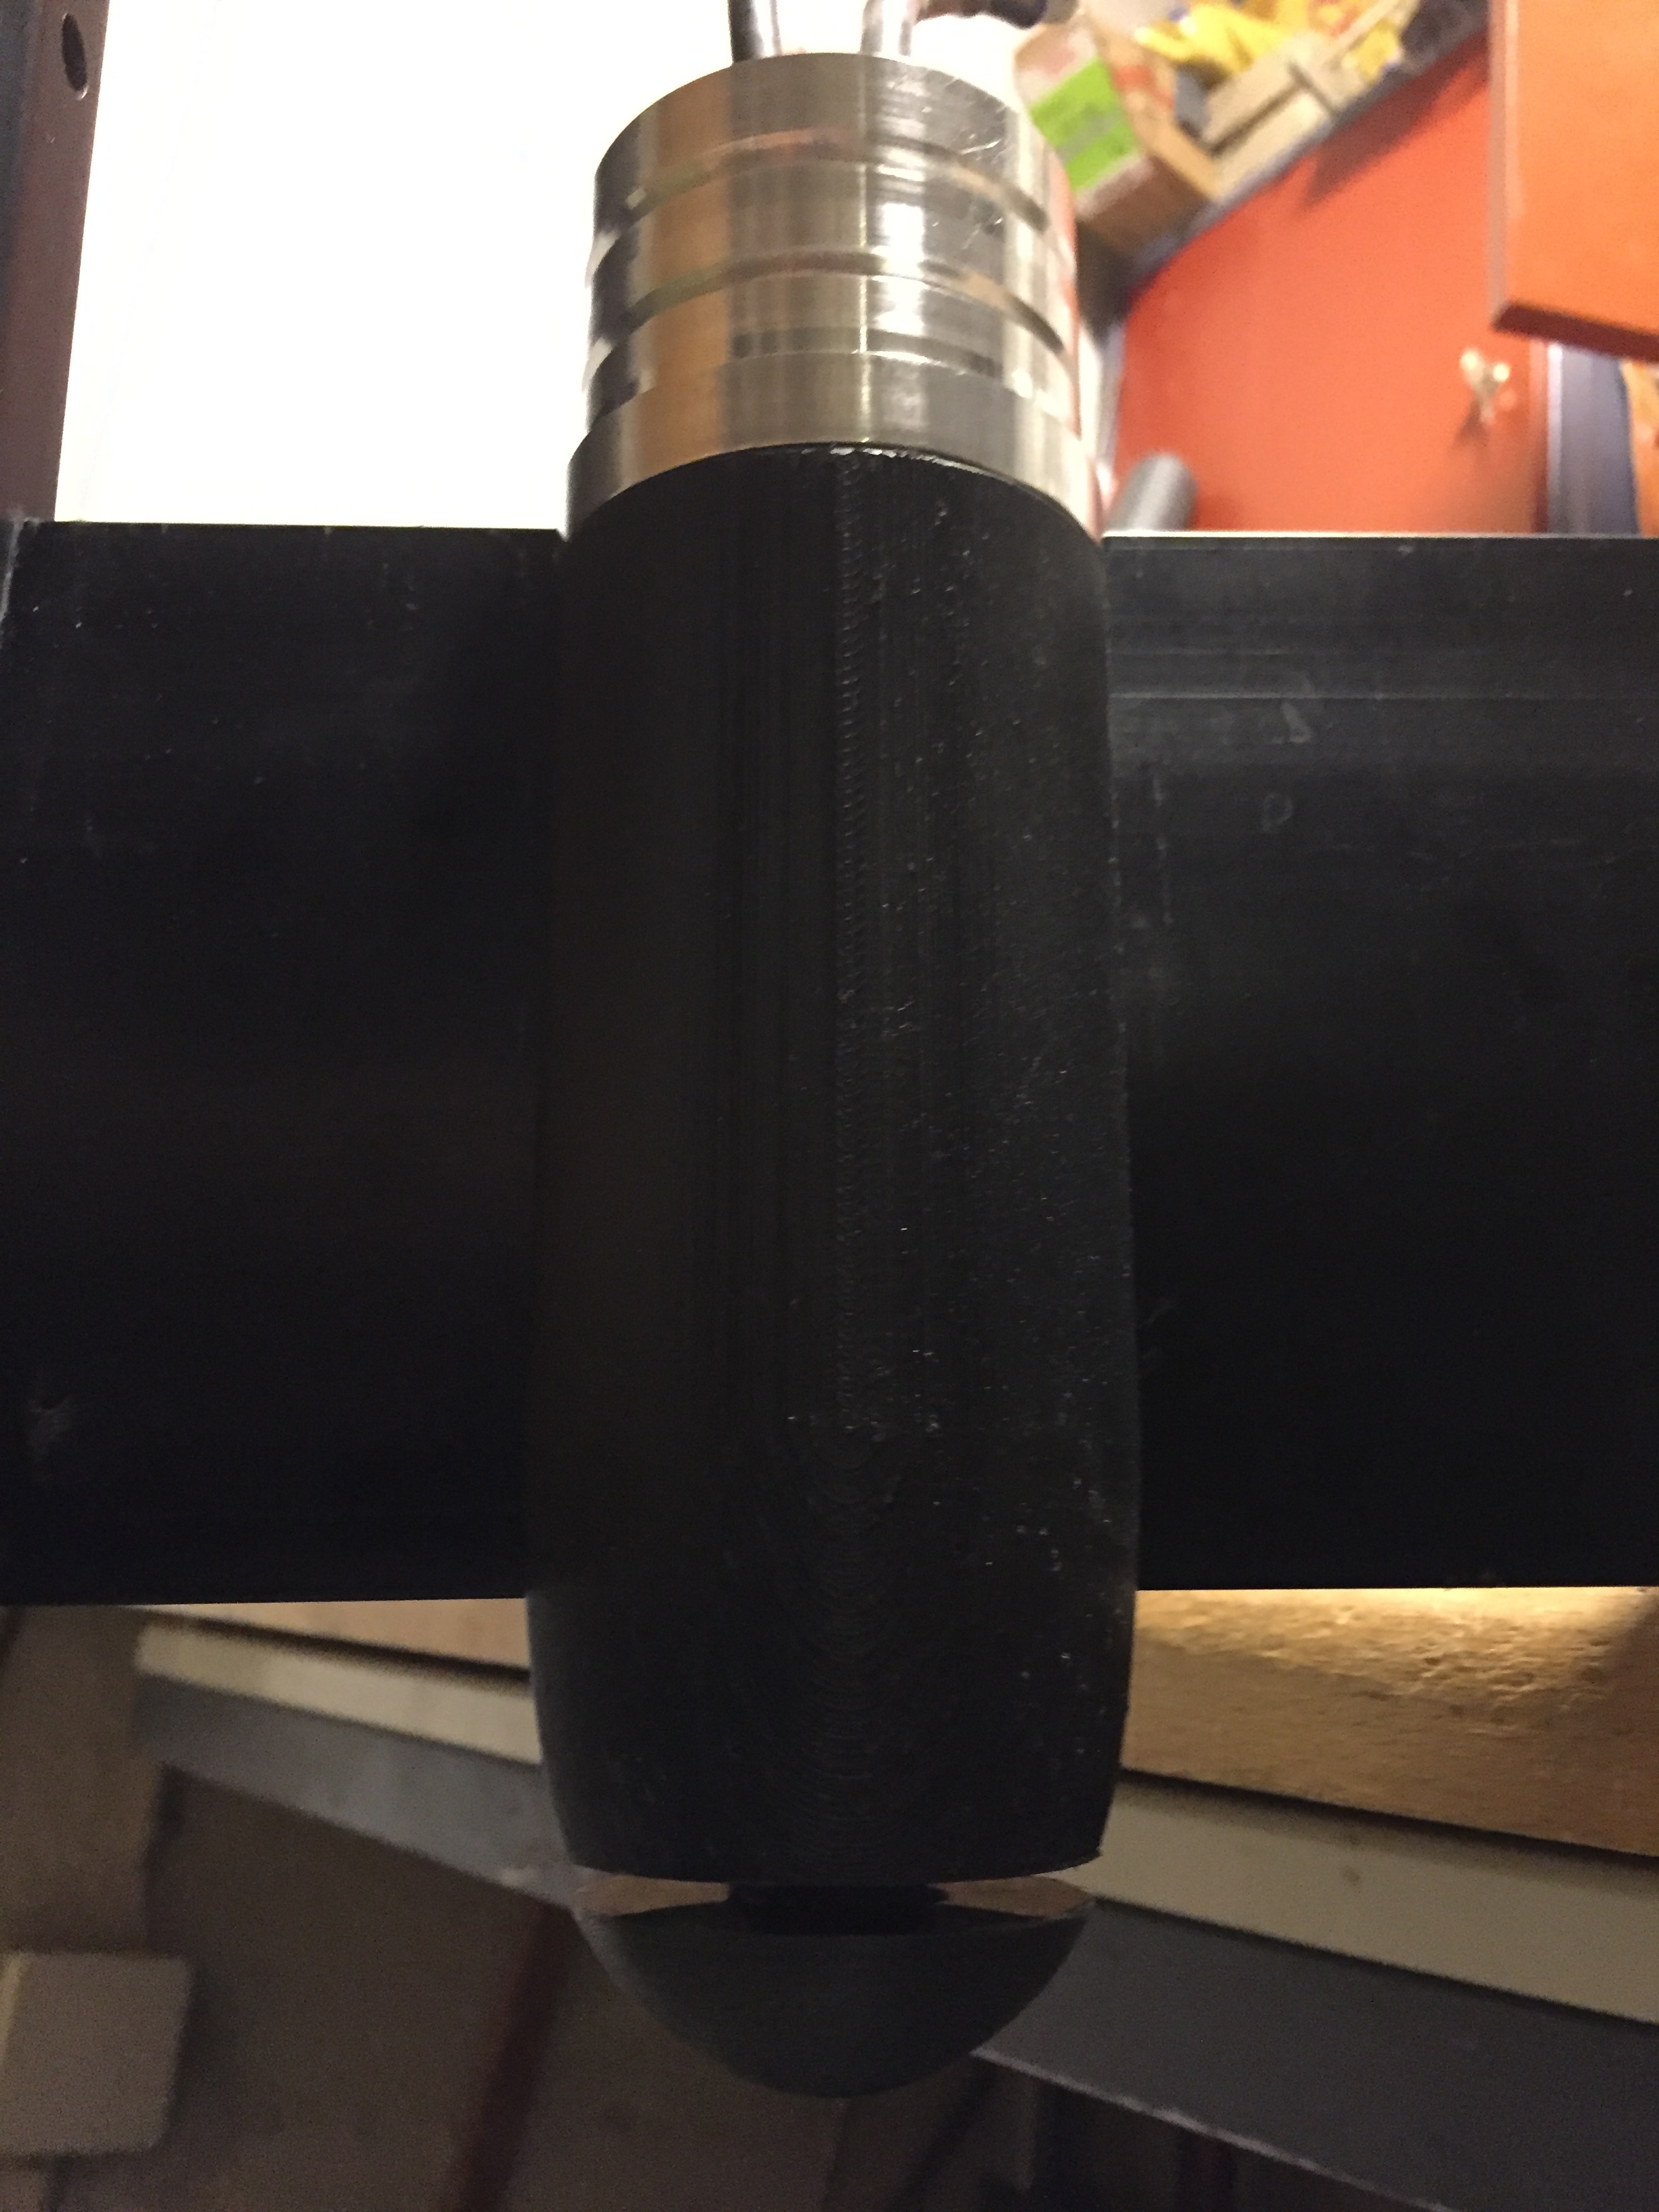
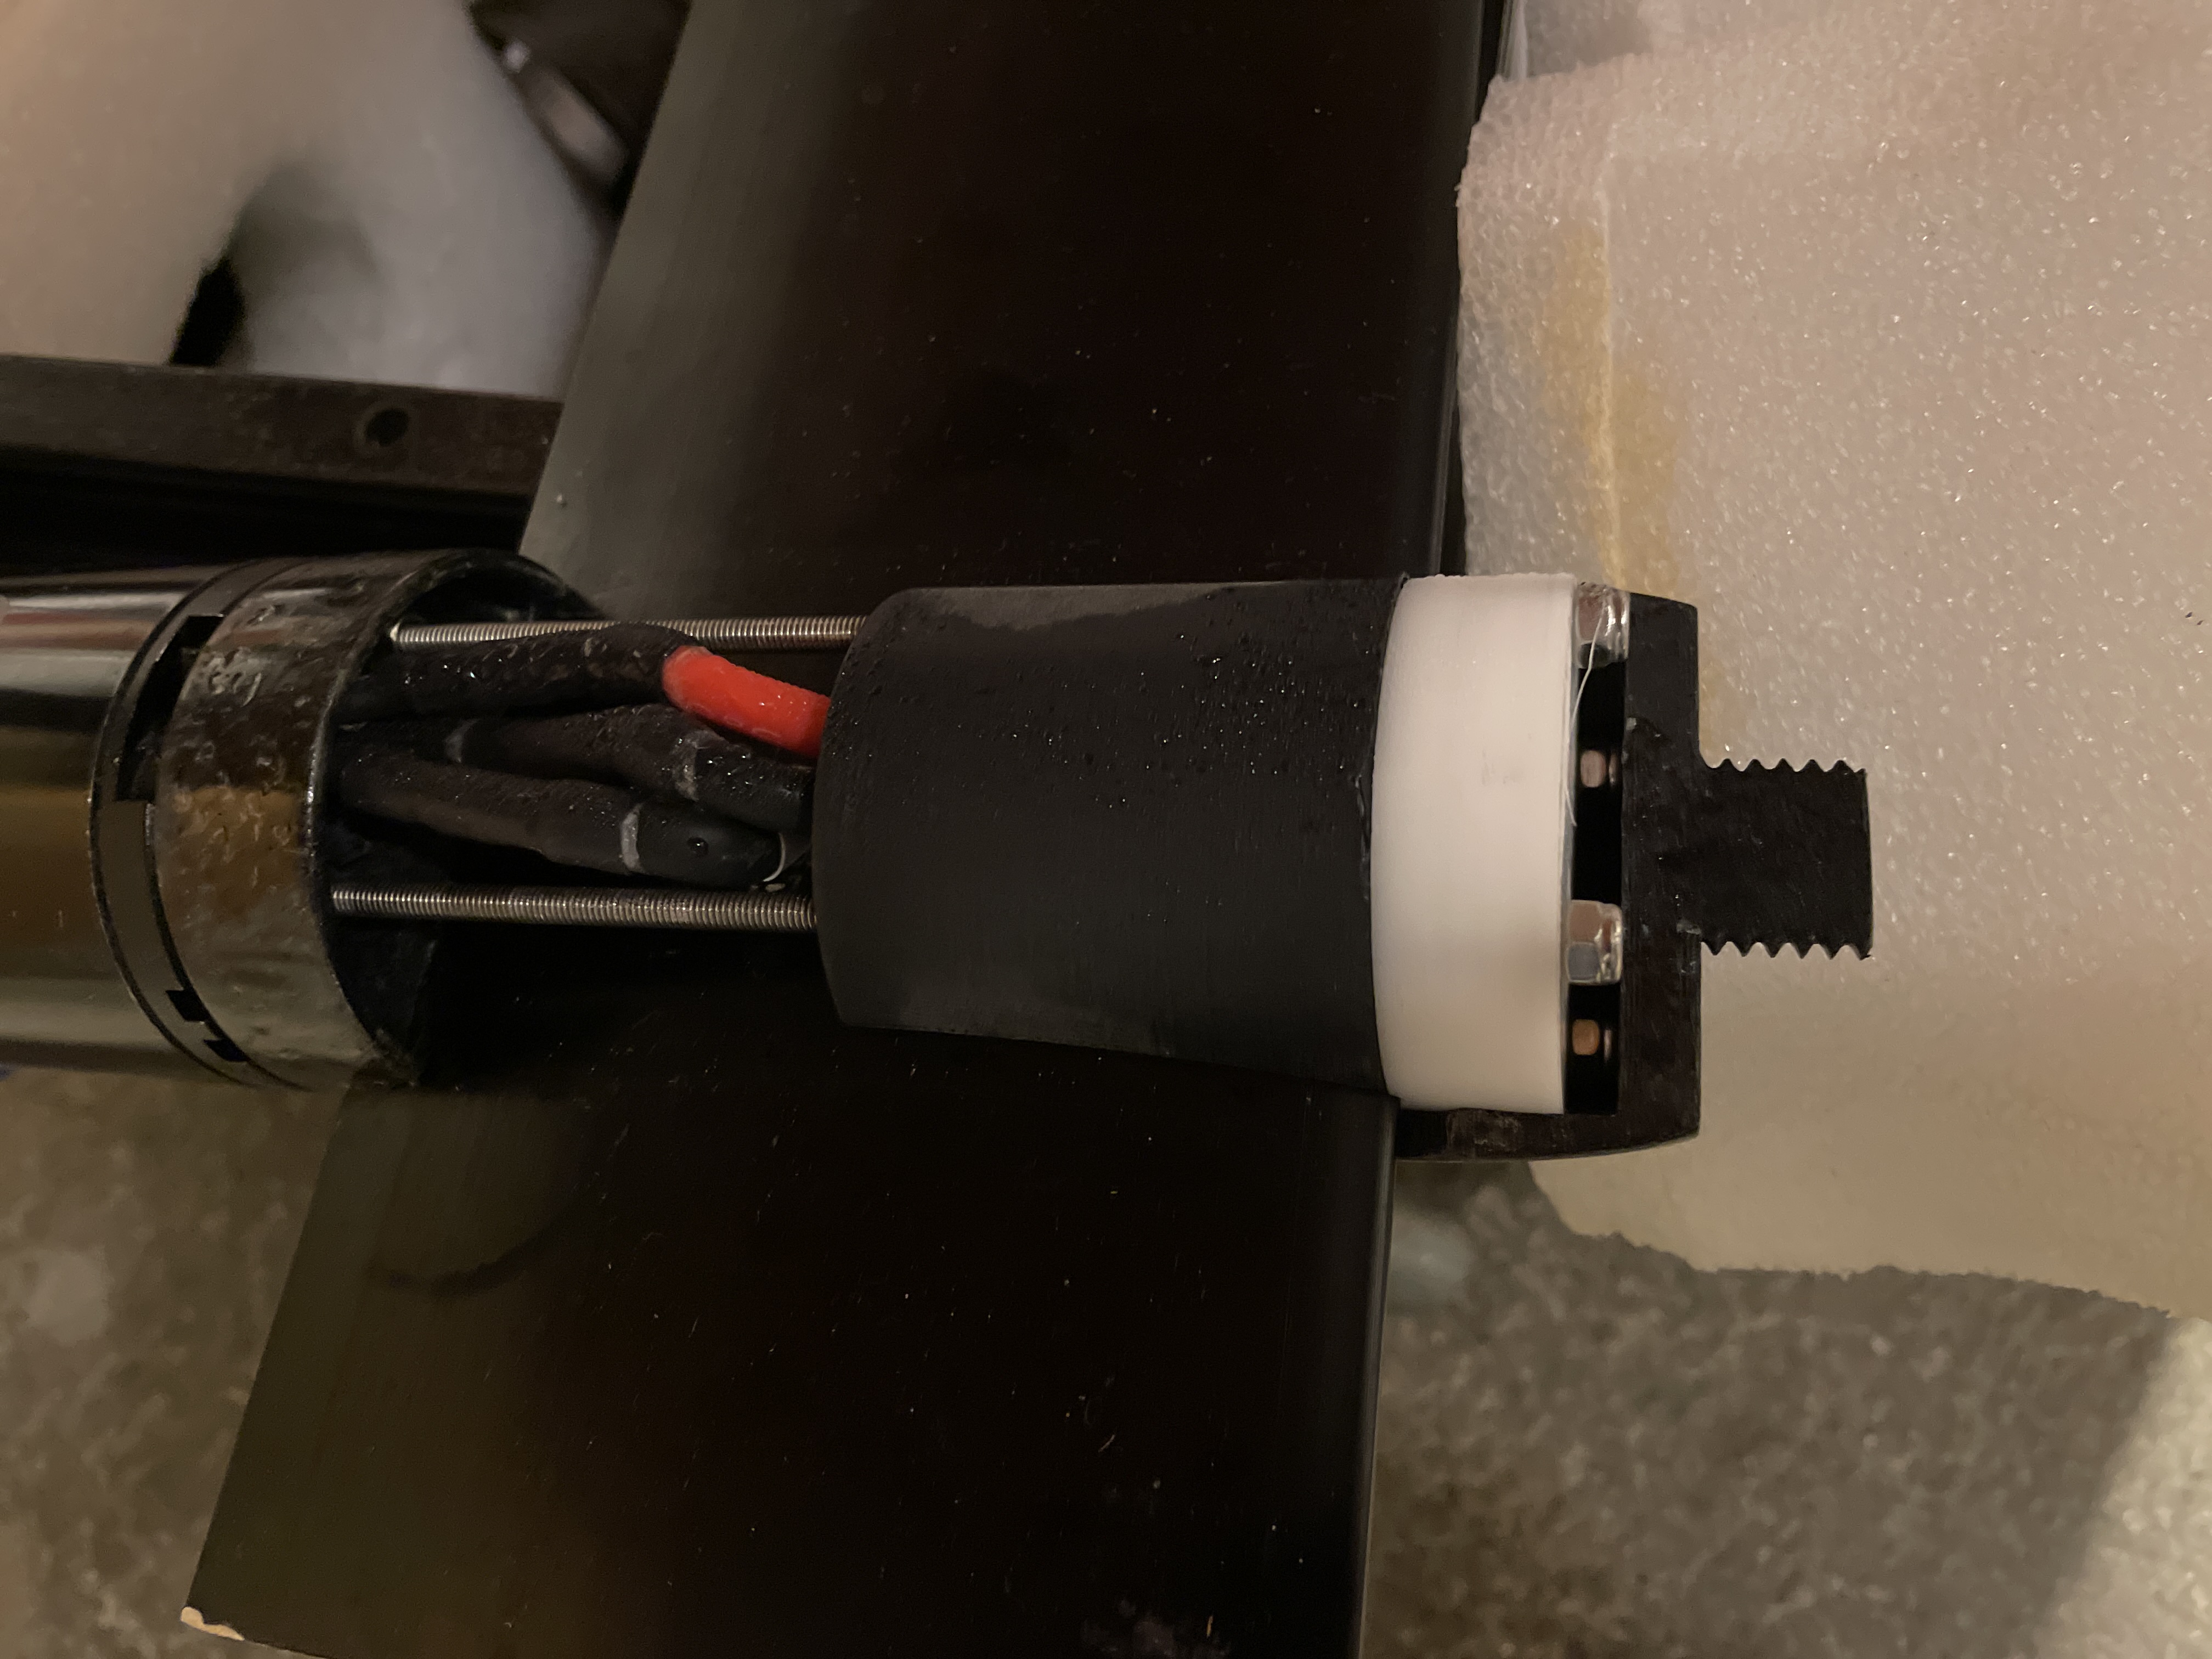
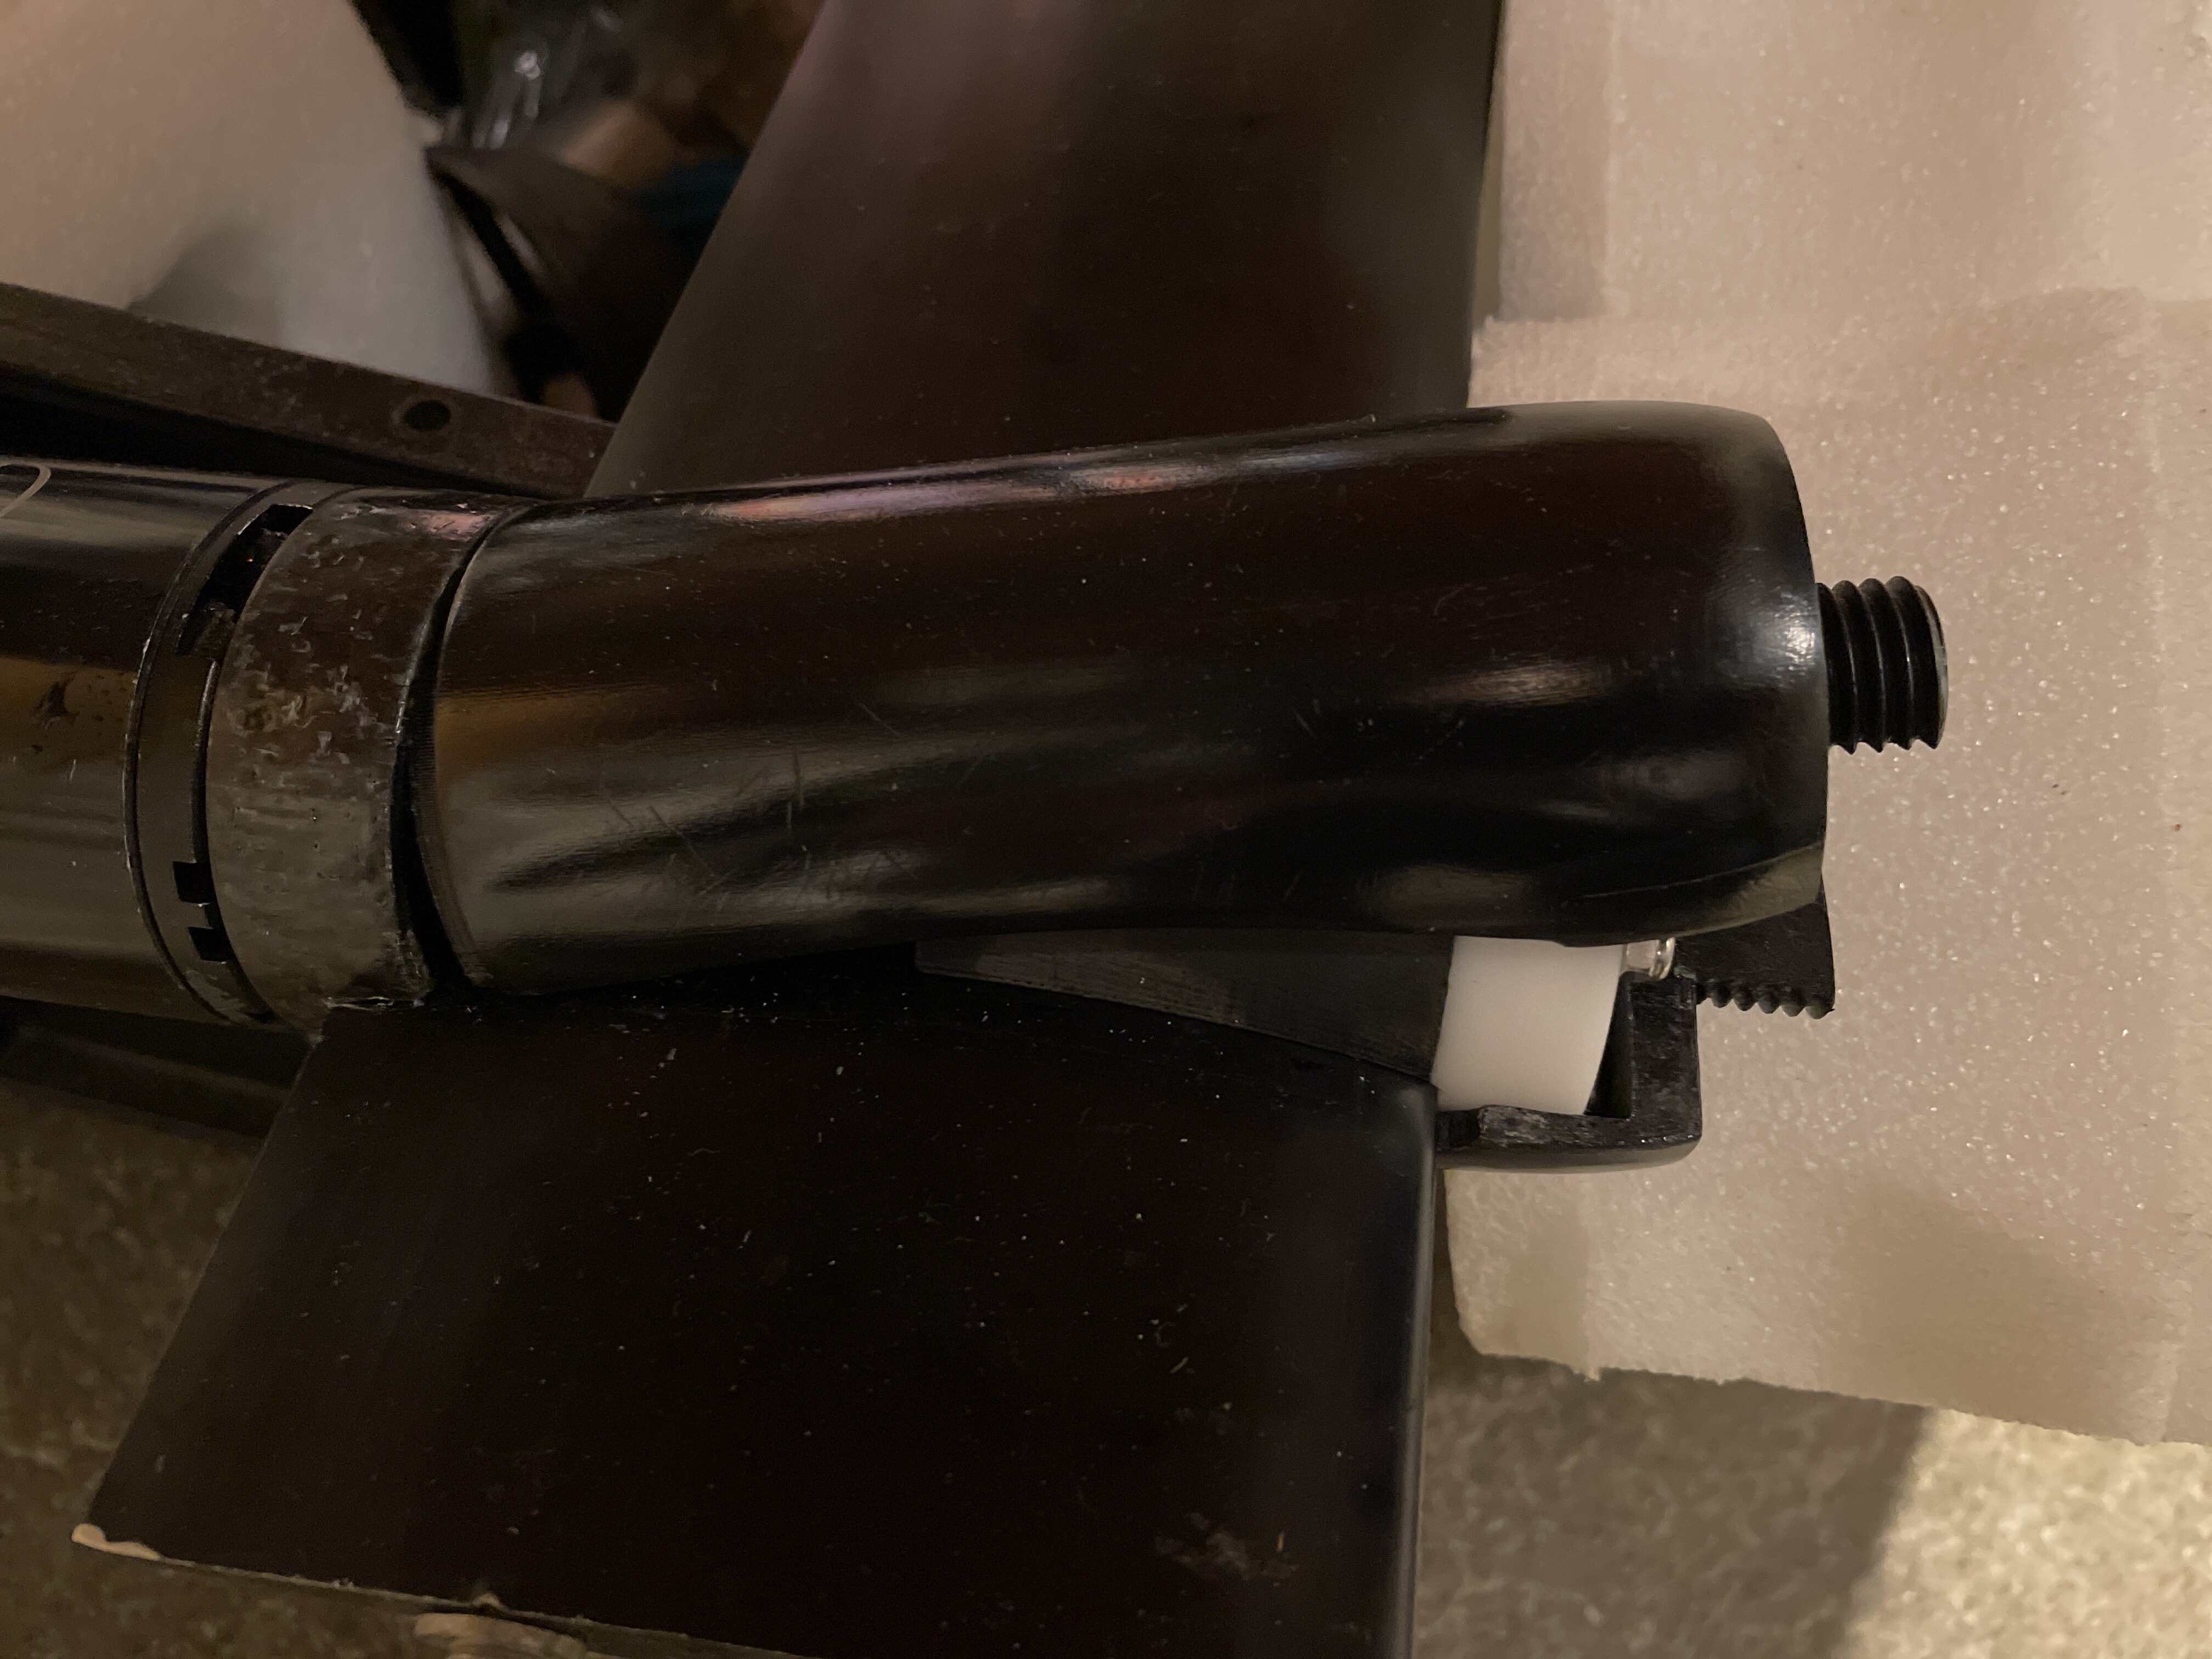
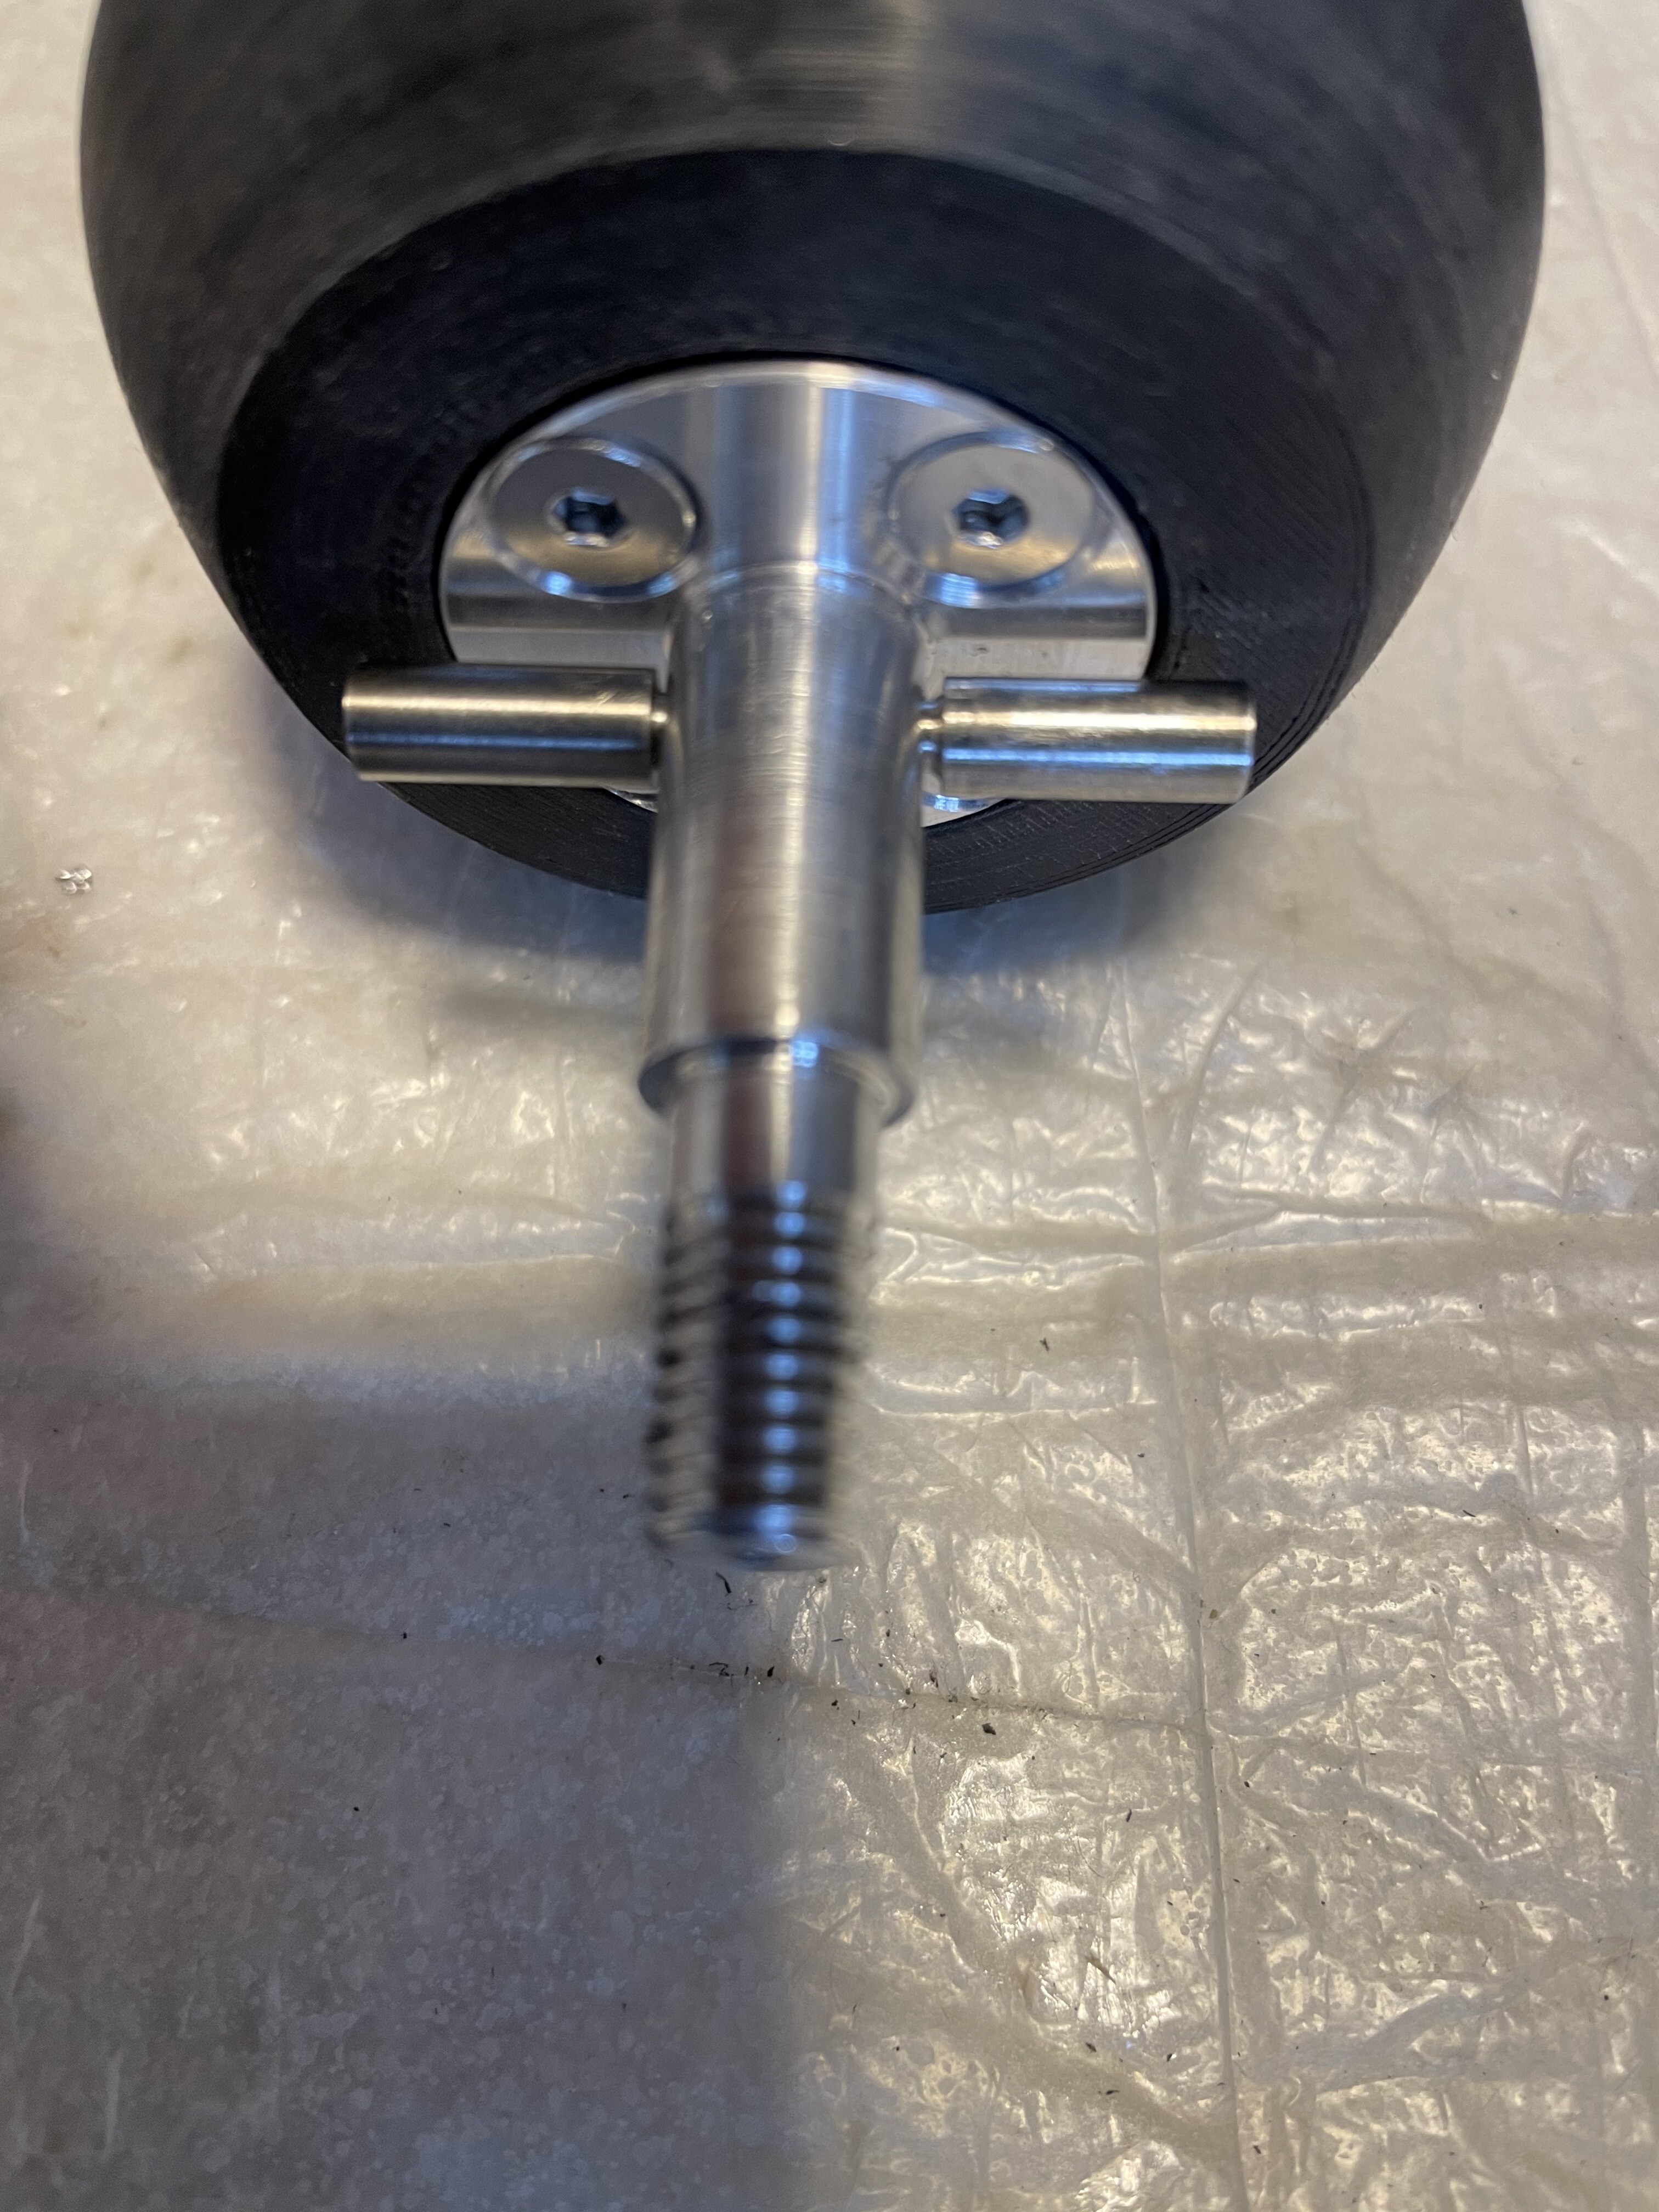
New mast clamp with 4 x M6 stainless threaded rods:
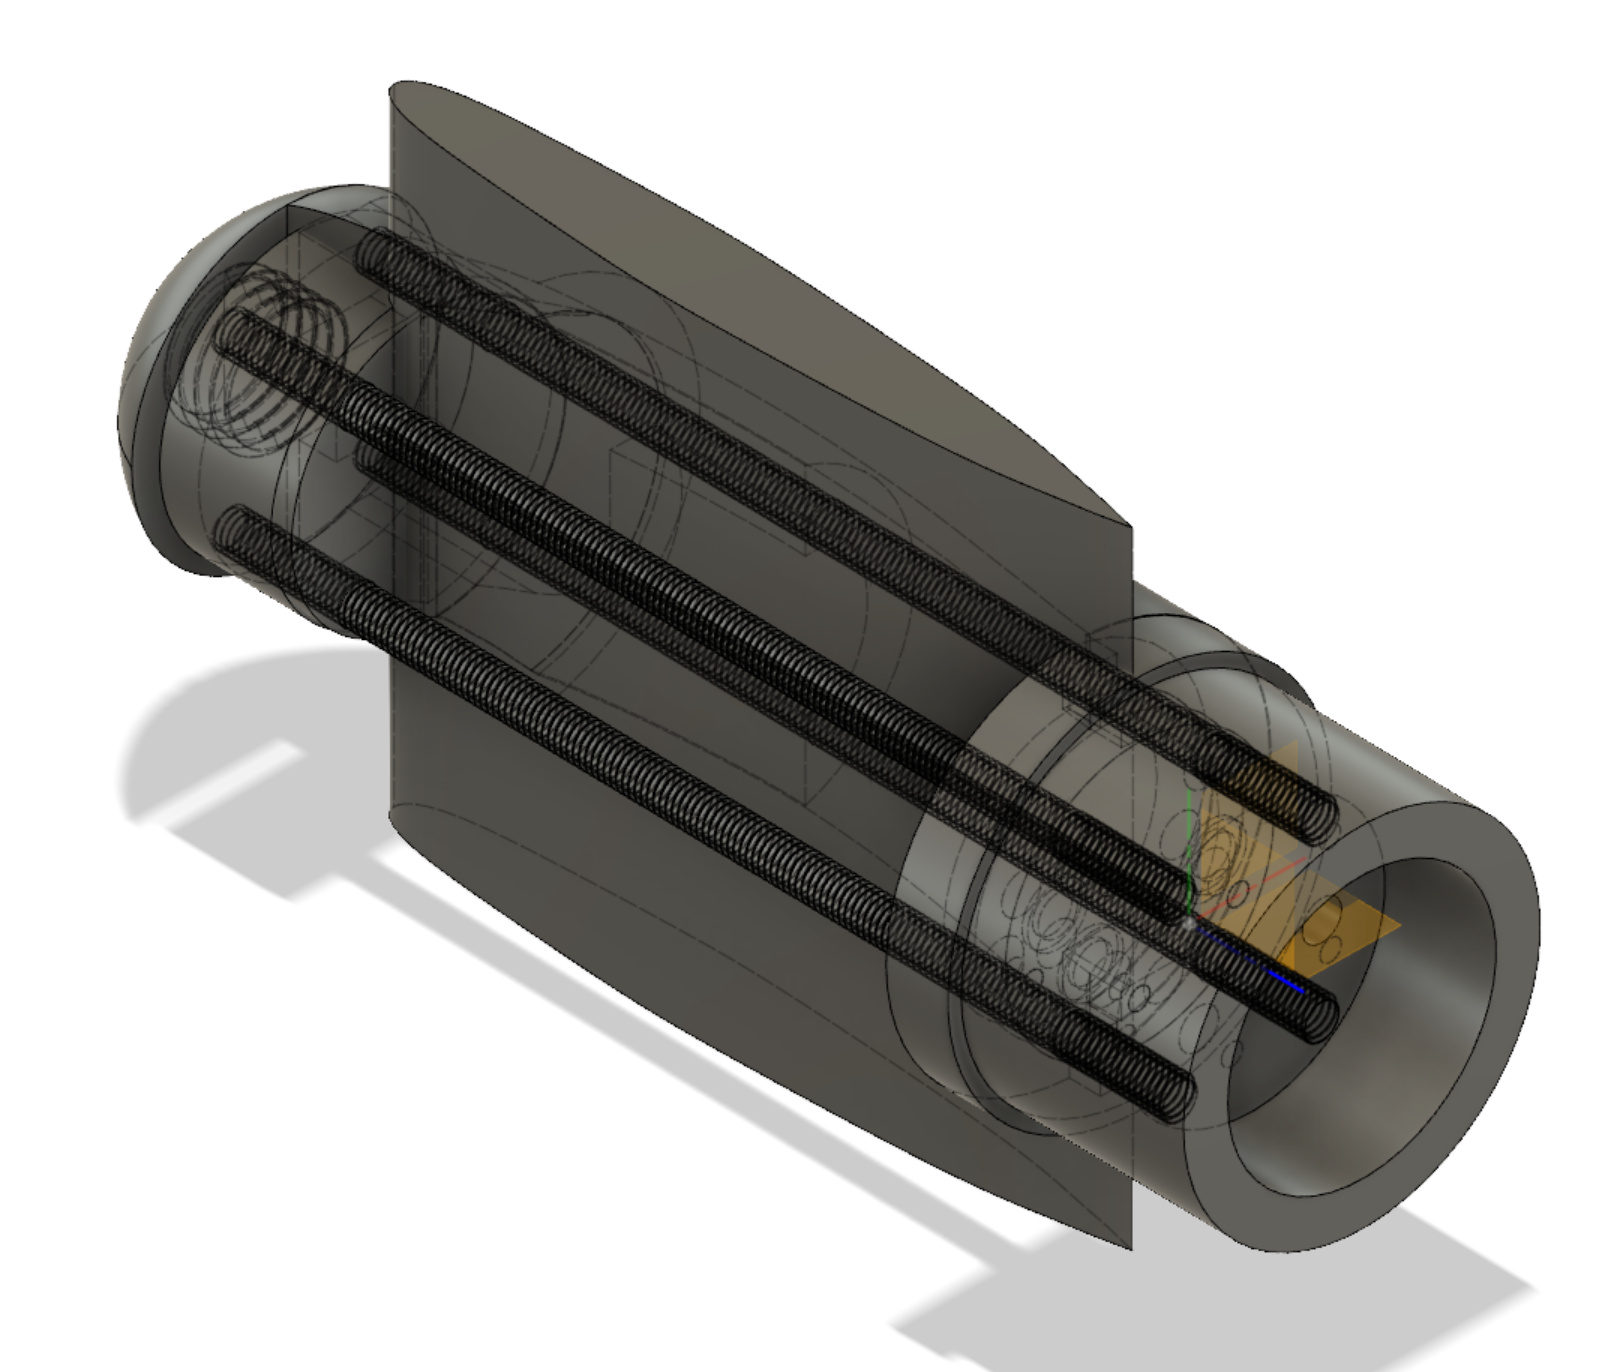
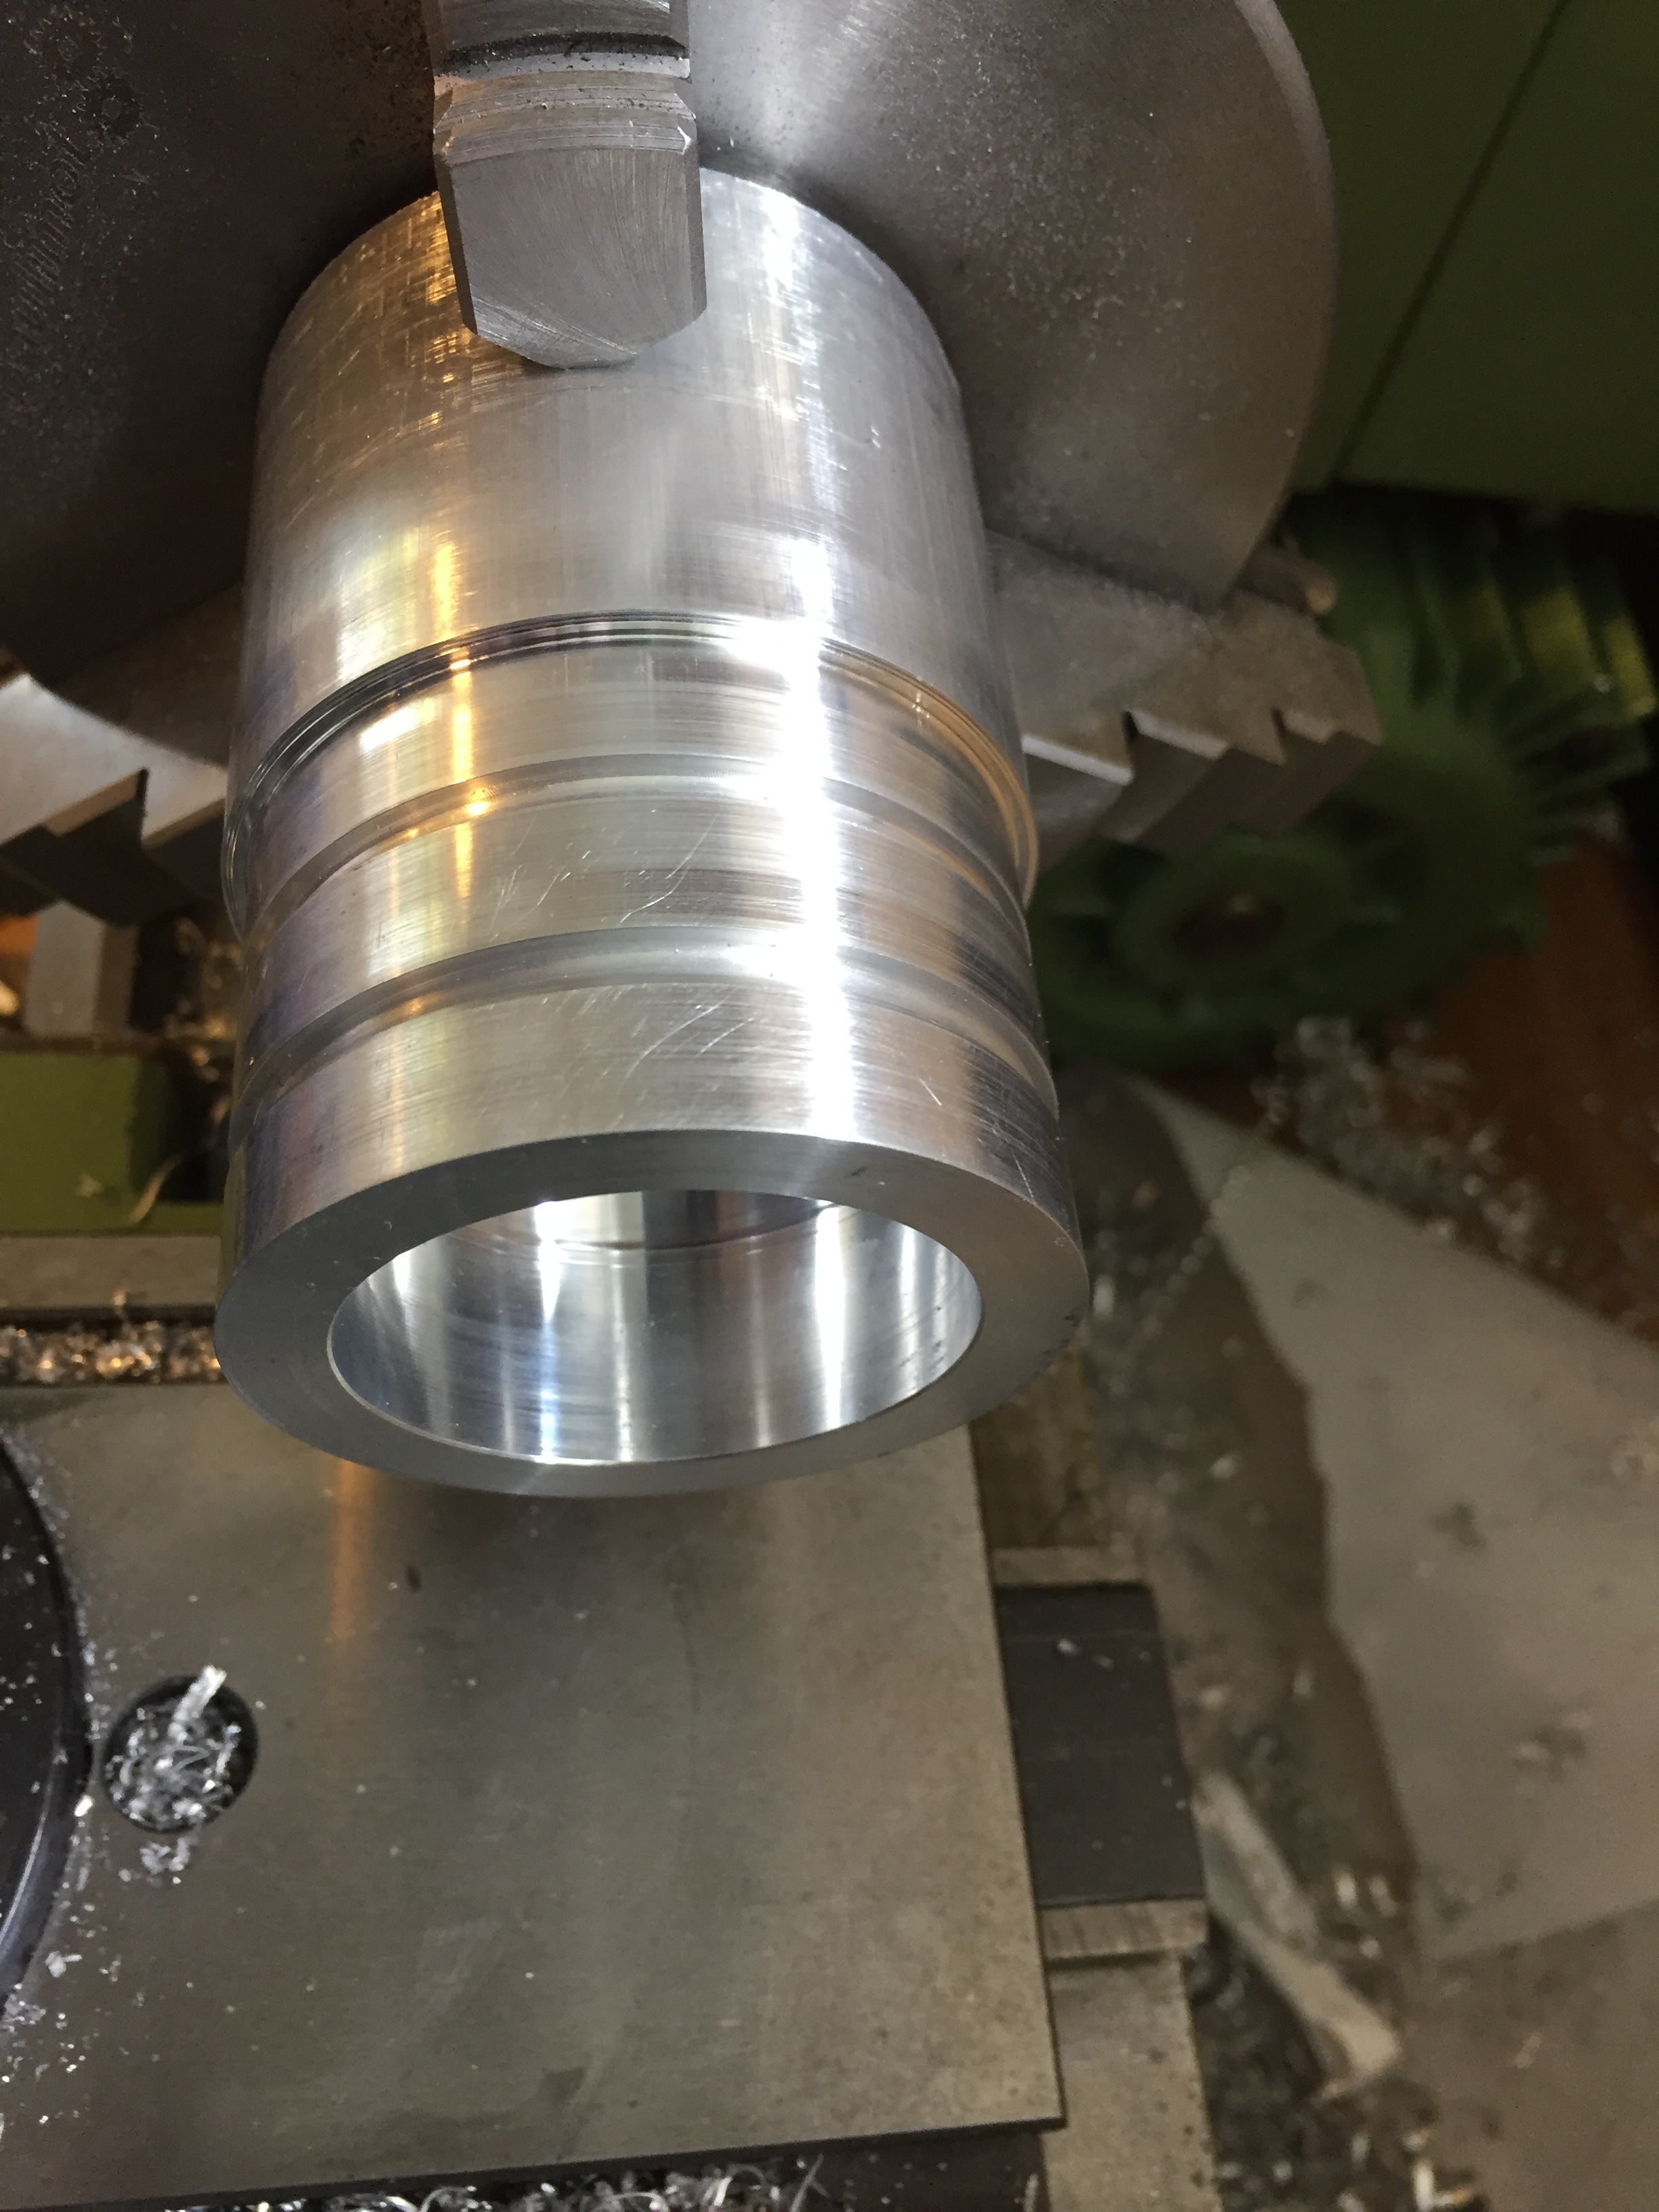
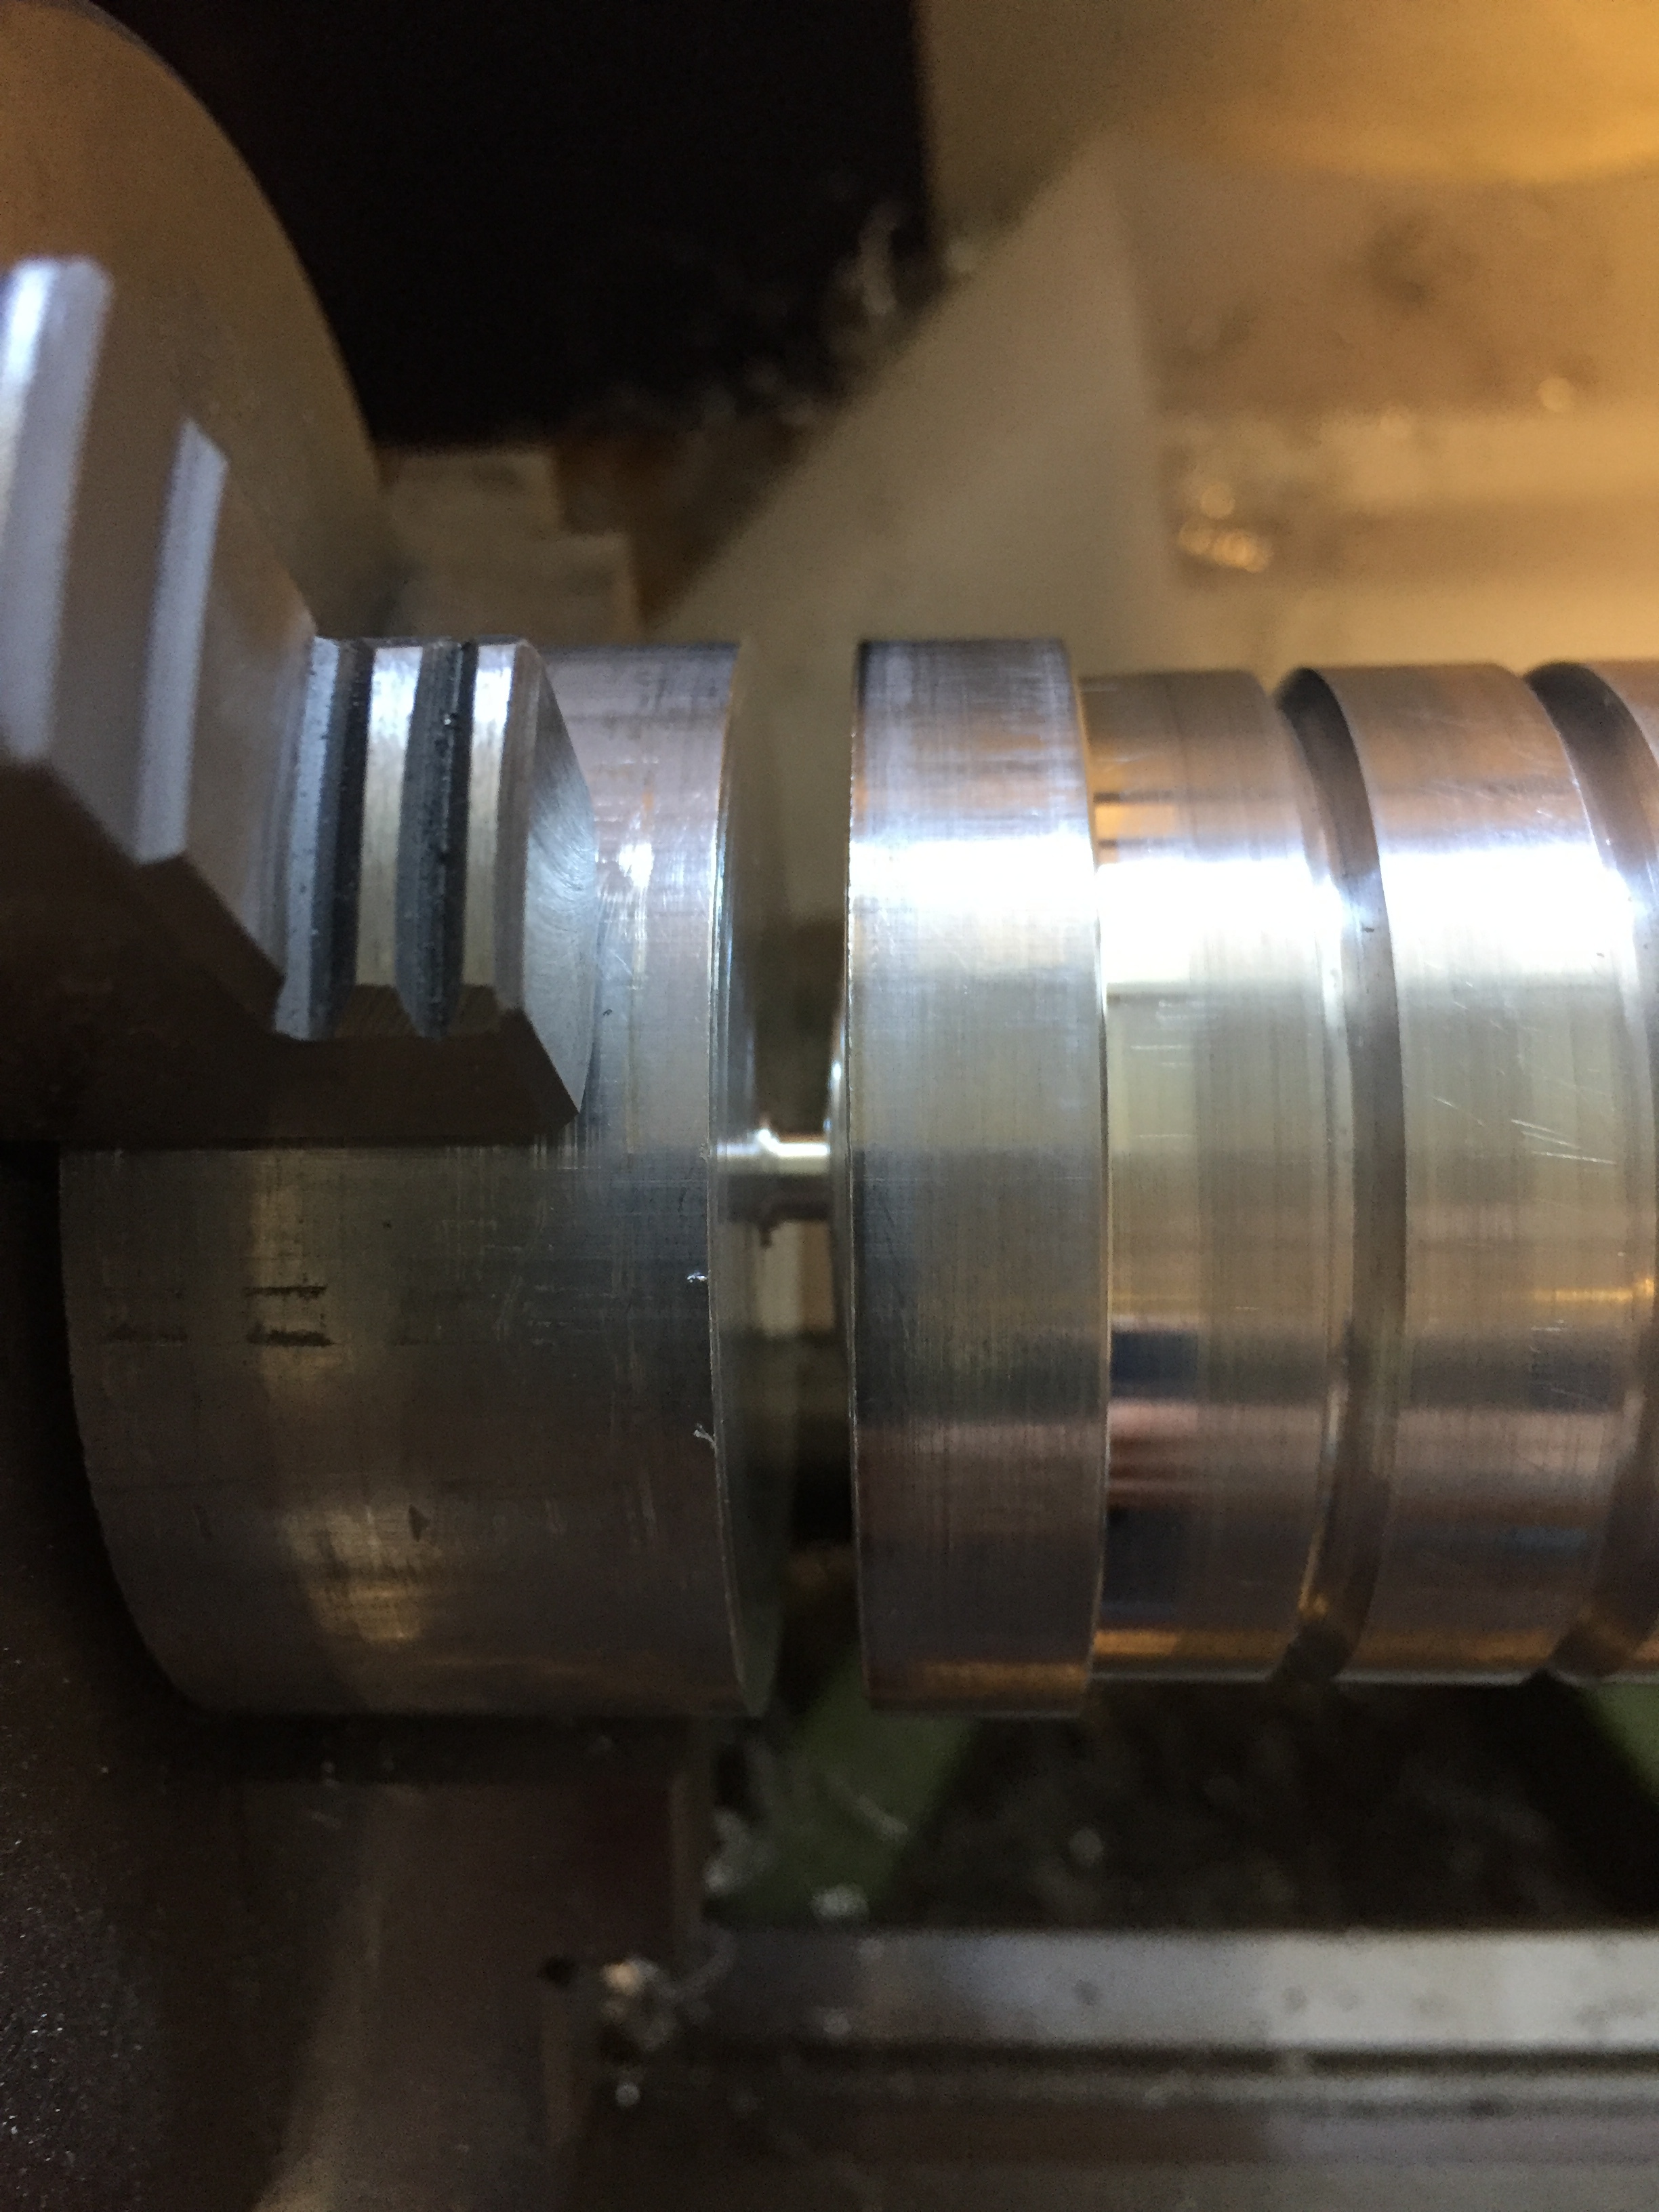
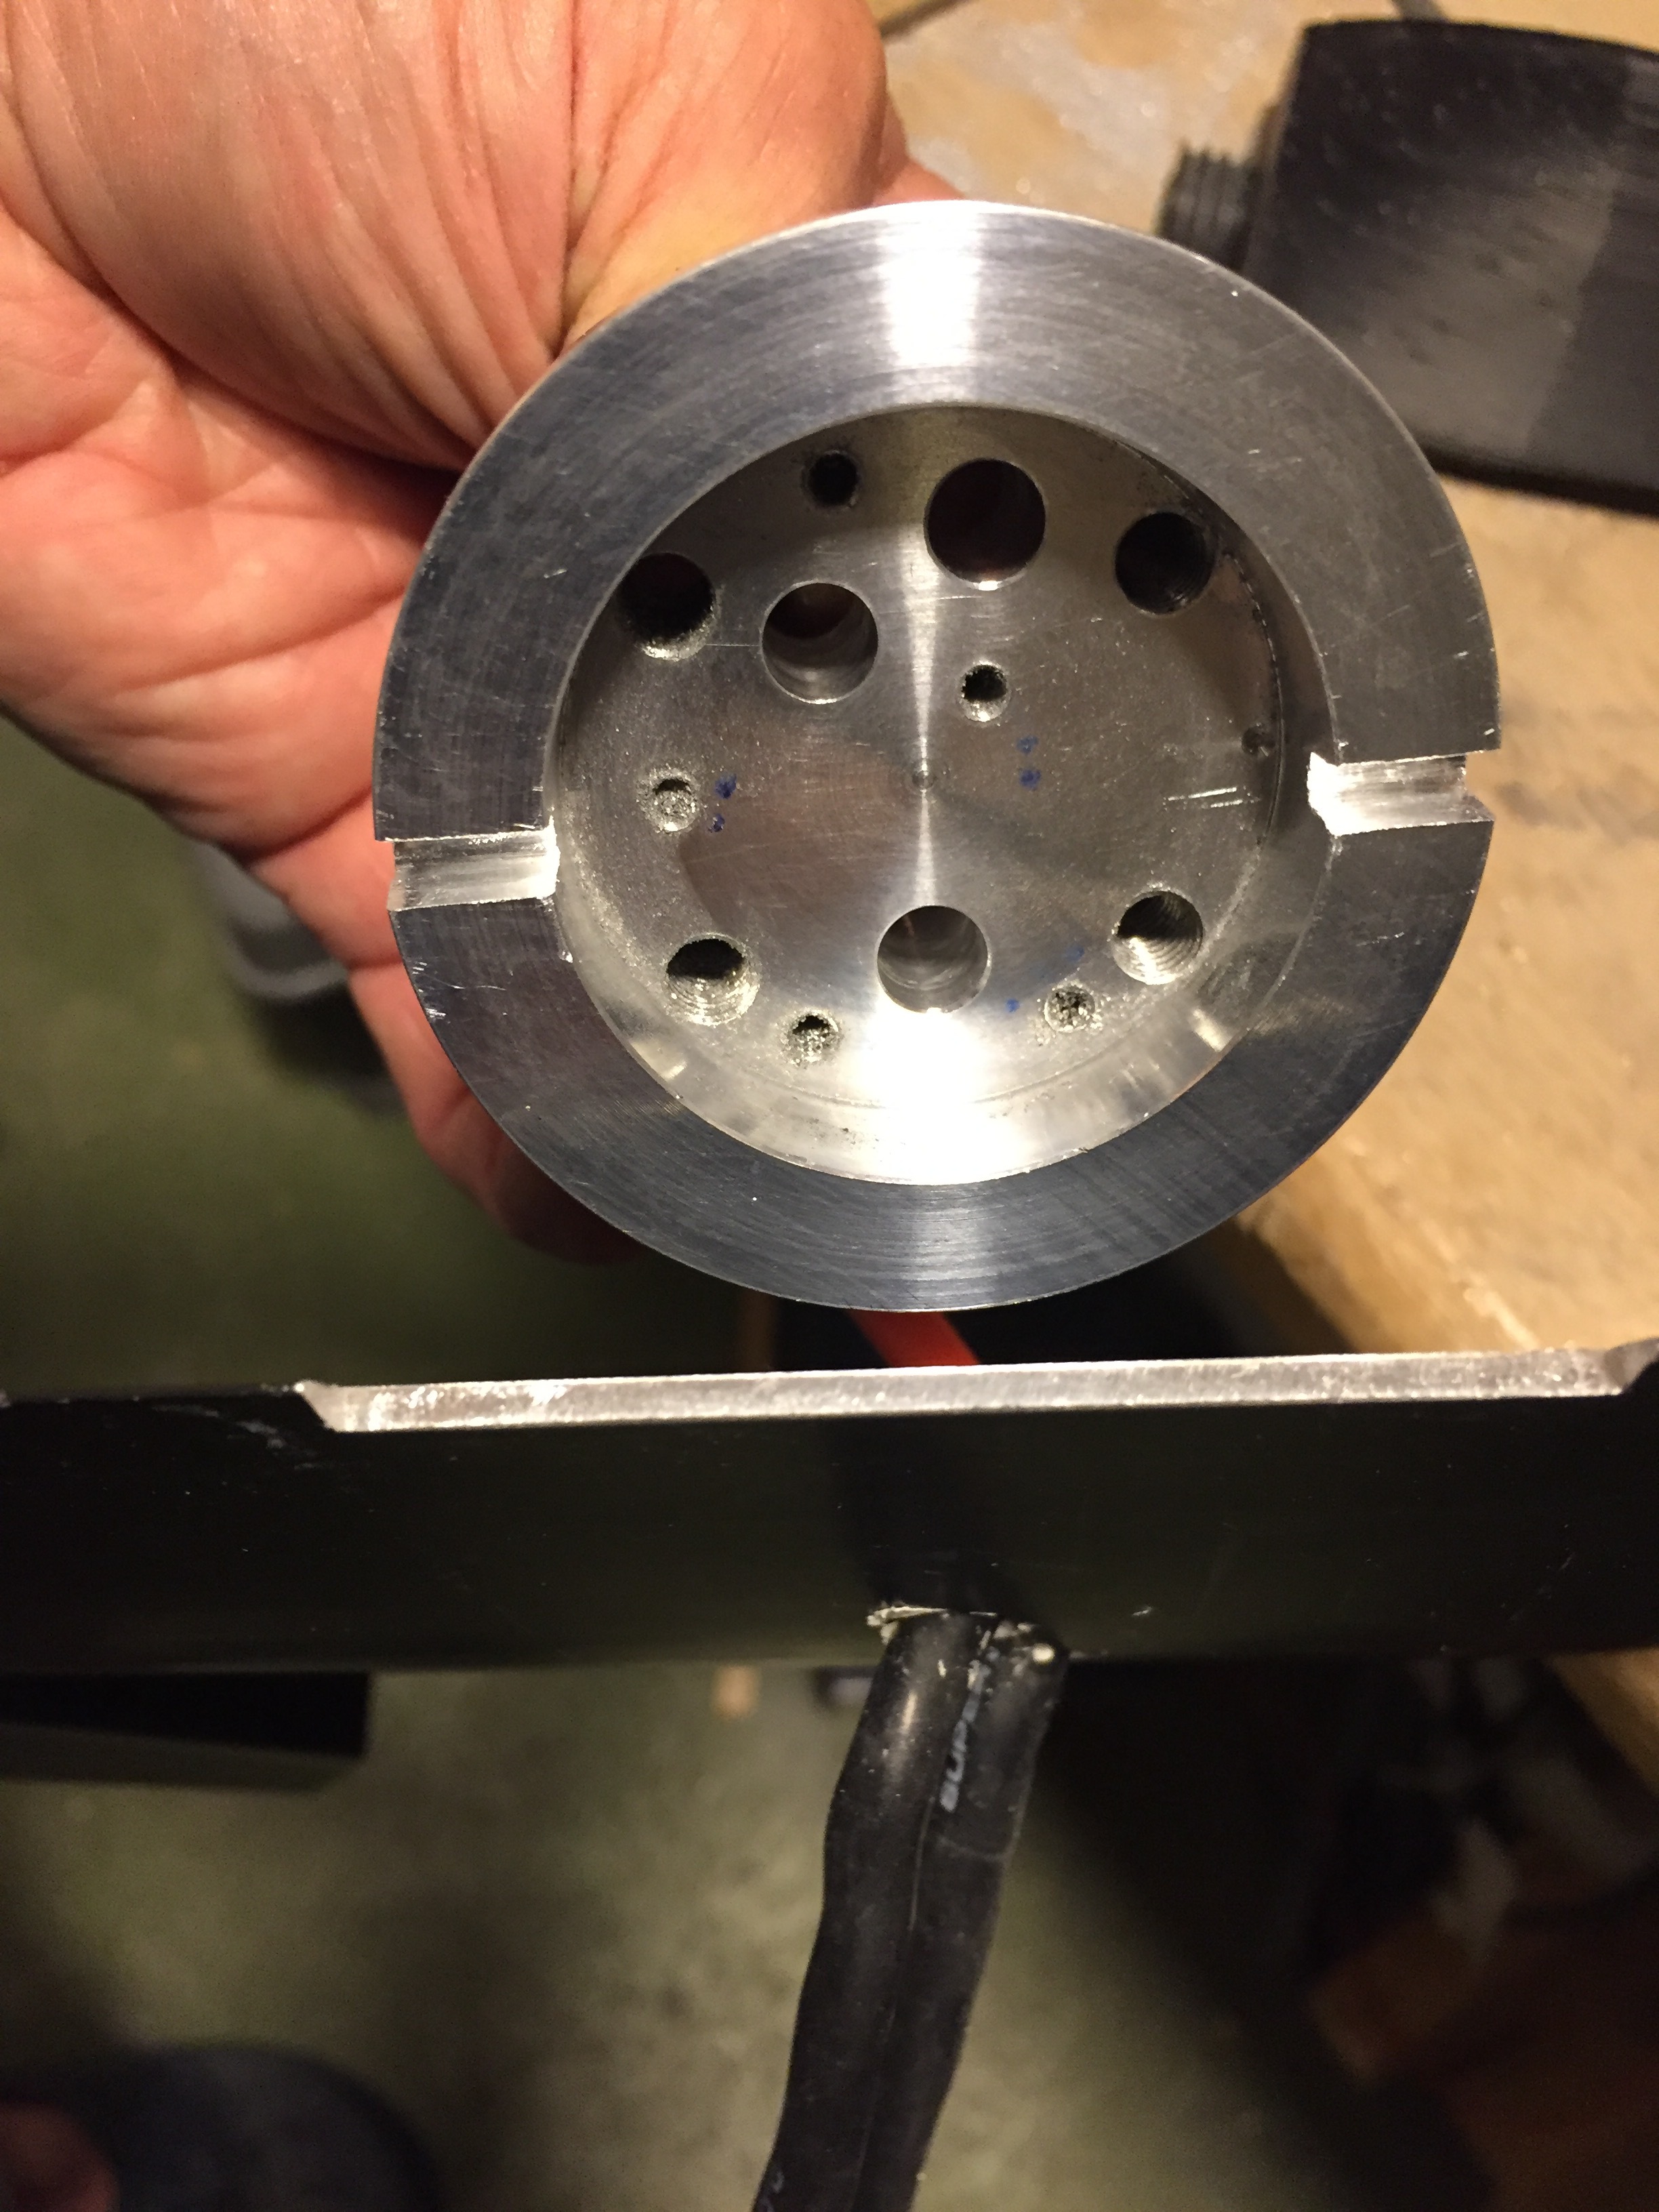
The white material is POM, so no 3d printed parts under load!
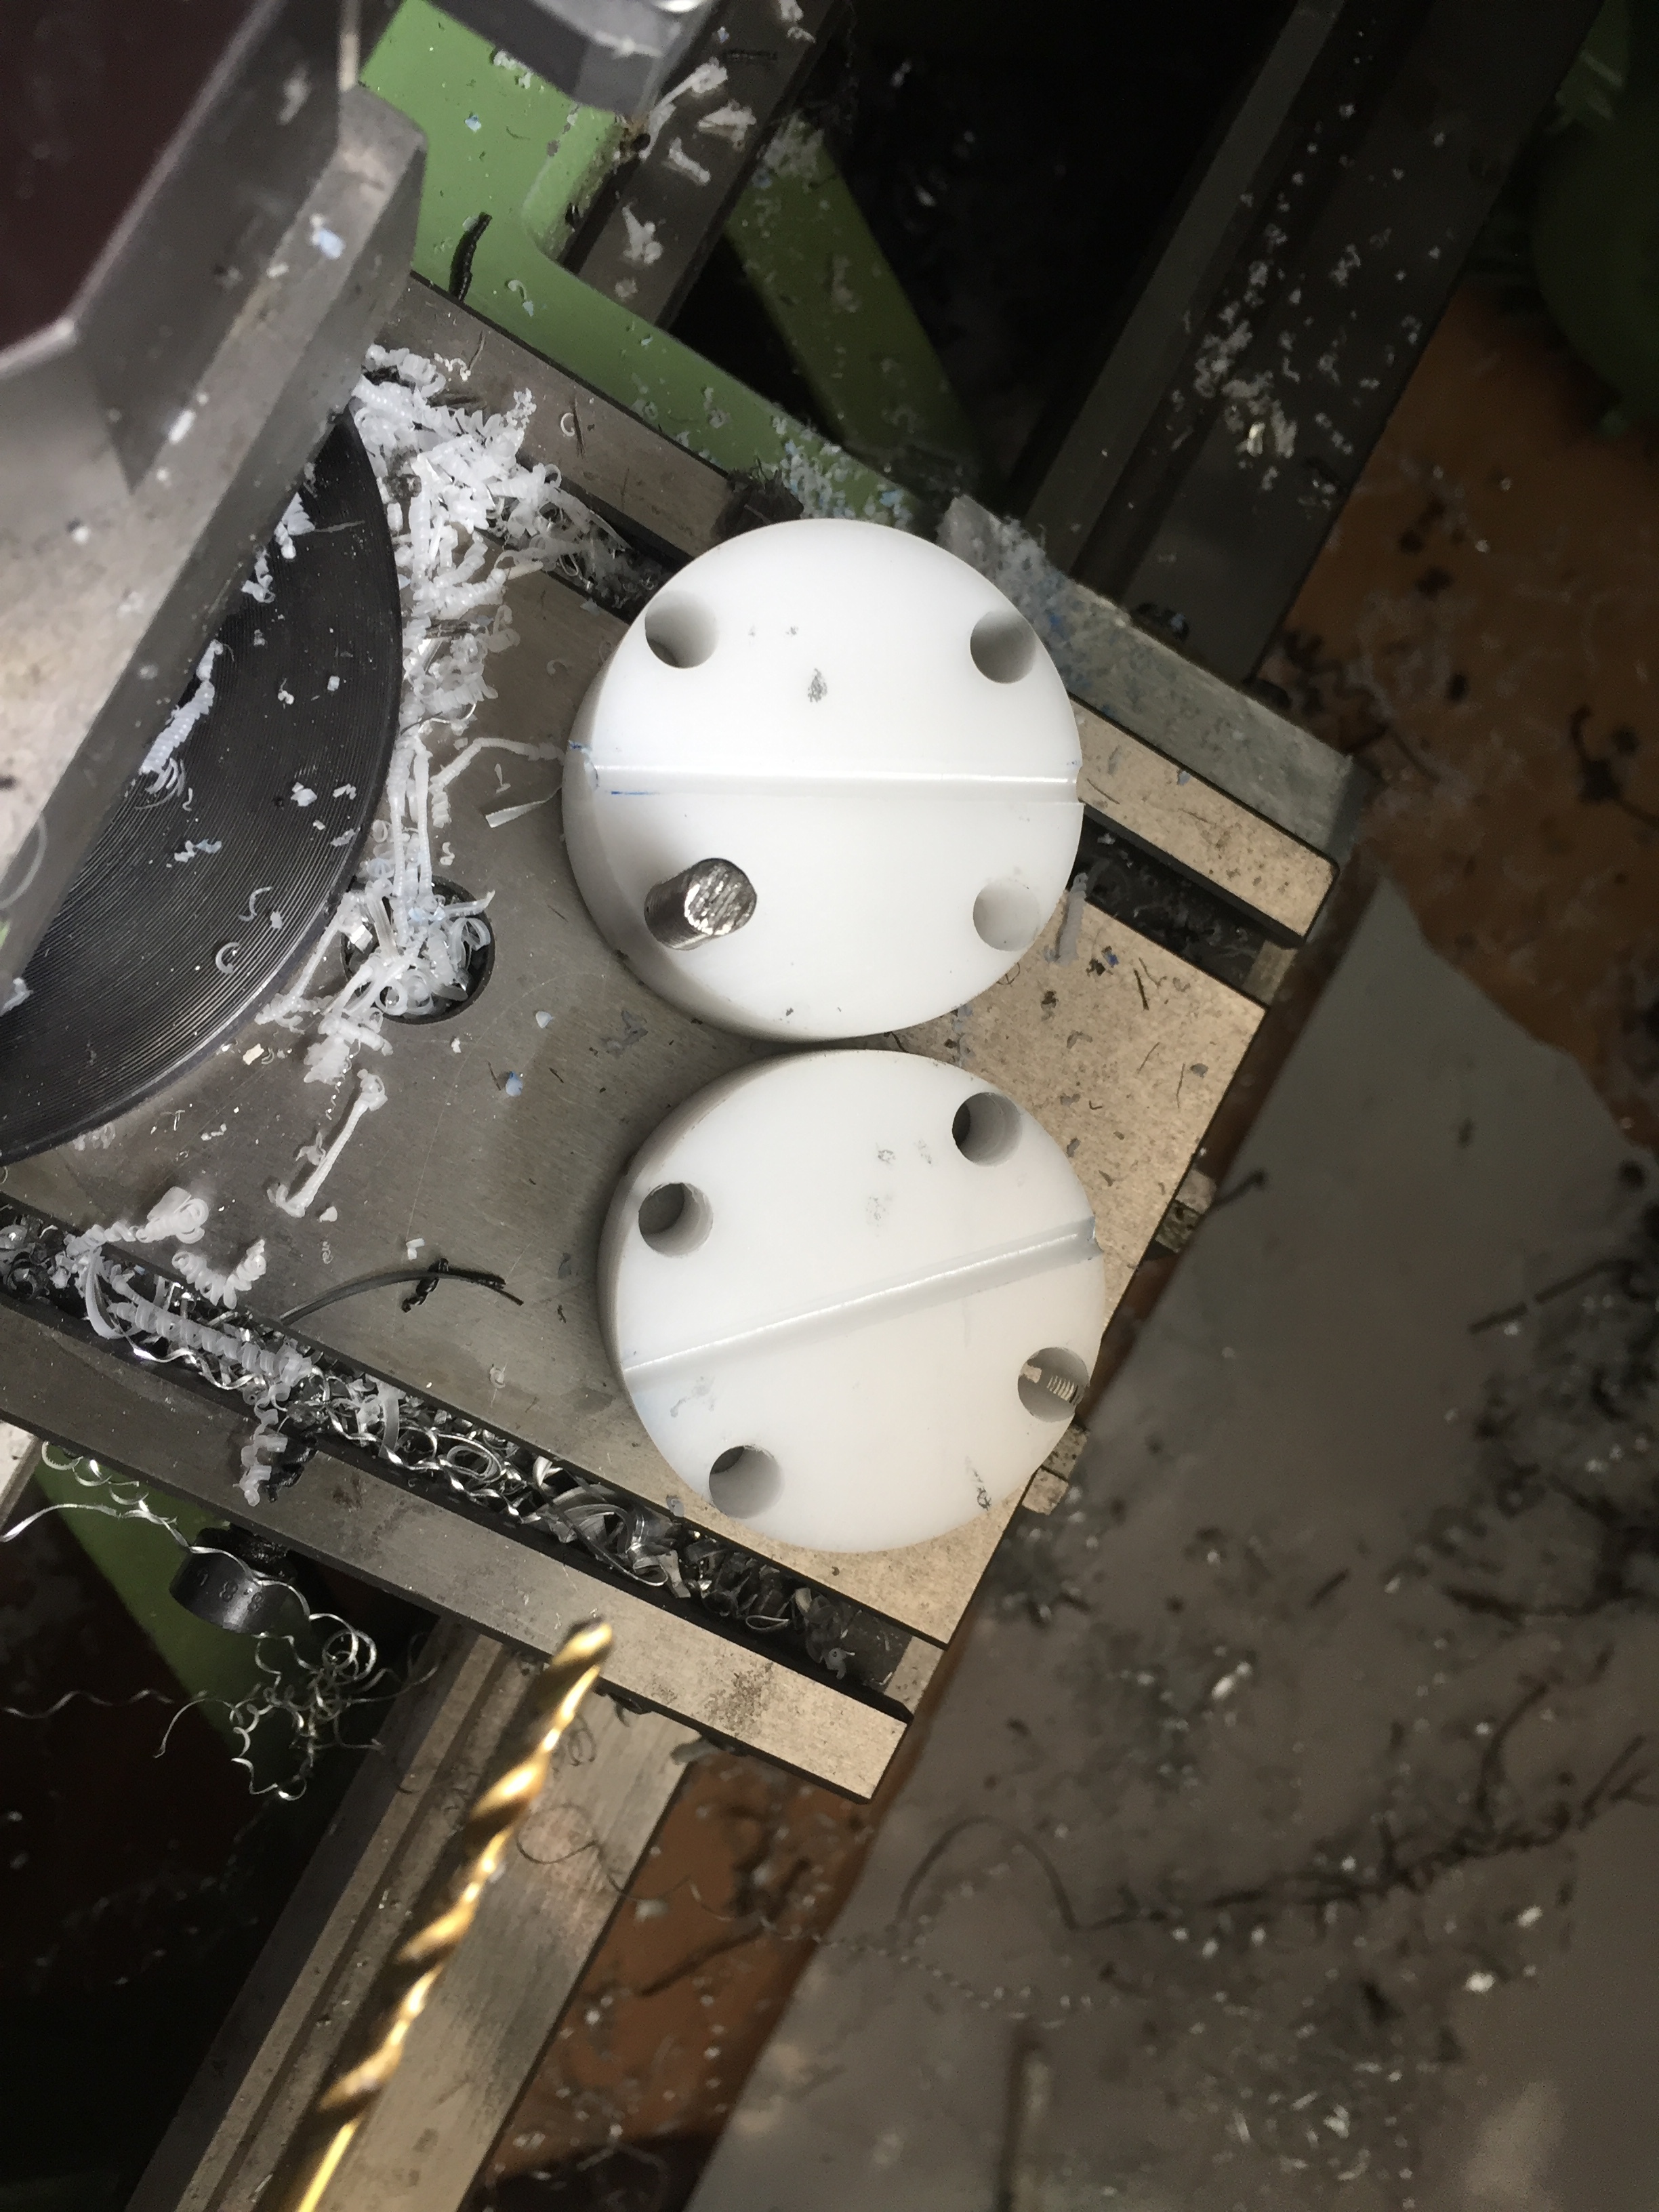
Seal with O-rings and POM plate that is fixed with screws.

3d printed enclosure can be snapped in and fixed with screw cap (copied @SUP-MIKE’s idea)
Thanks as well to @superlefax and @Toto44 from the german speaking group for their support.
7 Likes
@sat_be i am going to build with the same inflatable board as you. The manufacturer ia asking if I would like single layer or double layer or msi. Im new to all this so would you be able to guide me? Which one should I get? Of course more kayer means heavier but I am worried maybe single layer is too light and isnt strong enough.
I don’t know which one I have, probably single layer. I seems quite strong and if I pump it to 1 bar it is stable and does not flex. It is 160x65x12cm and weights 3.8 kg. I would not go bigger, slightly smaller would be good, opening as far back as possible.
1 Like
Thanks for the quick reply!
Any ideas about the center box? ed printed vs all aluminium vs fiberglass? I see a lot of people using fiberglass/ carbonfiber but i dont have any experience in these materials. Will be nice to be able to 3d print but i also read 3dprinted ones shrink in water. Maybe a different material?
It is not so easy too build a good box, there are many ways. Aluminium works but you need 3mm or thicker which will end up in a heavy construction. Have a look at the CFK box of the finish guy, I think he found a good solution, especially with this open space which allows to put the box in the opening.
1 Like
whos the Finnish guy? lol have you got a link please?
I also riding since August an Inflatable efoils.
I think to build a box, make them waterproof, fitting perfectly inside the hole of the inflatable is a complicate way.
But it works!
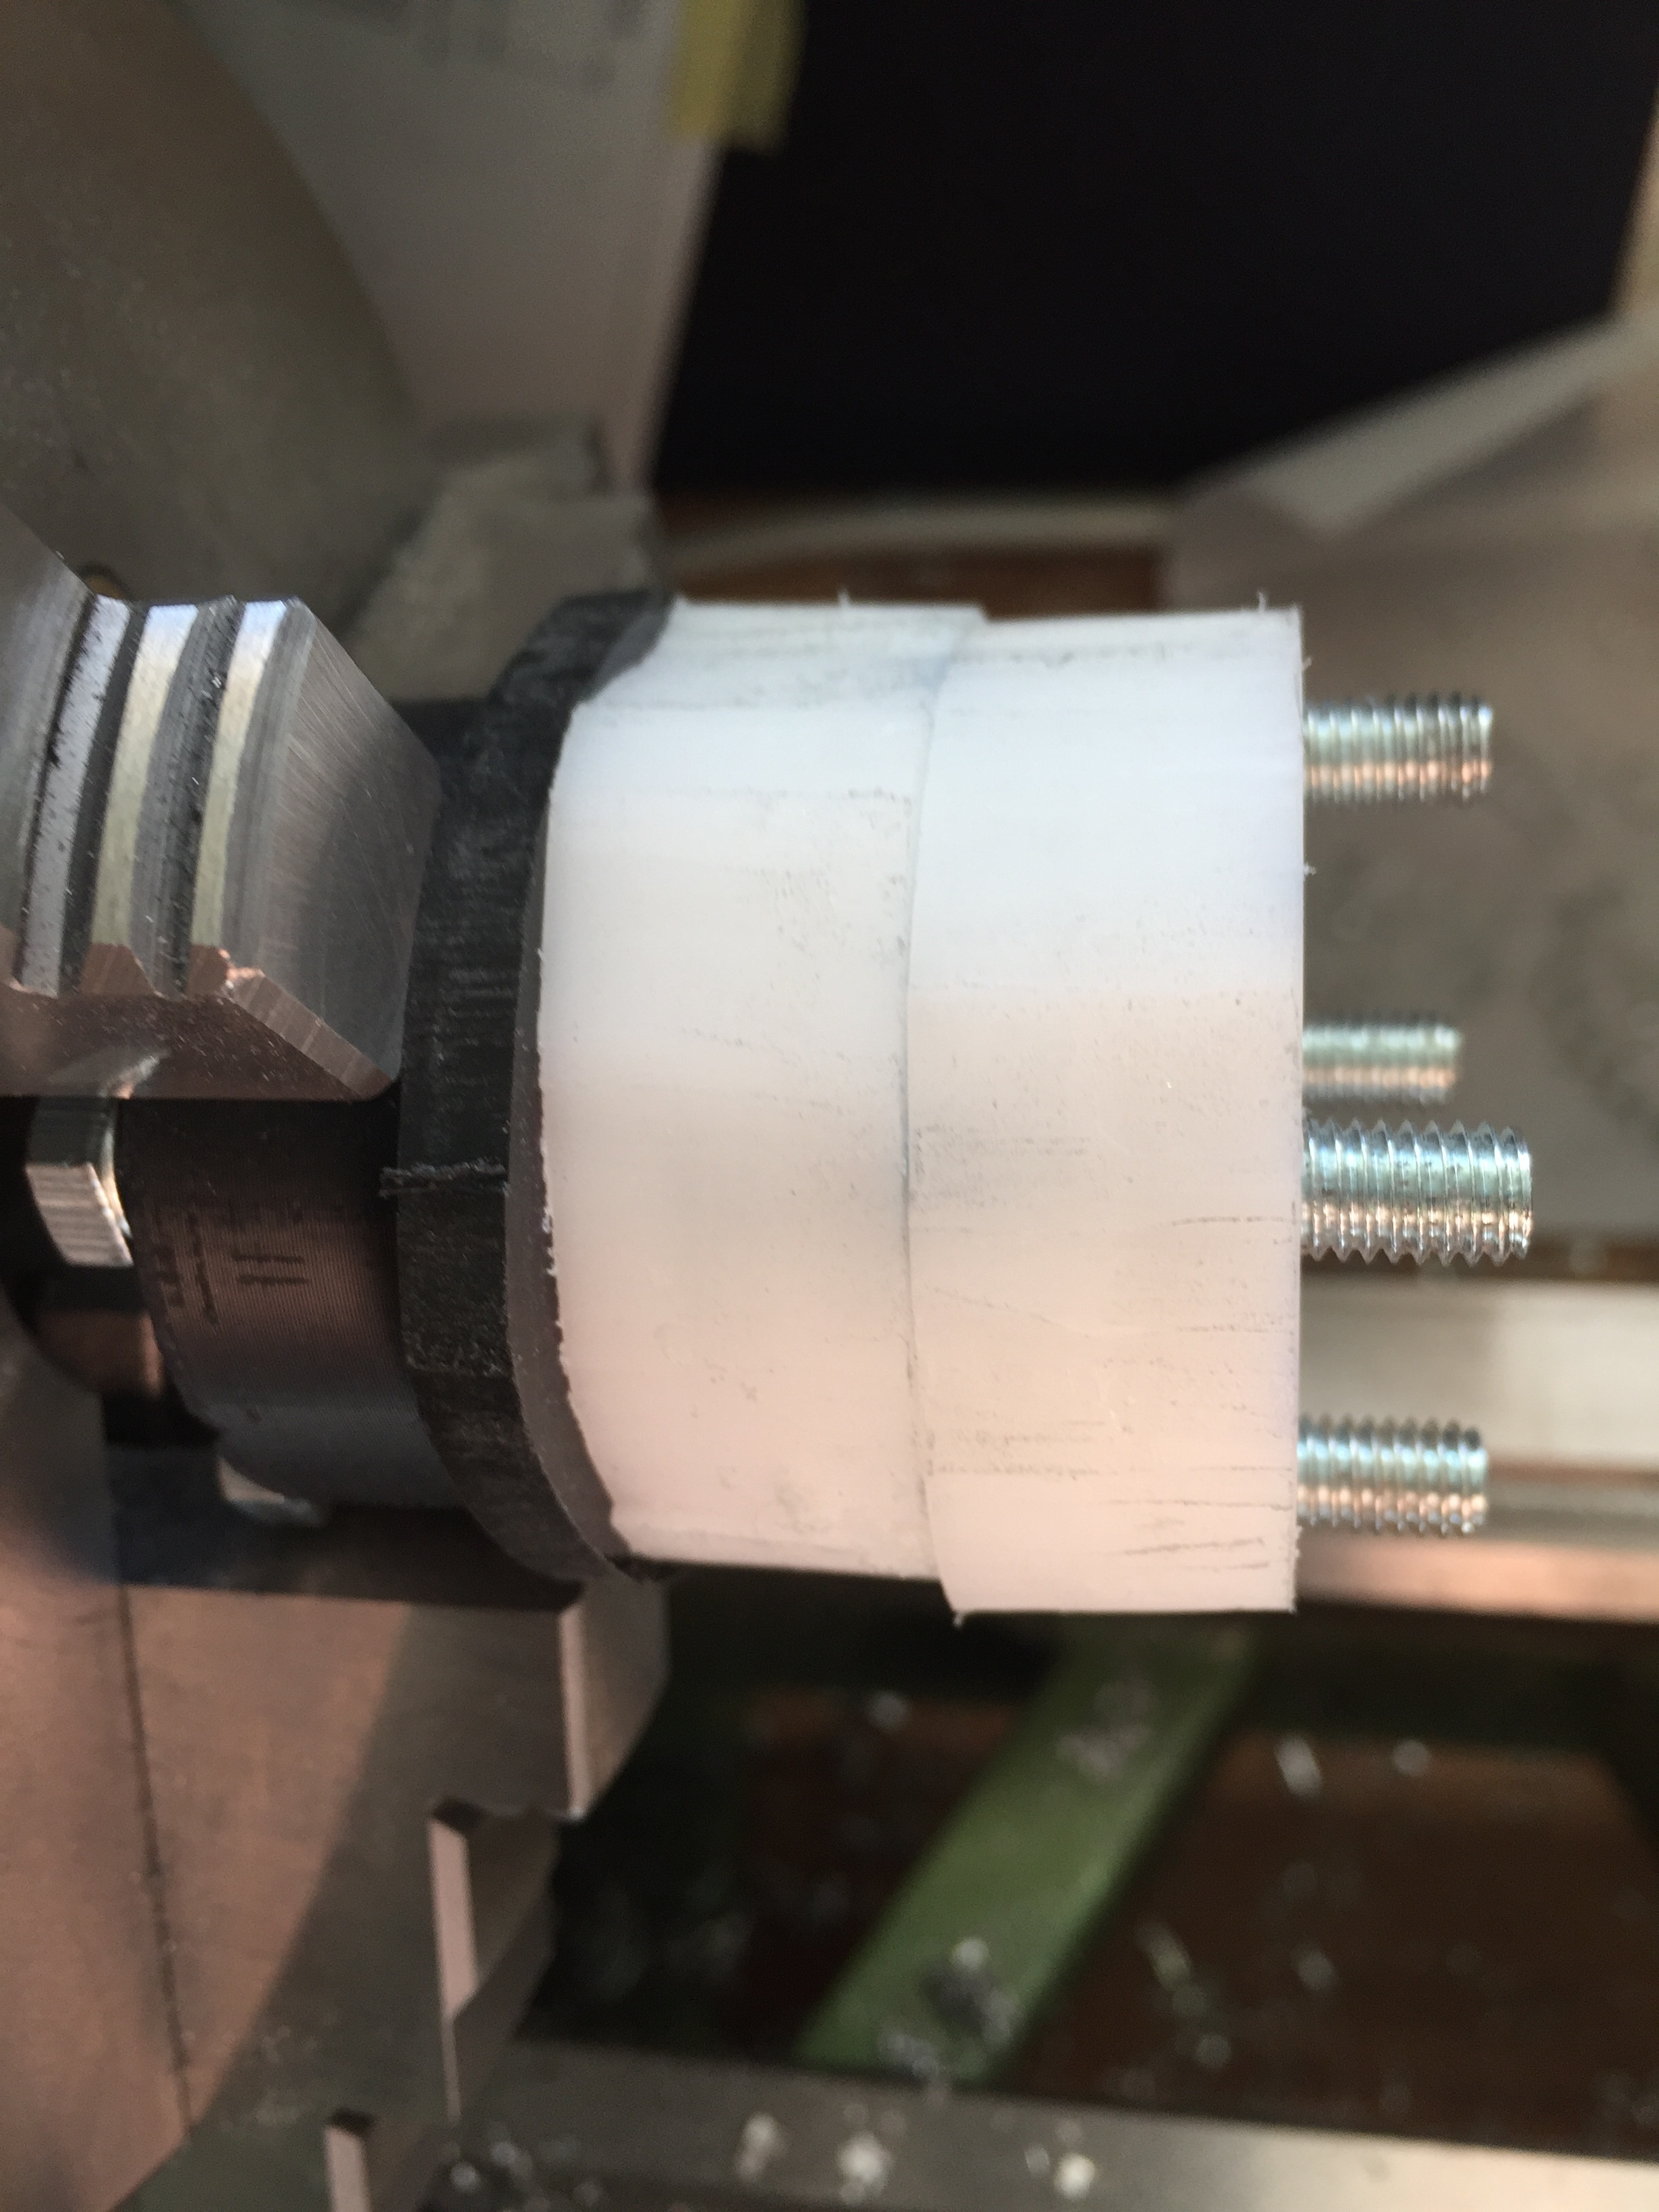
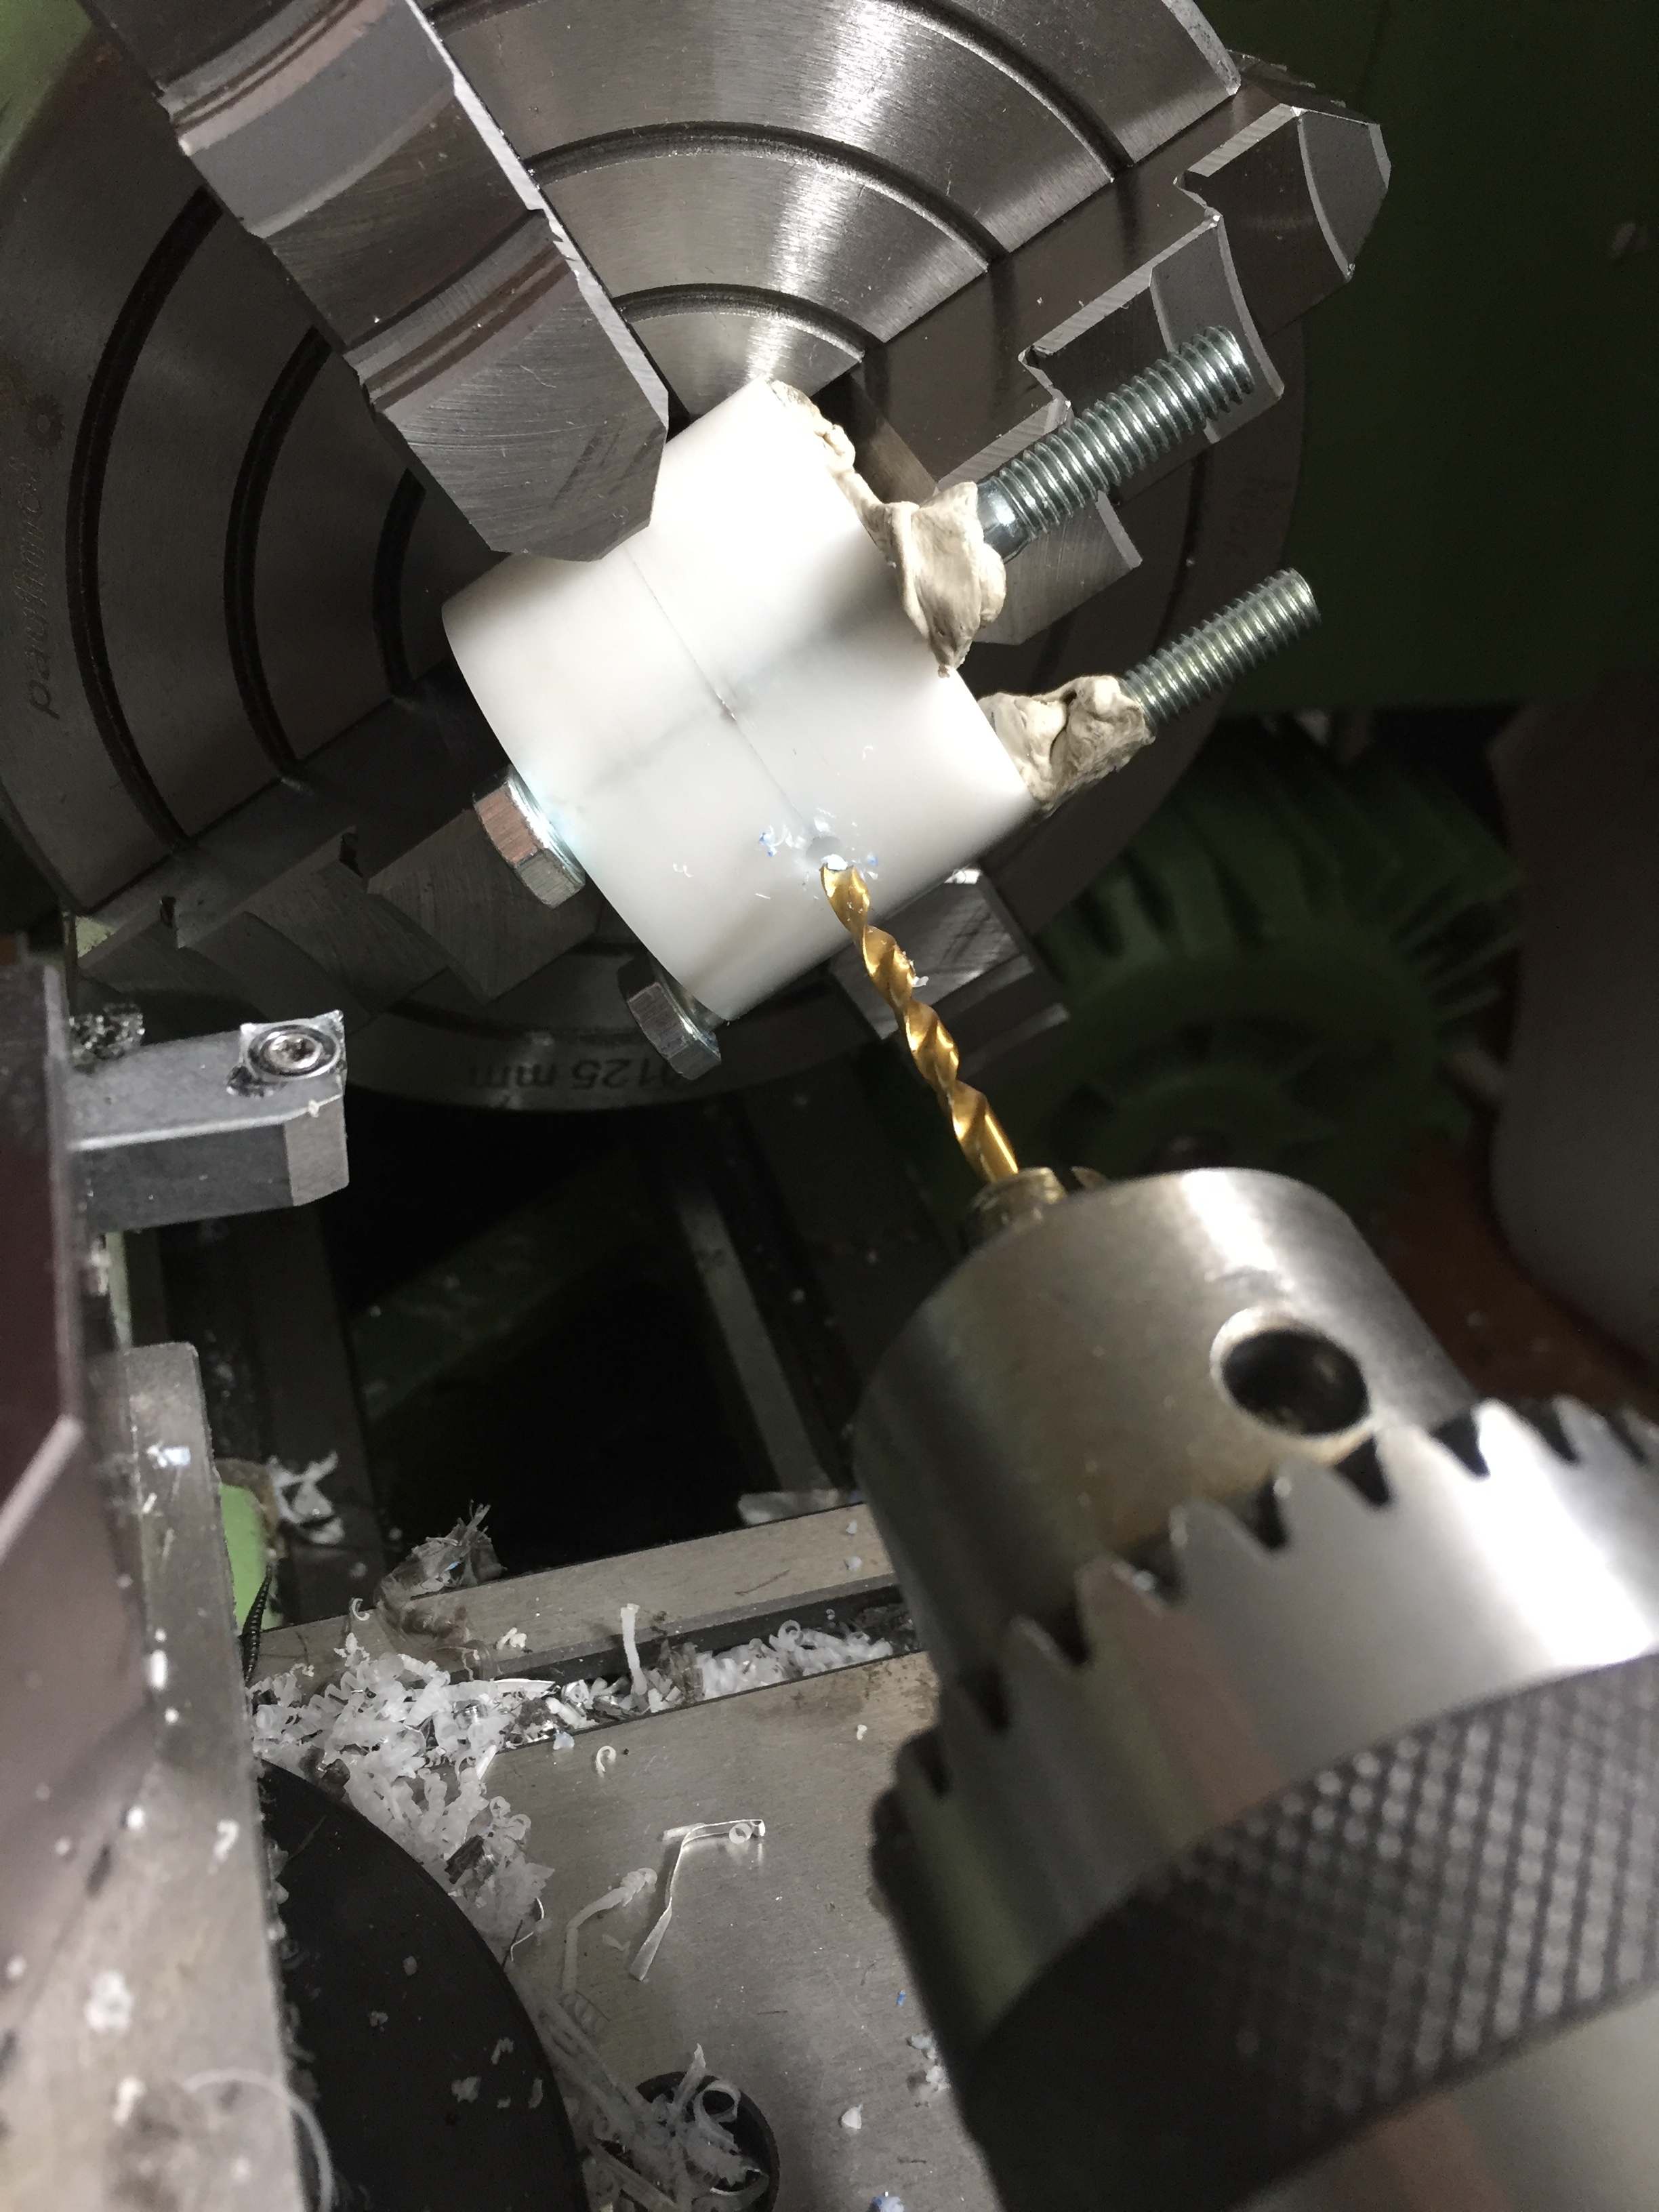
I print my box in two parts with an Anycubic Chiron.
I glued both ends together and laminate theme with CFK. I Mount on the bottom a aluminum plate and make the plate with one layer Glas and epoxy waterproof.
As top plate I used a Siebdruckplatte.
You can see all in my Build thread.
2 Likes
2 Likes
How much did you inflatable boards cost you? Without shipping and taxes?
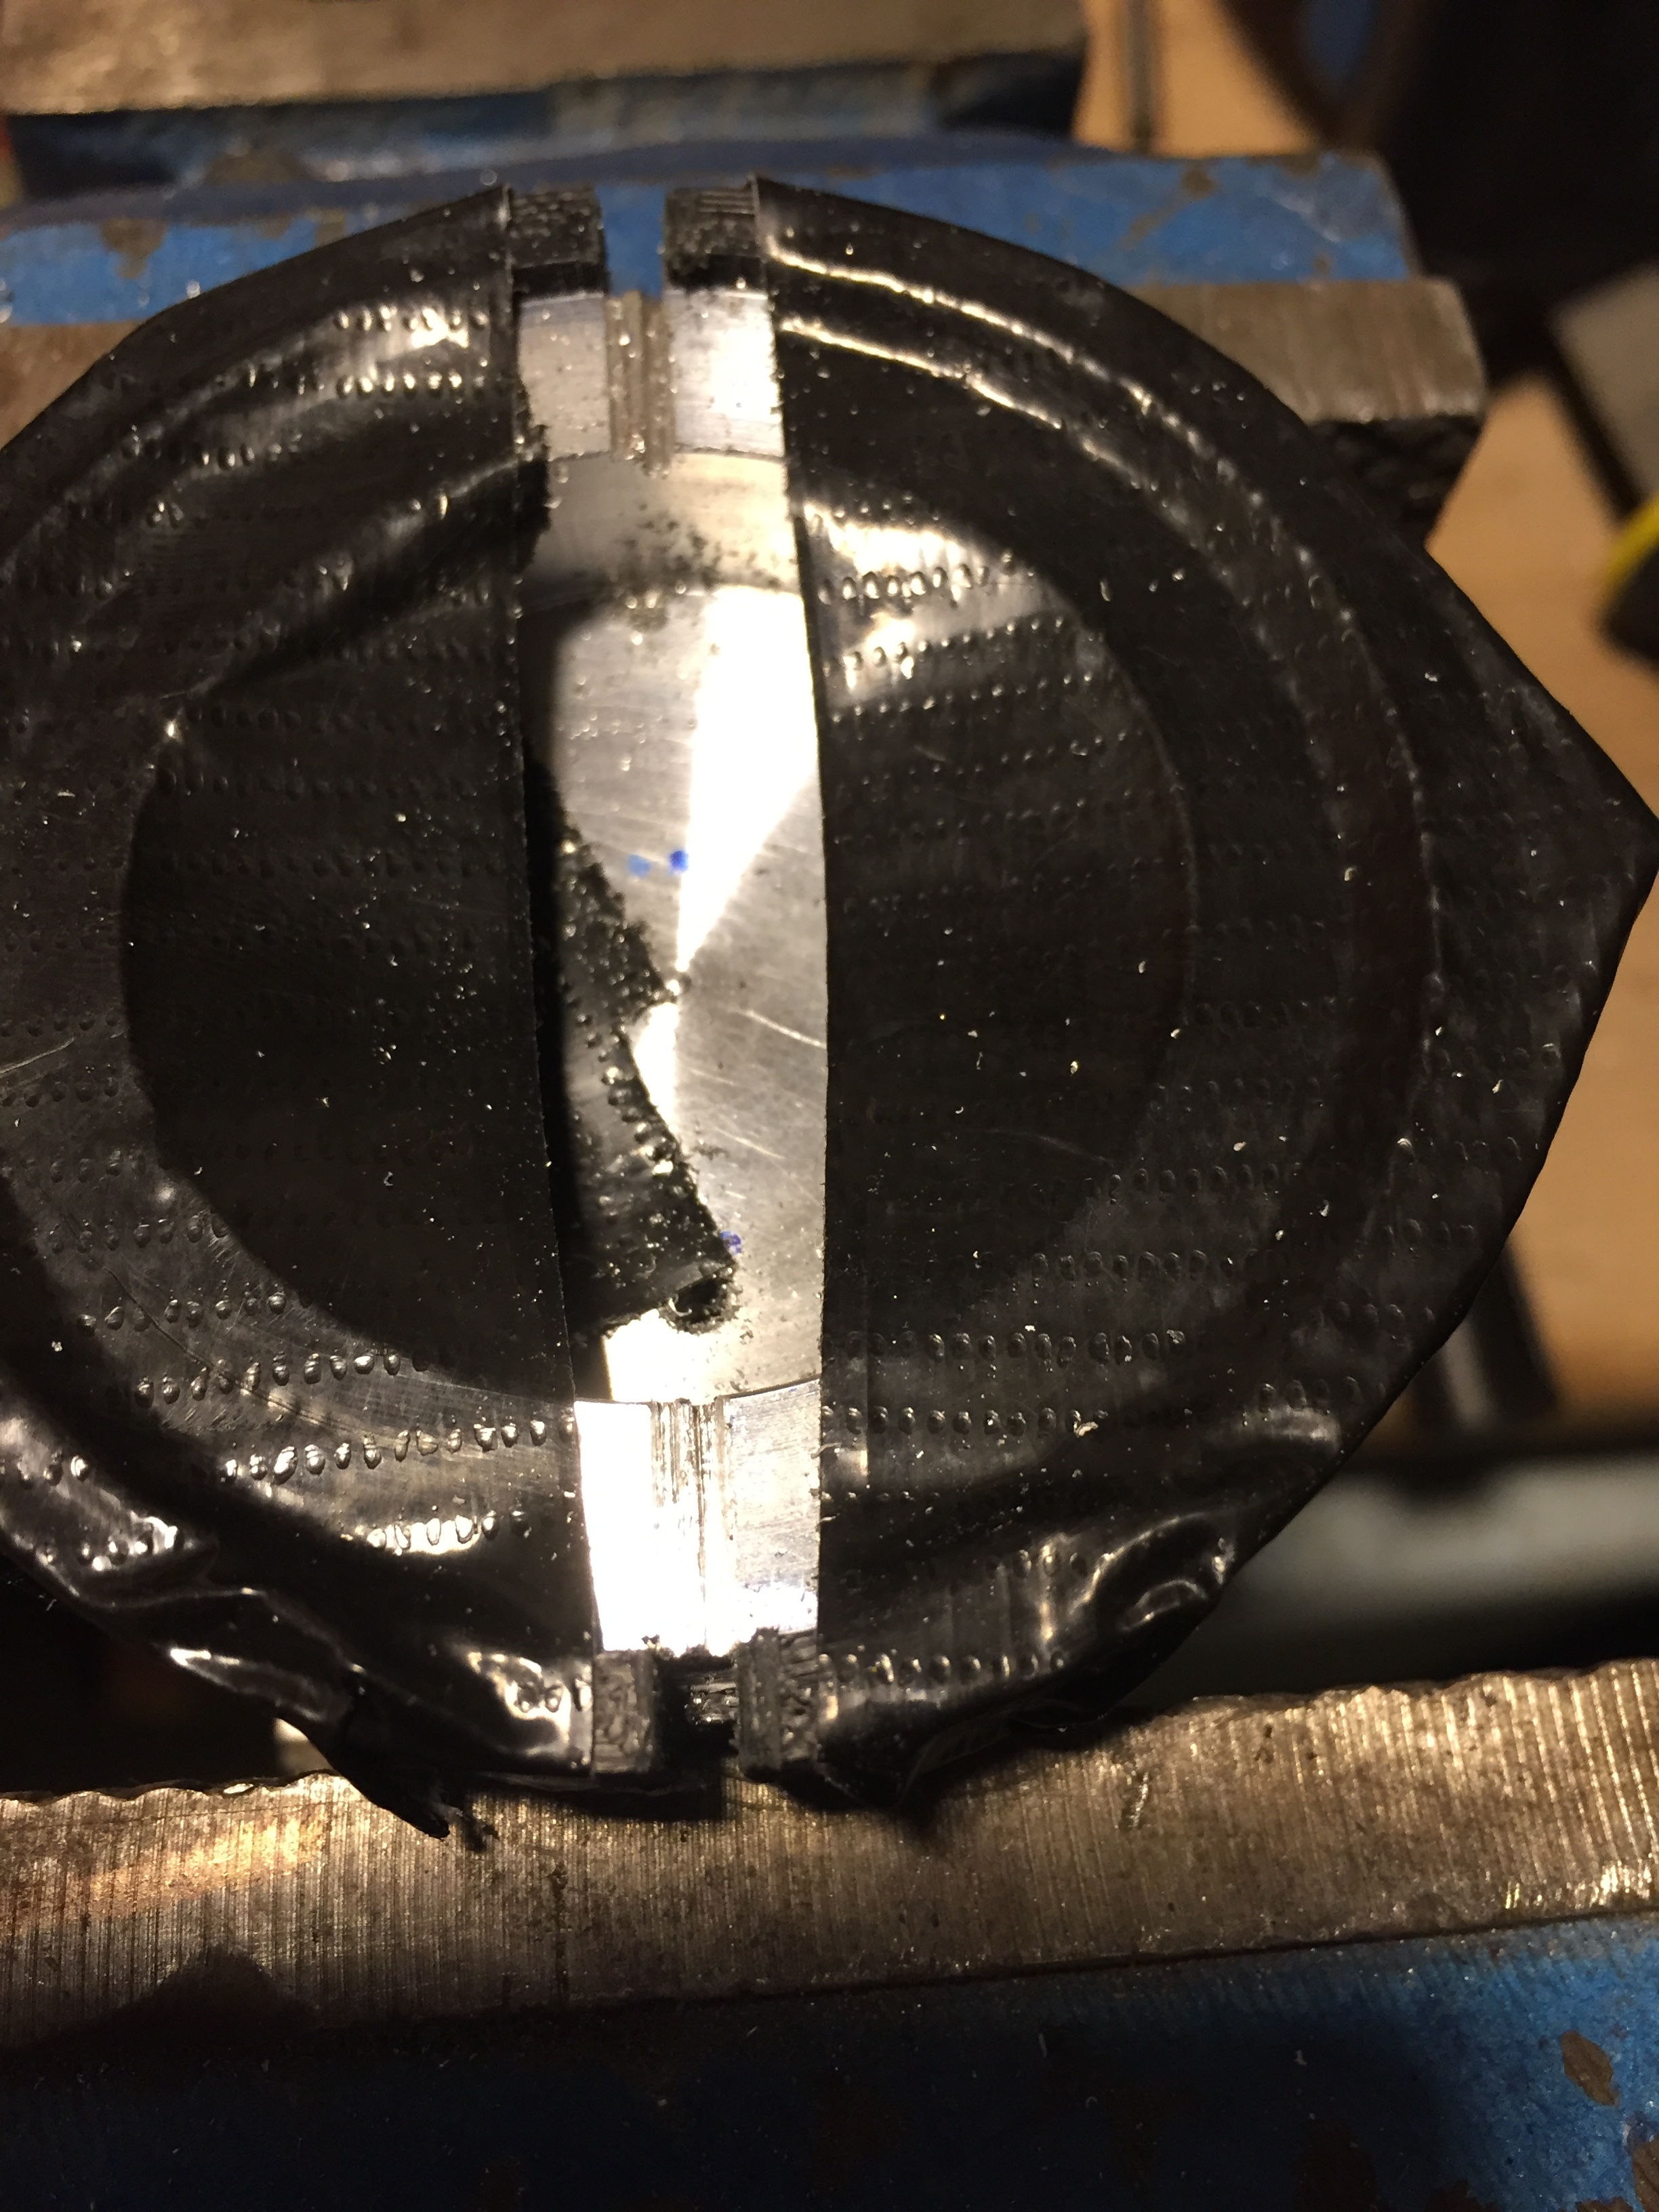
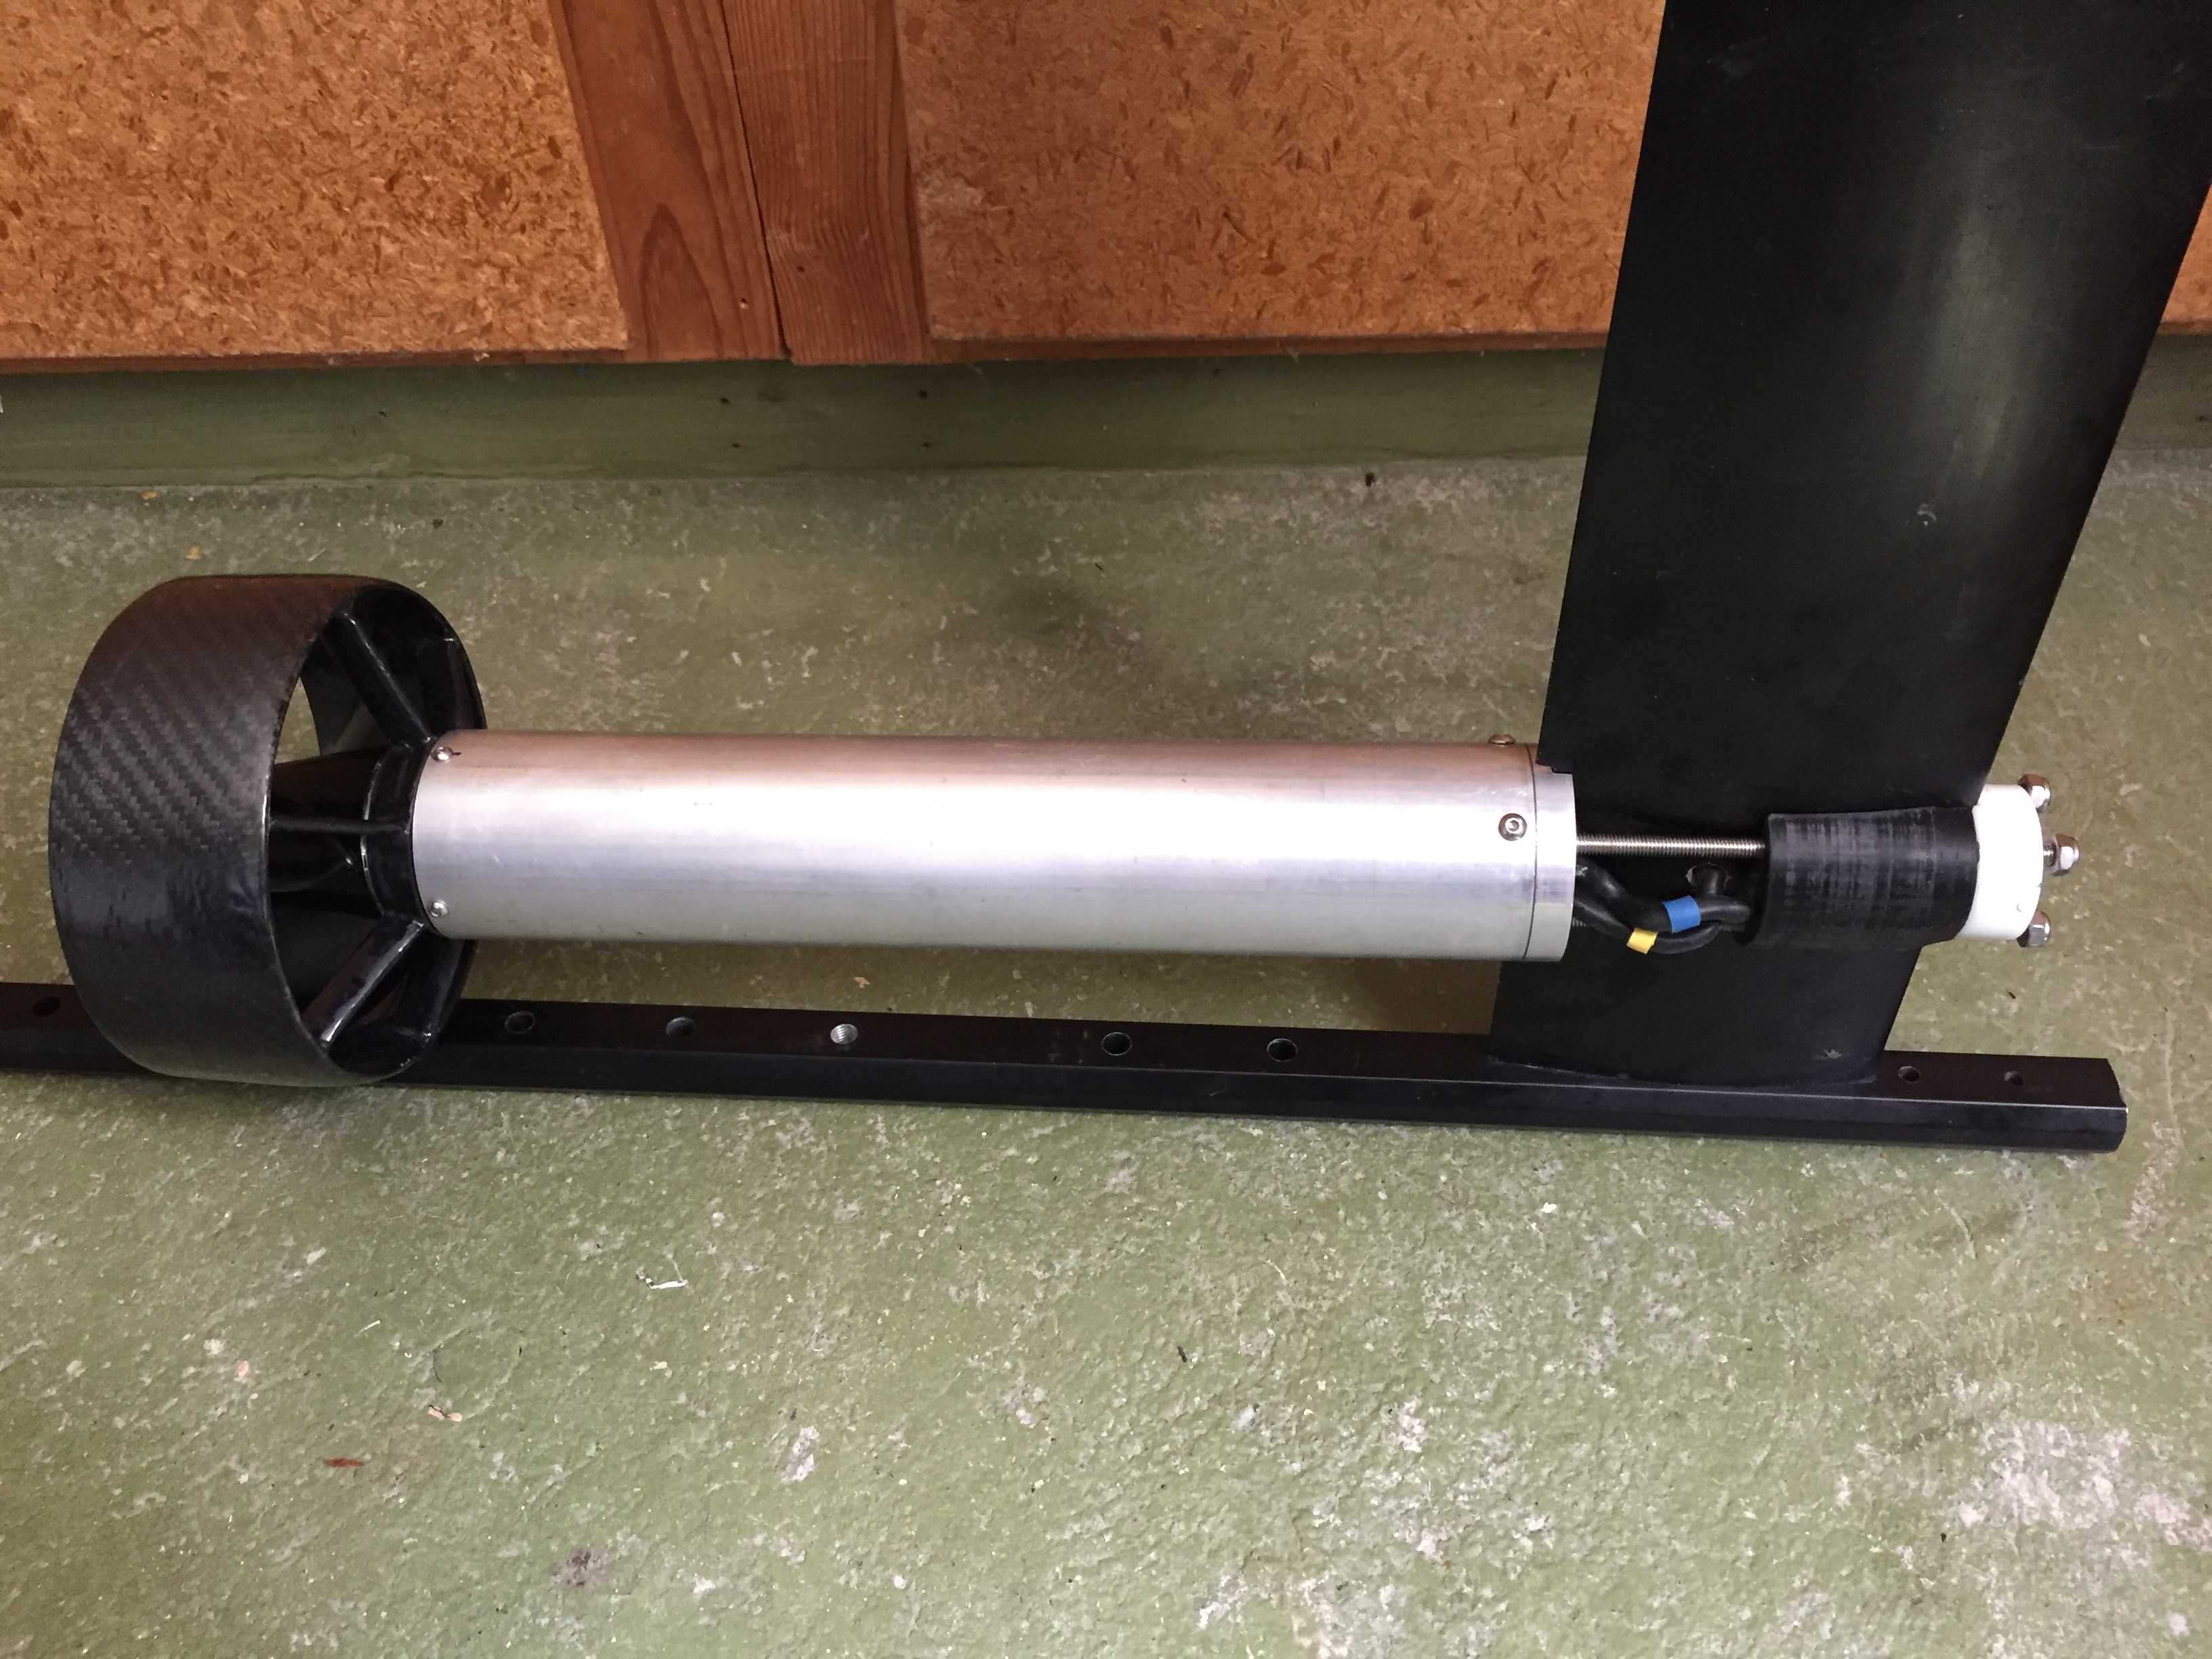
Update: Ungeared my setup!
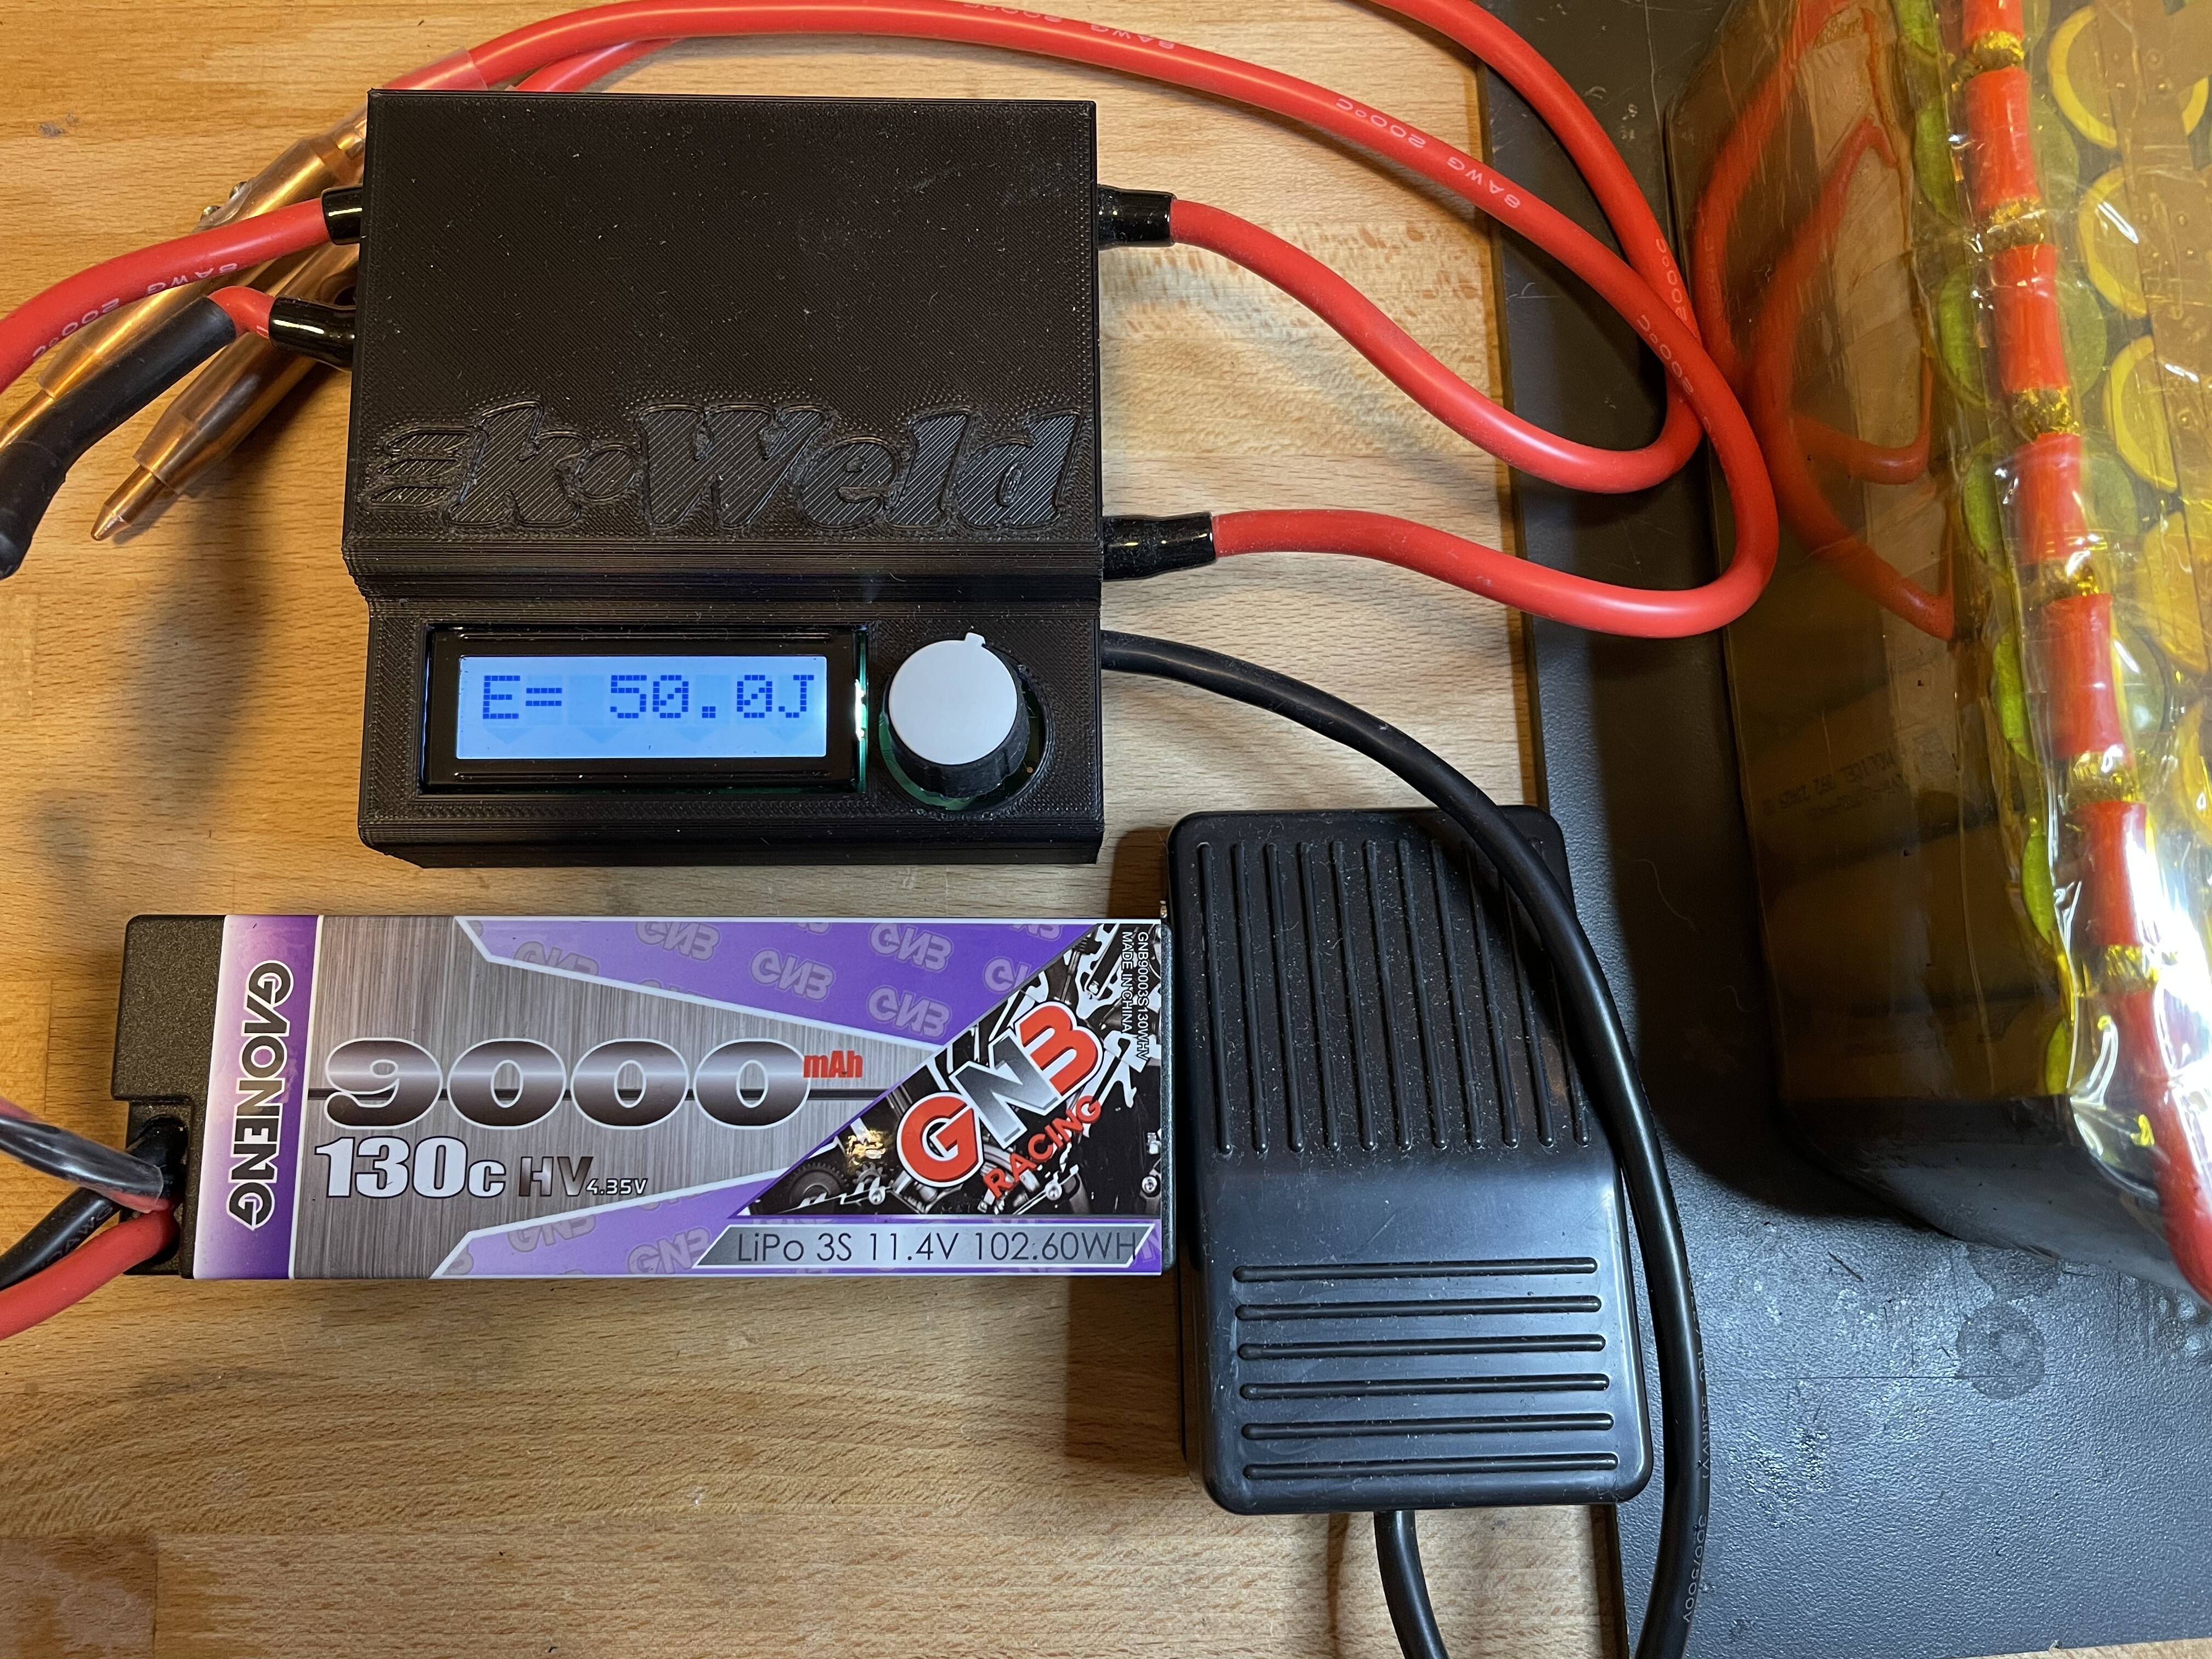
After some trouble with a cold fused alu prop to the stainless steel shaft, I had to destroy parts of the geared motor pod. It worked well but was a bit long and heavy. I also did not want to bother about water ingress into the pod any longer, therefore I went for a 63100 run wet.
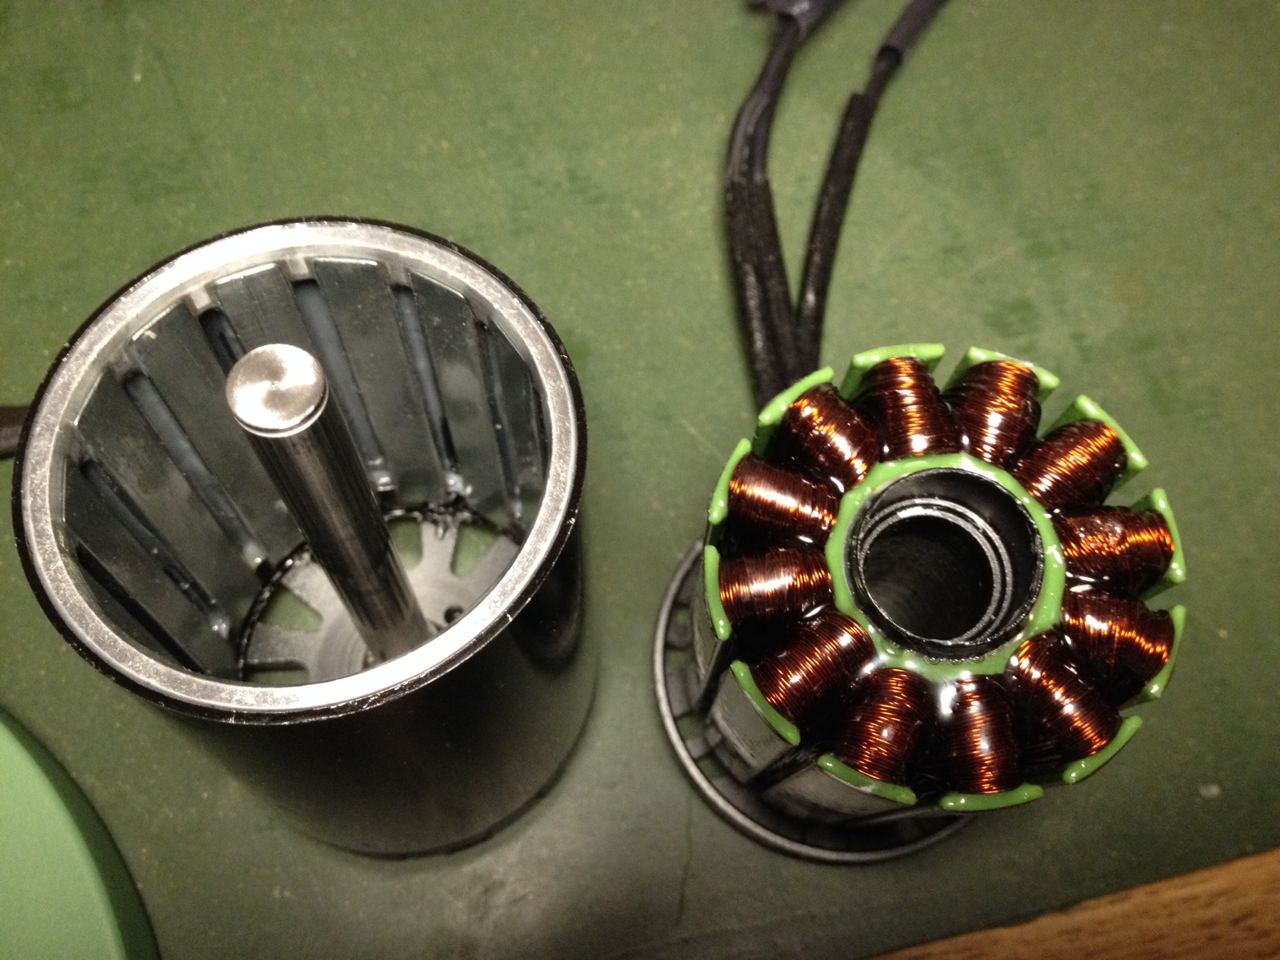
coated stator and rotor with epoxy

Also replaced the ESC, the Flier went up in smoke due to water ingress. The new one is a HGL-TECH 75200 and works well so far.
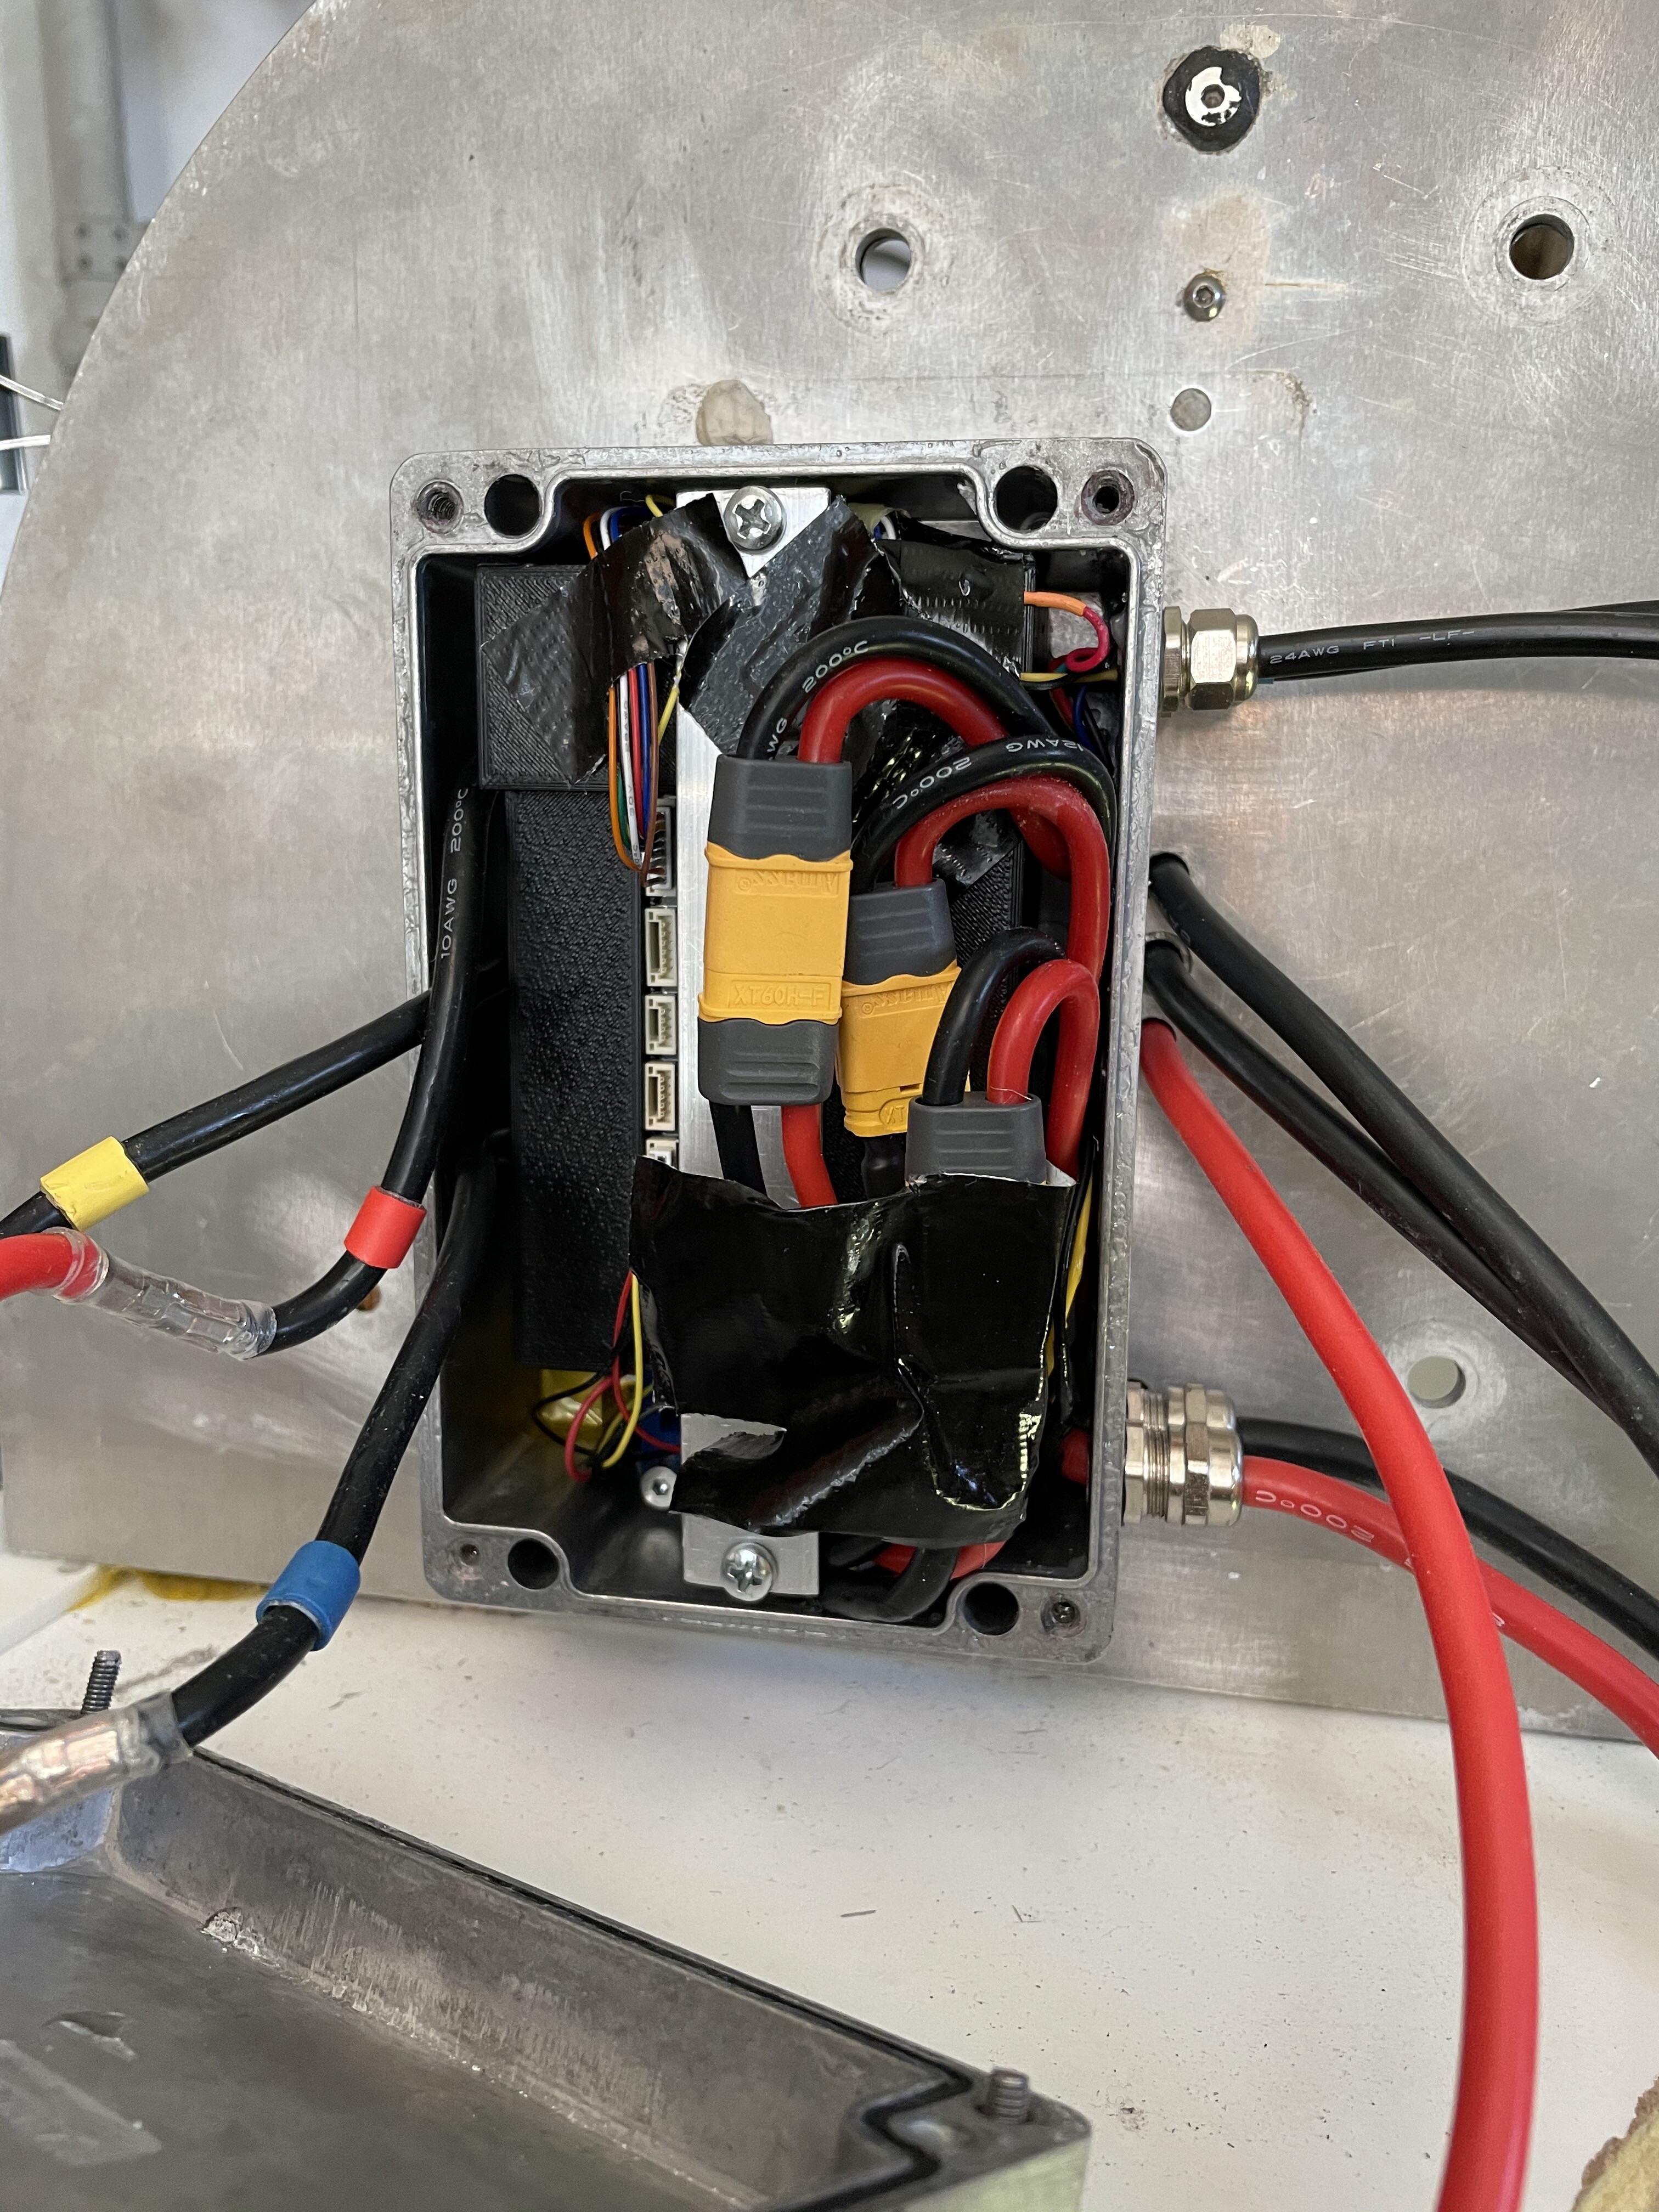
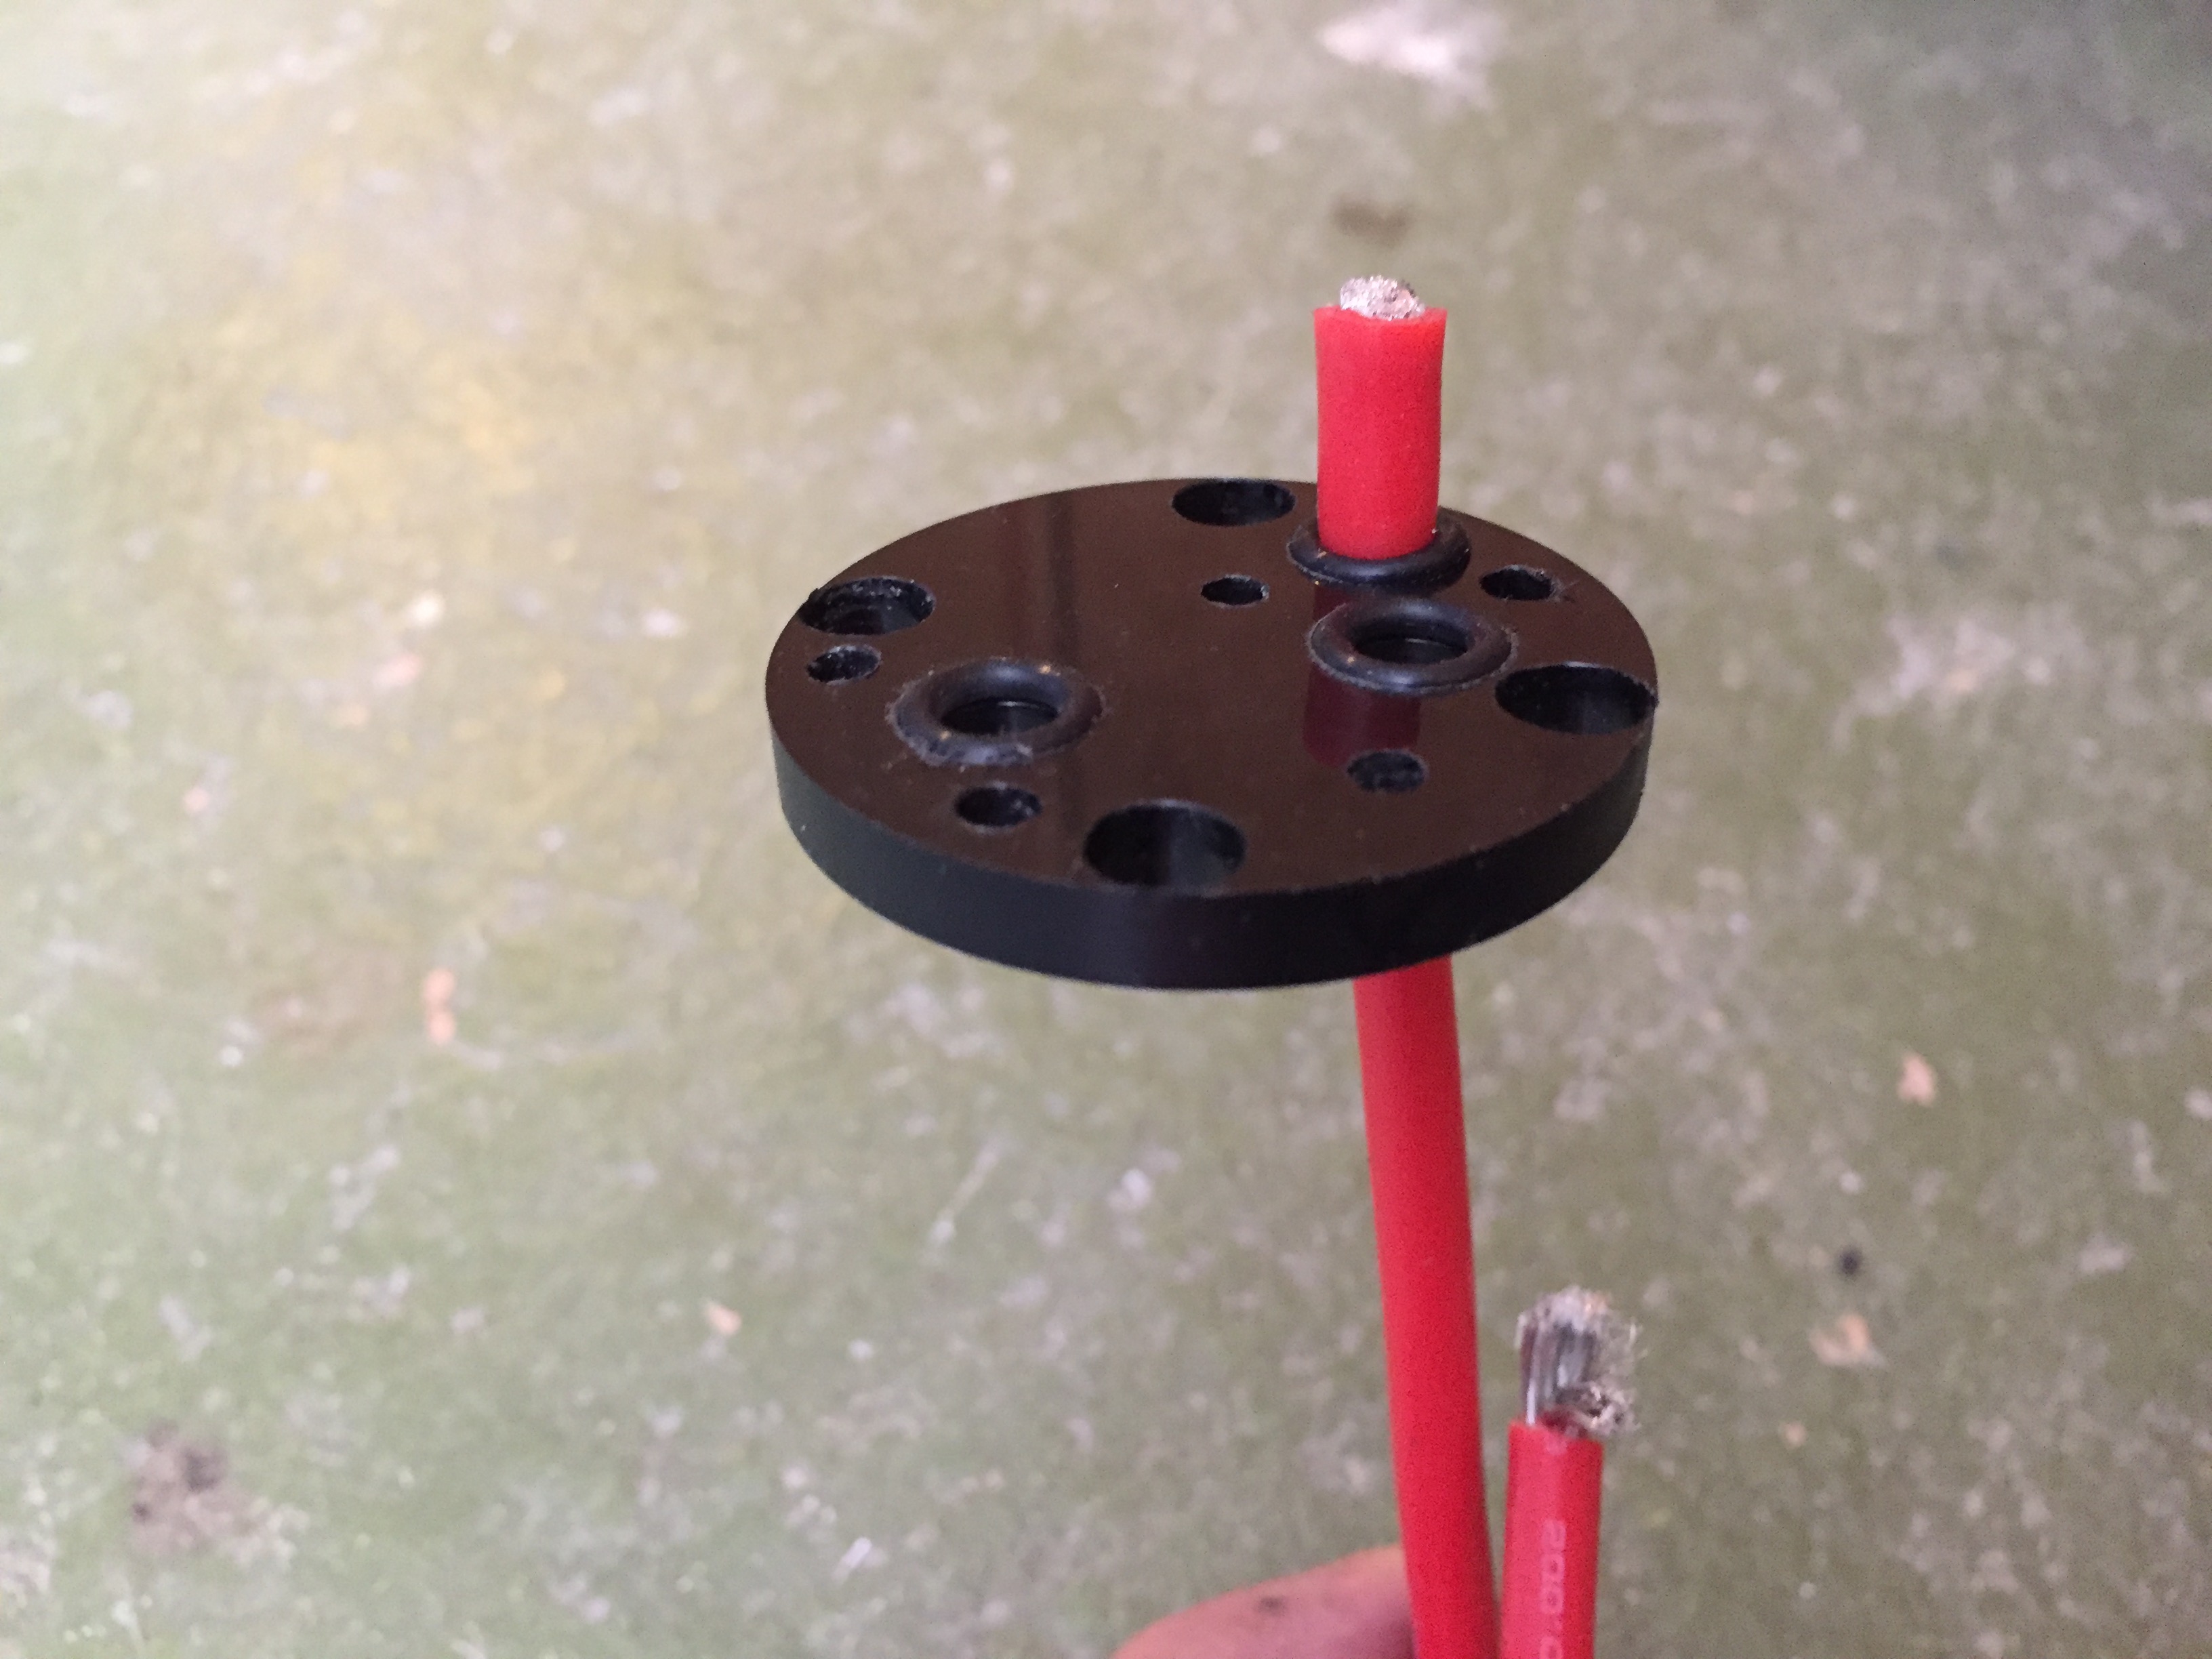
Changed the entry point of the phase wires, they enter from the top with cable glands, now the box is waterproof.
For the prop I first used a printed pla+ 2 blade prop from @V_S, it worked well. Now I use a Flite prop which is more robust.


thanks @Toto44 for the prop adapter
11 Likes
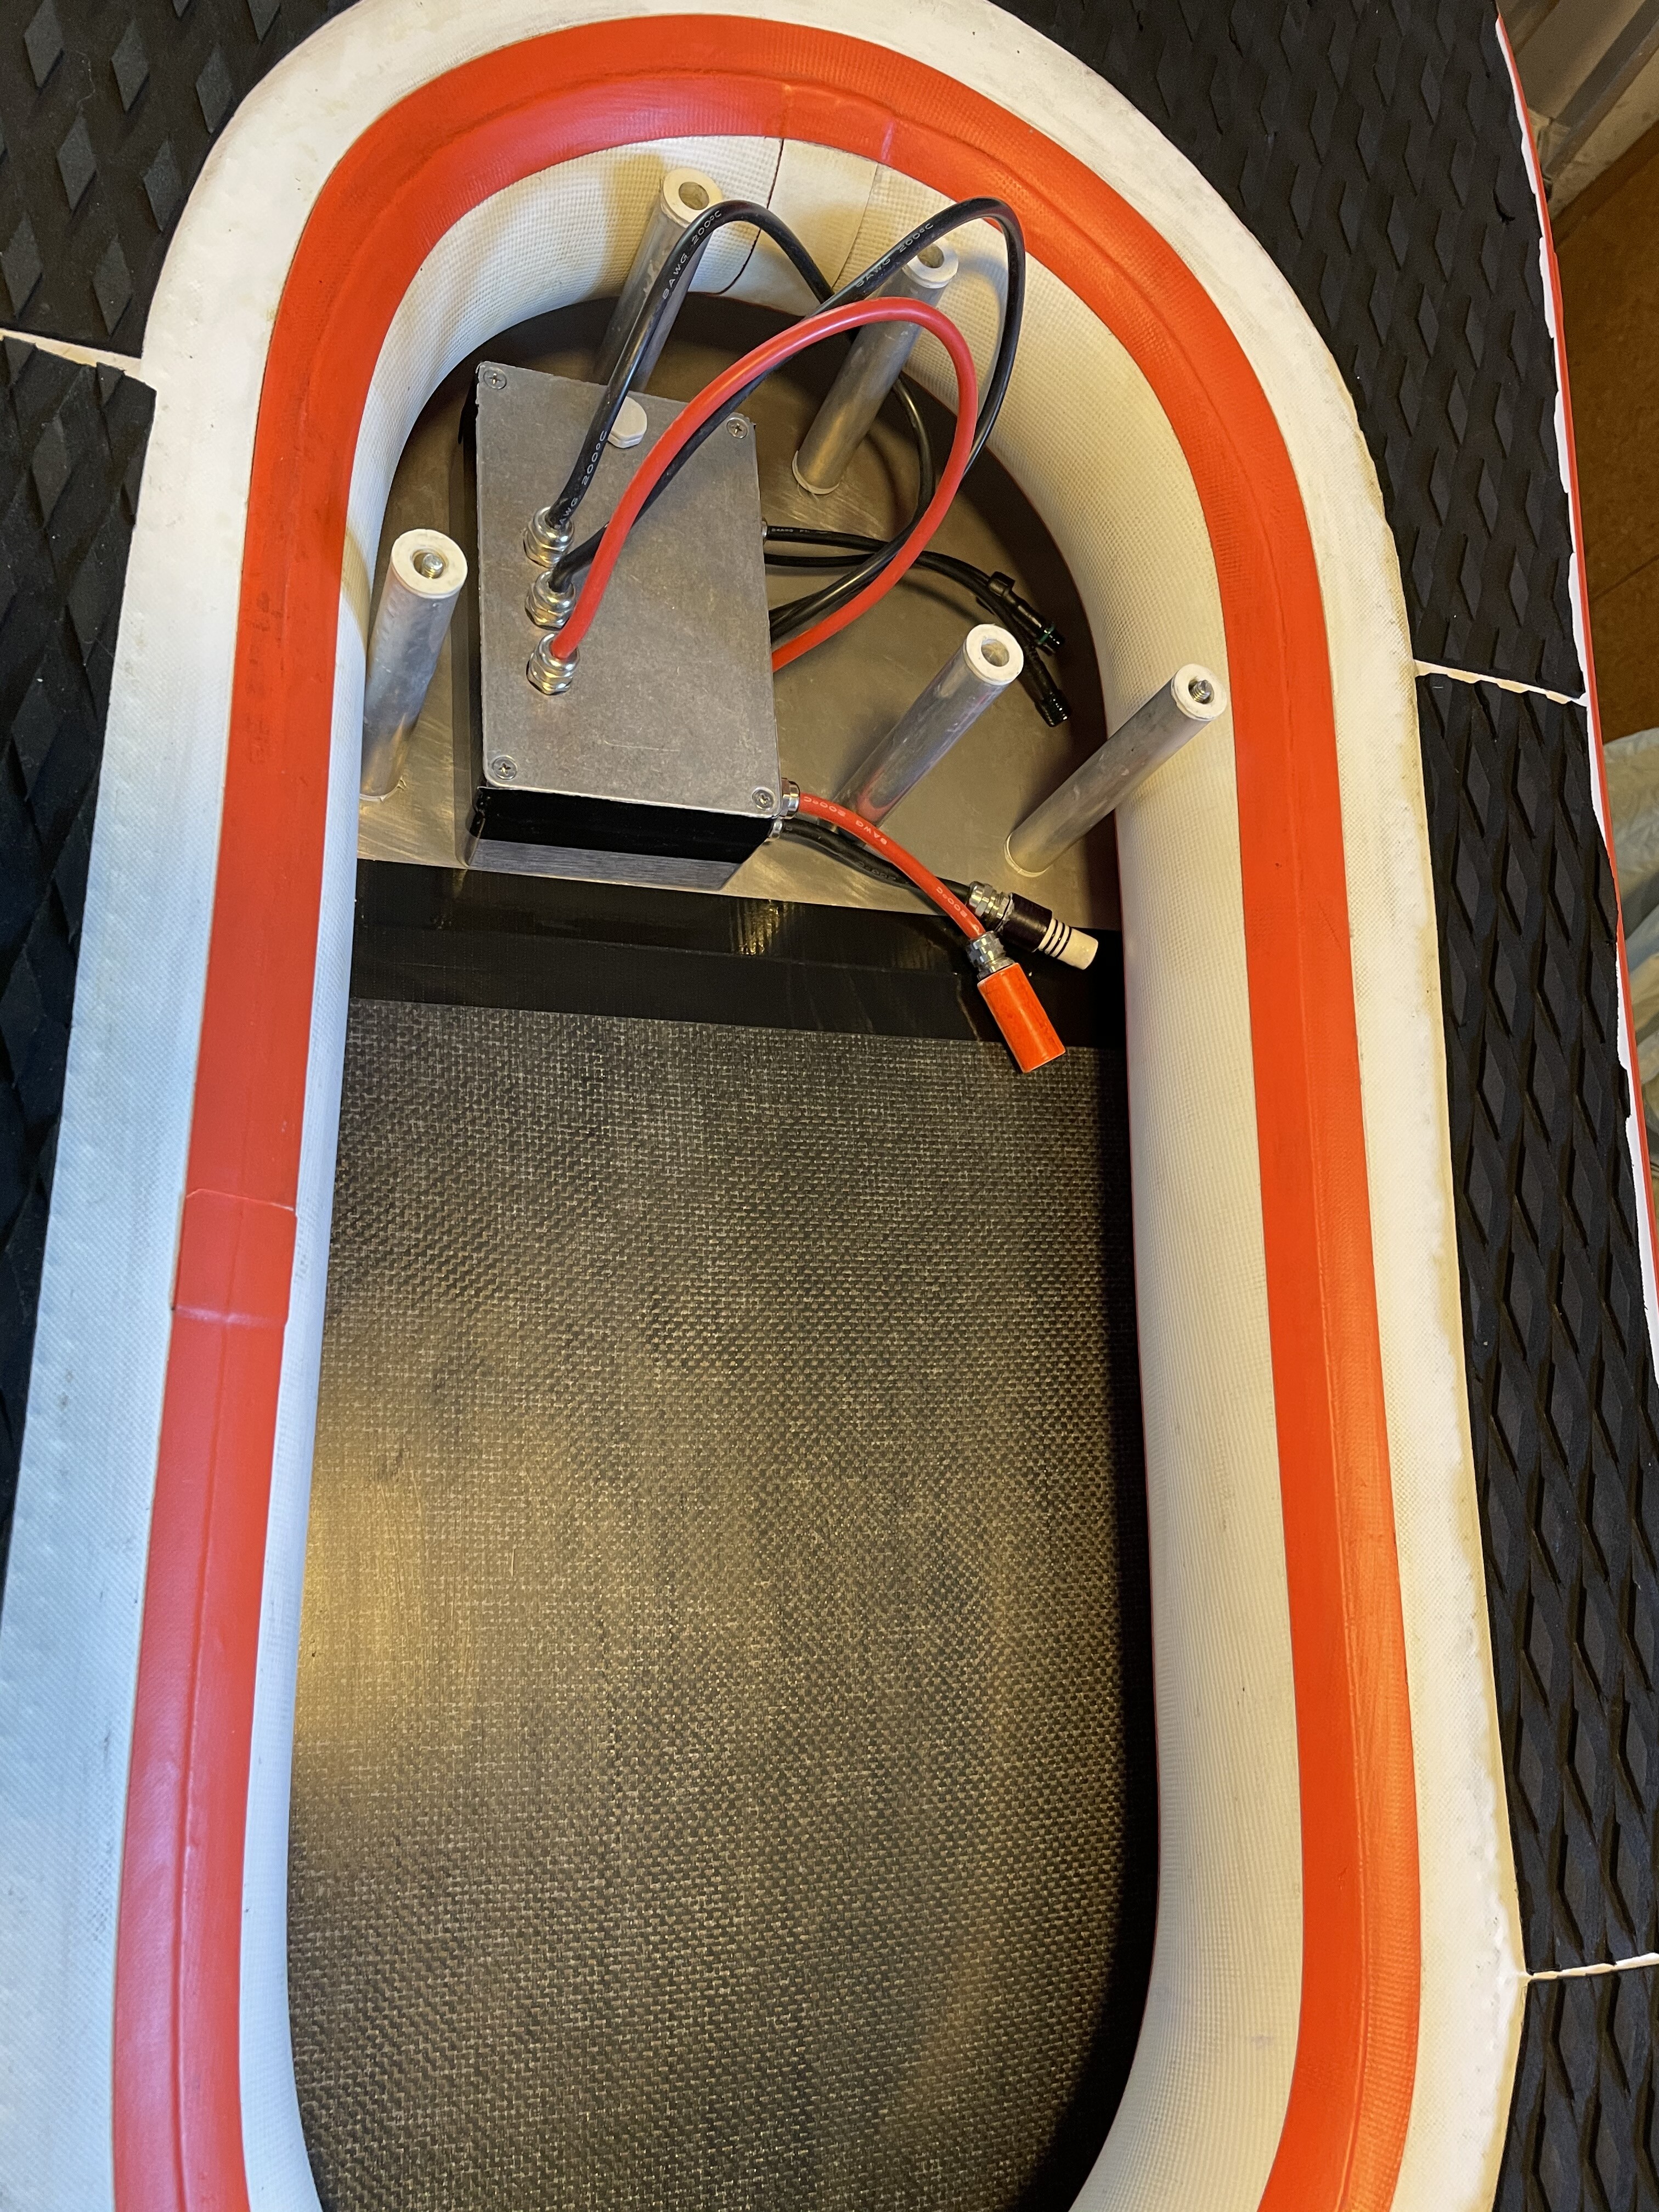
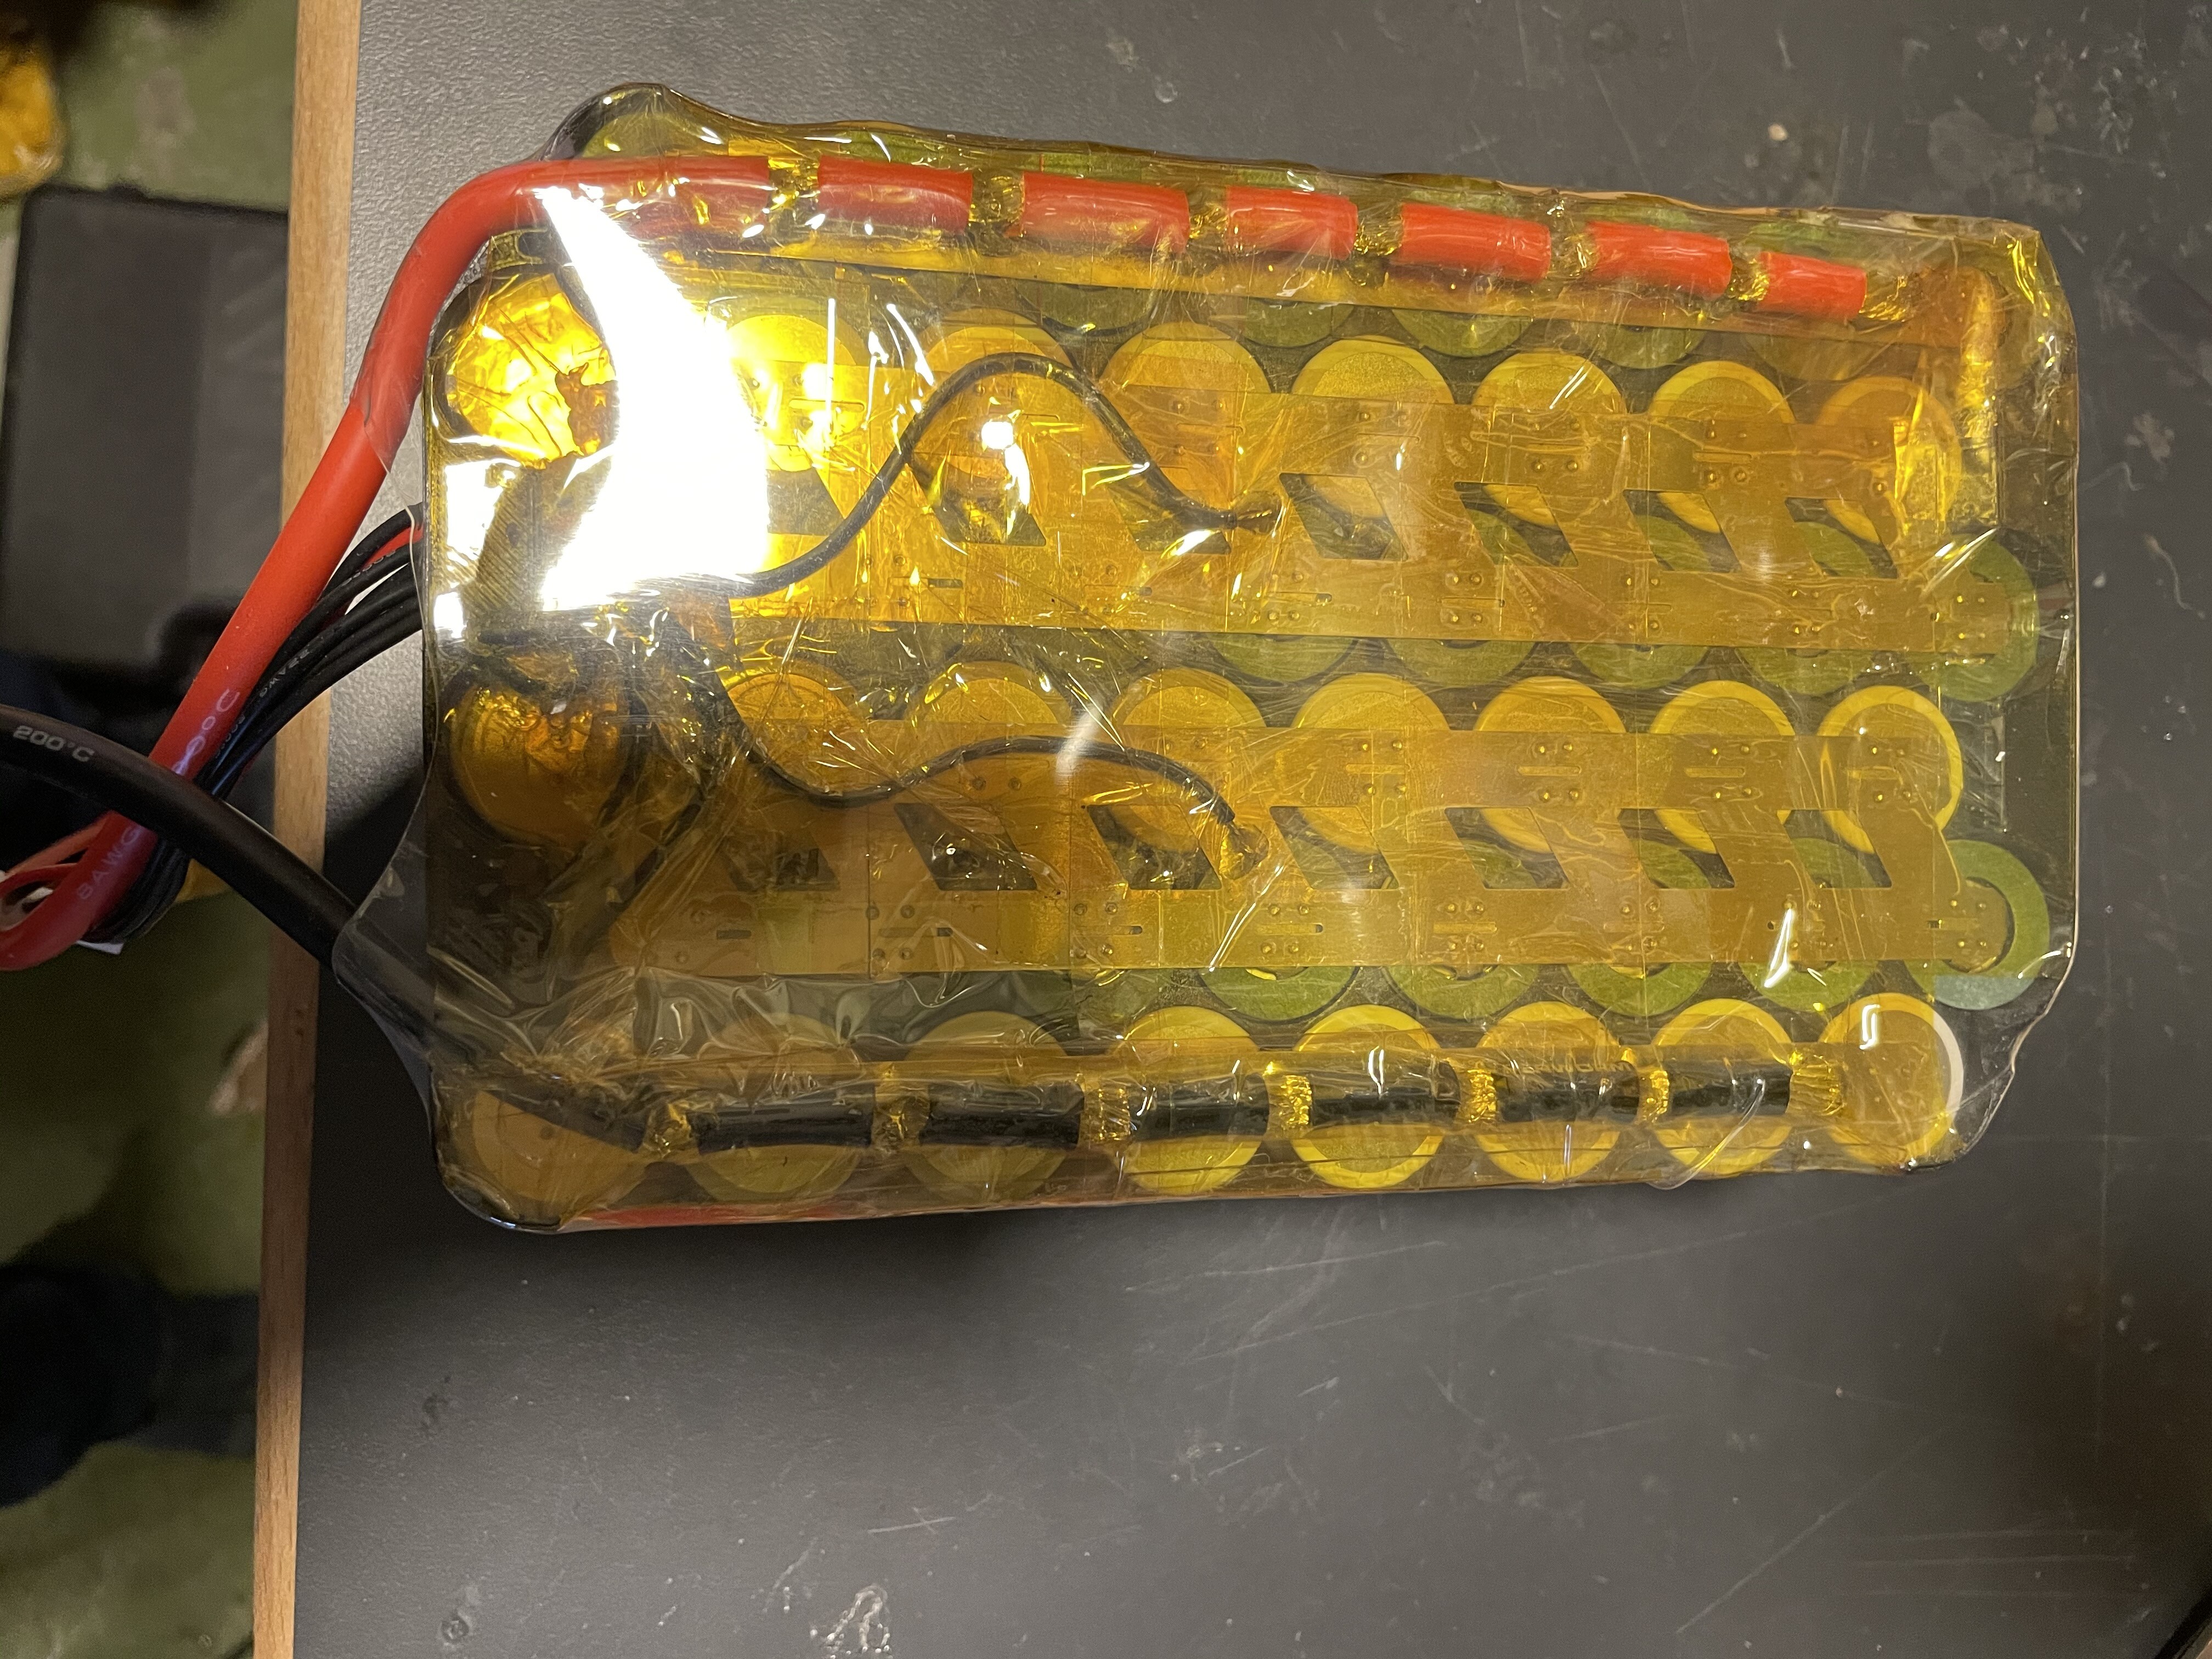
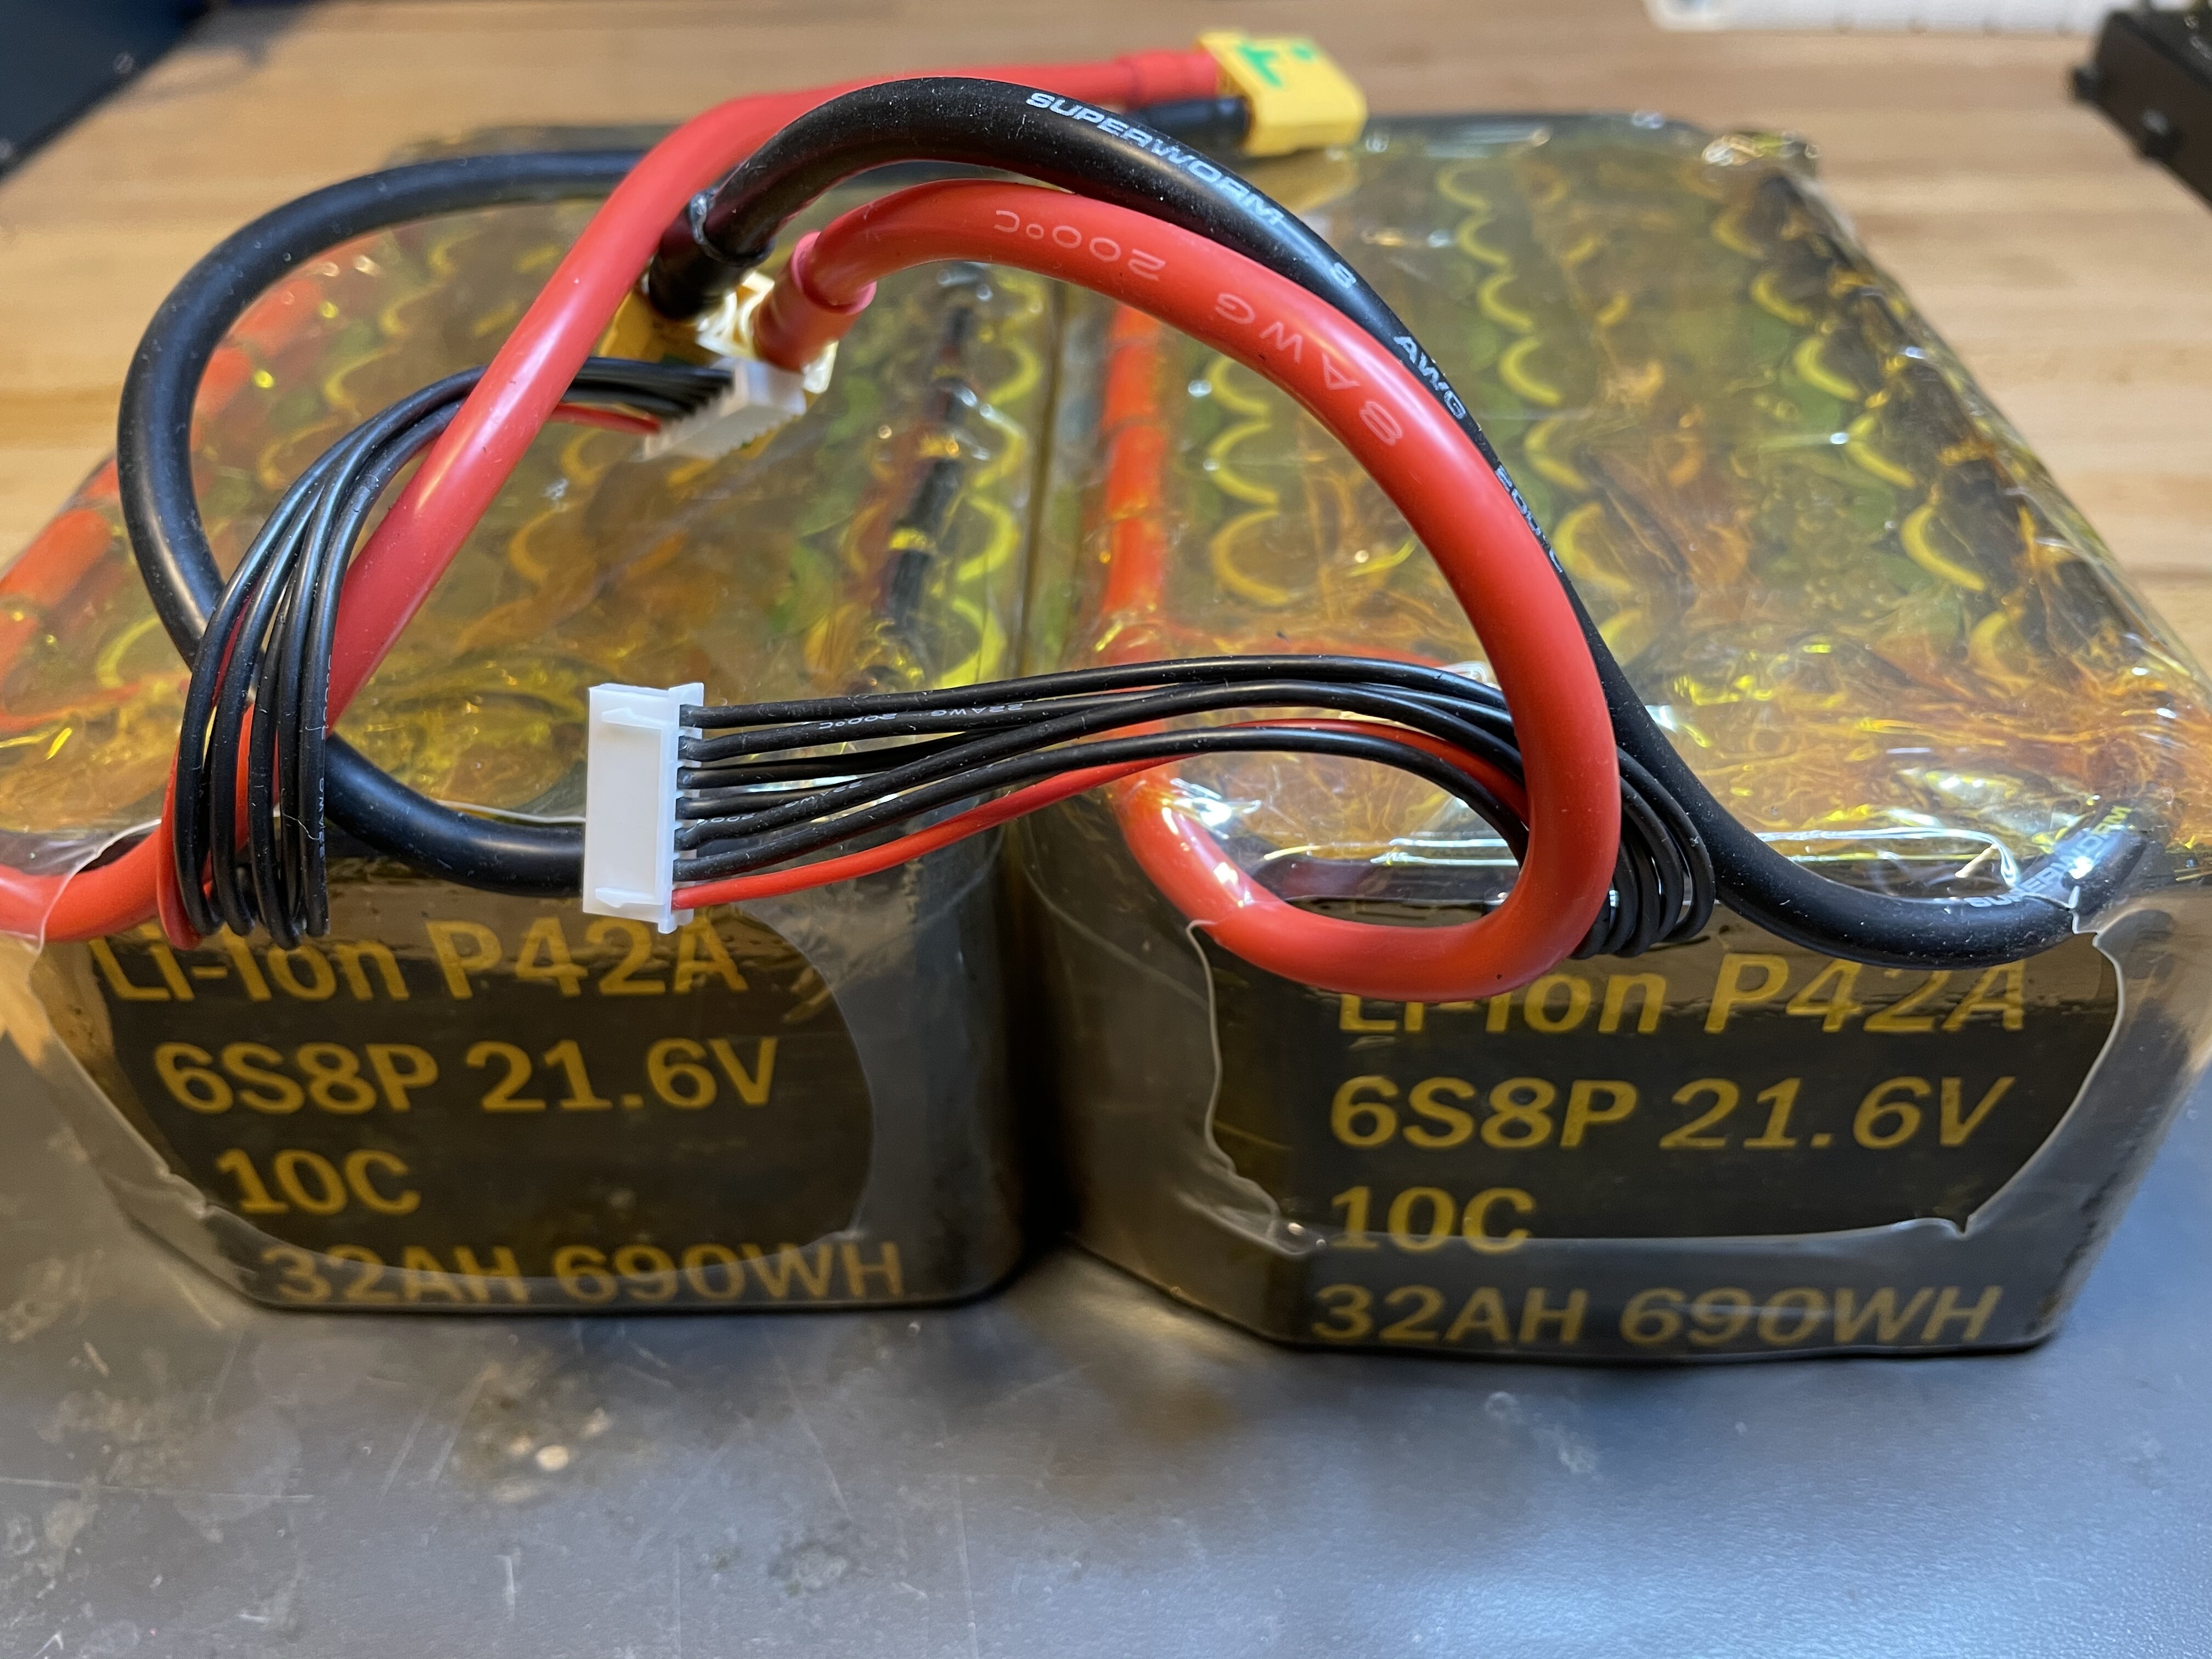
Also built LiIon packs as the Lipos started to loose capacity. As it is hard to get cells at the moment, I chose Molicel P42A 21700, they were available. The battery is split into two 6S packs to fit the hatch. Max I could fit in was 6S8P.


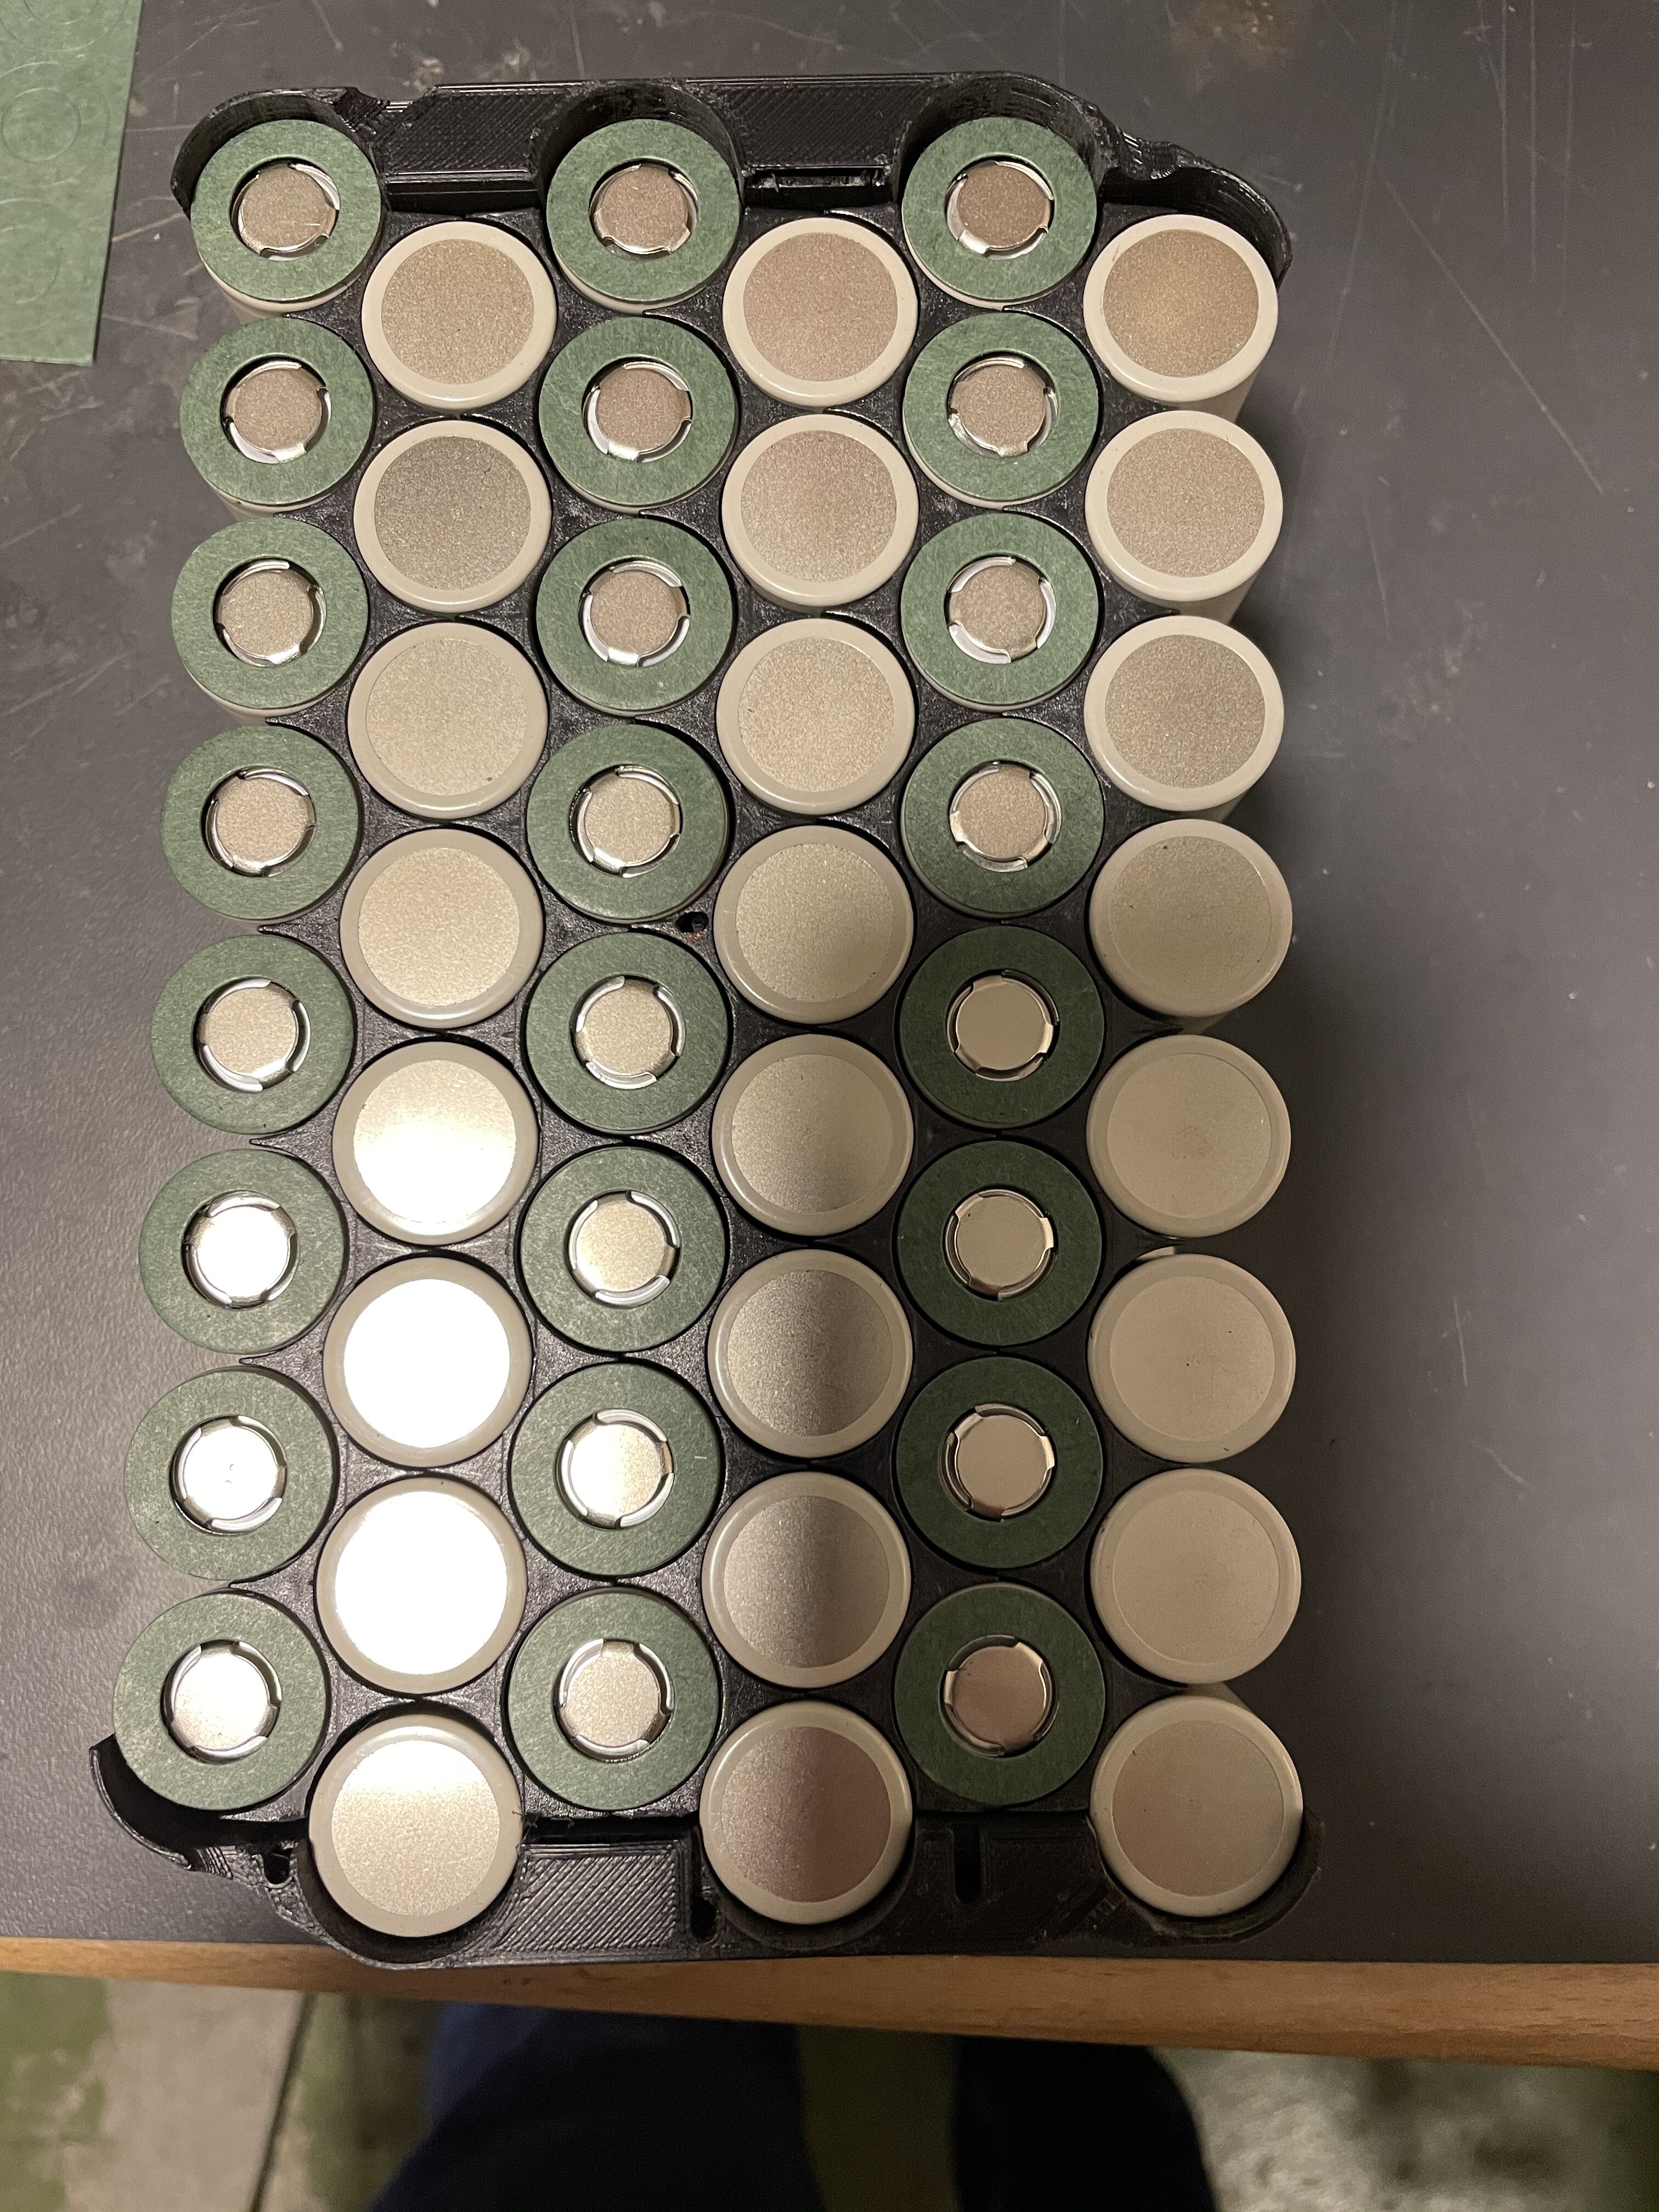
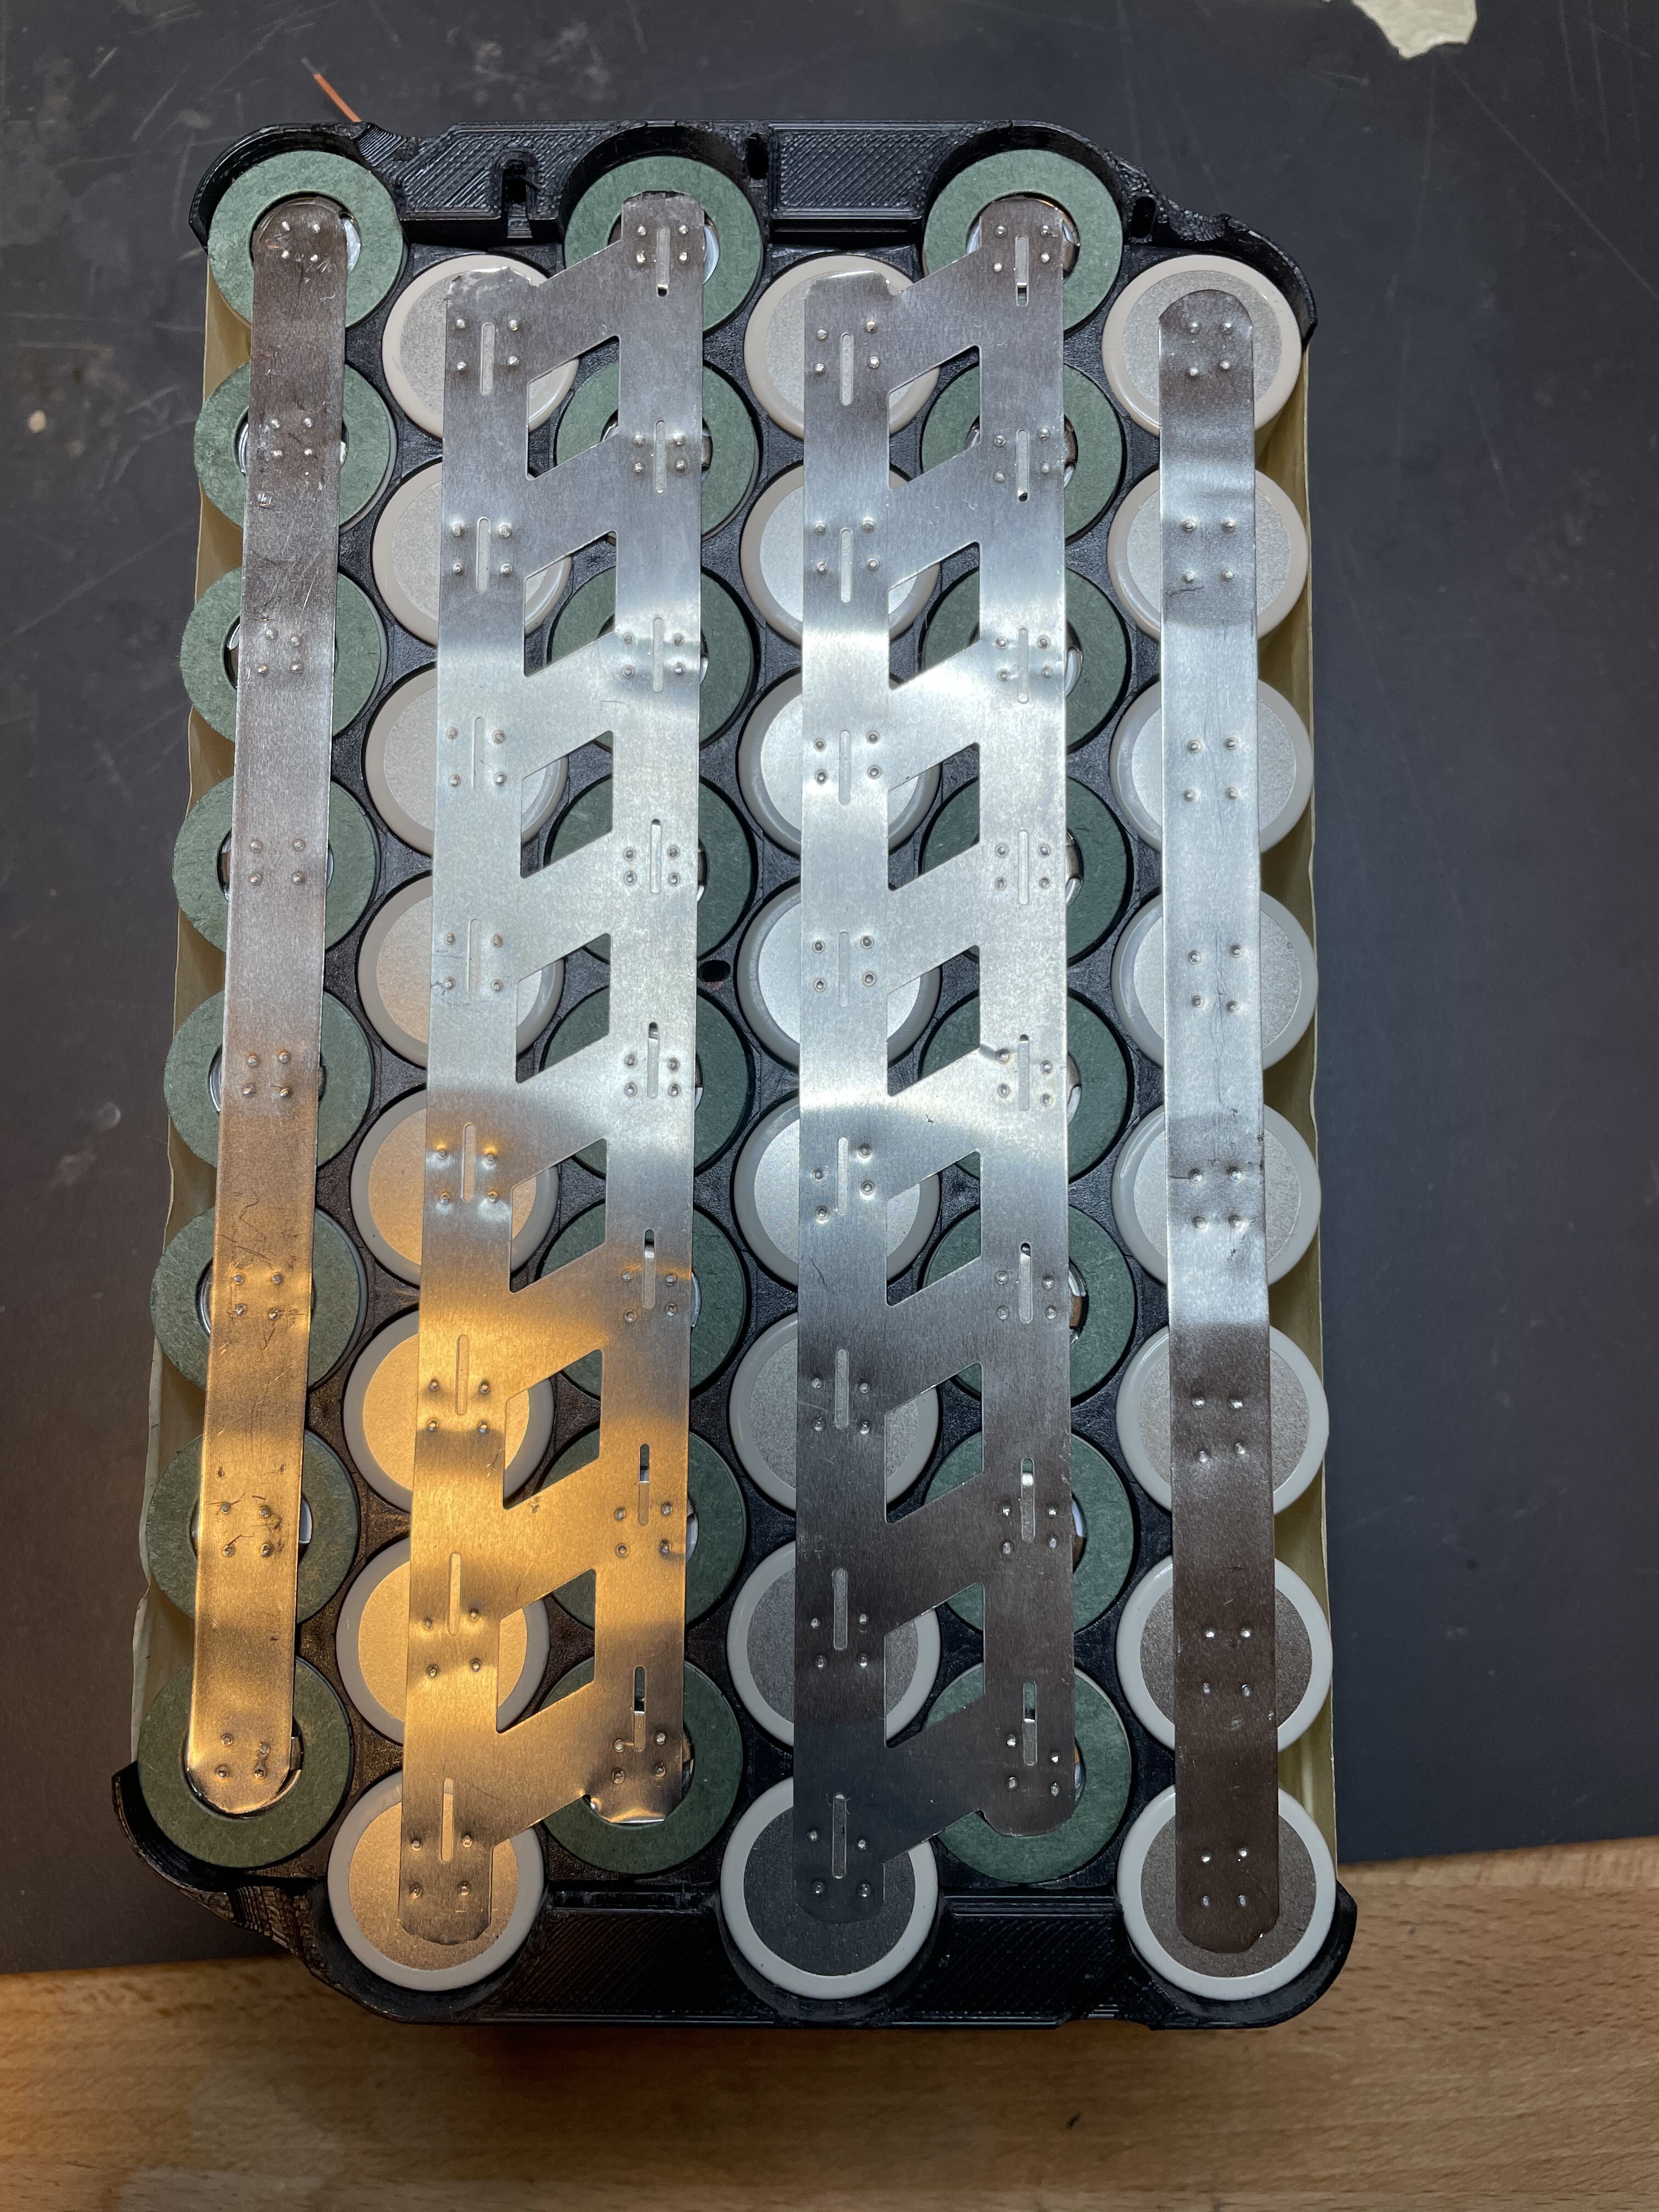
0.2mm nickel strips
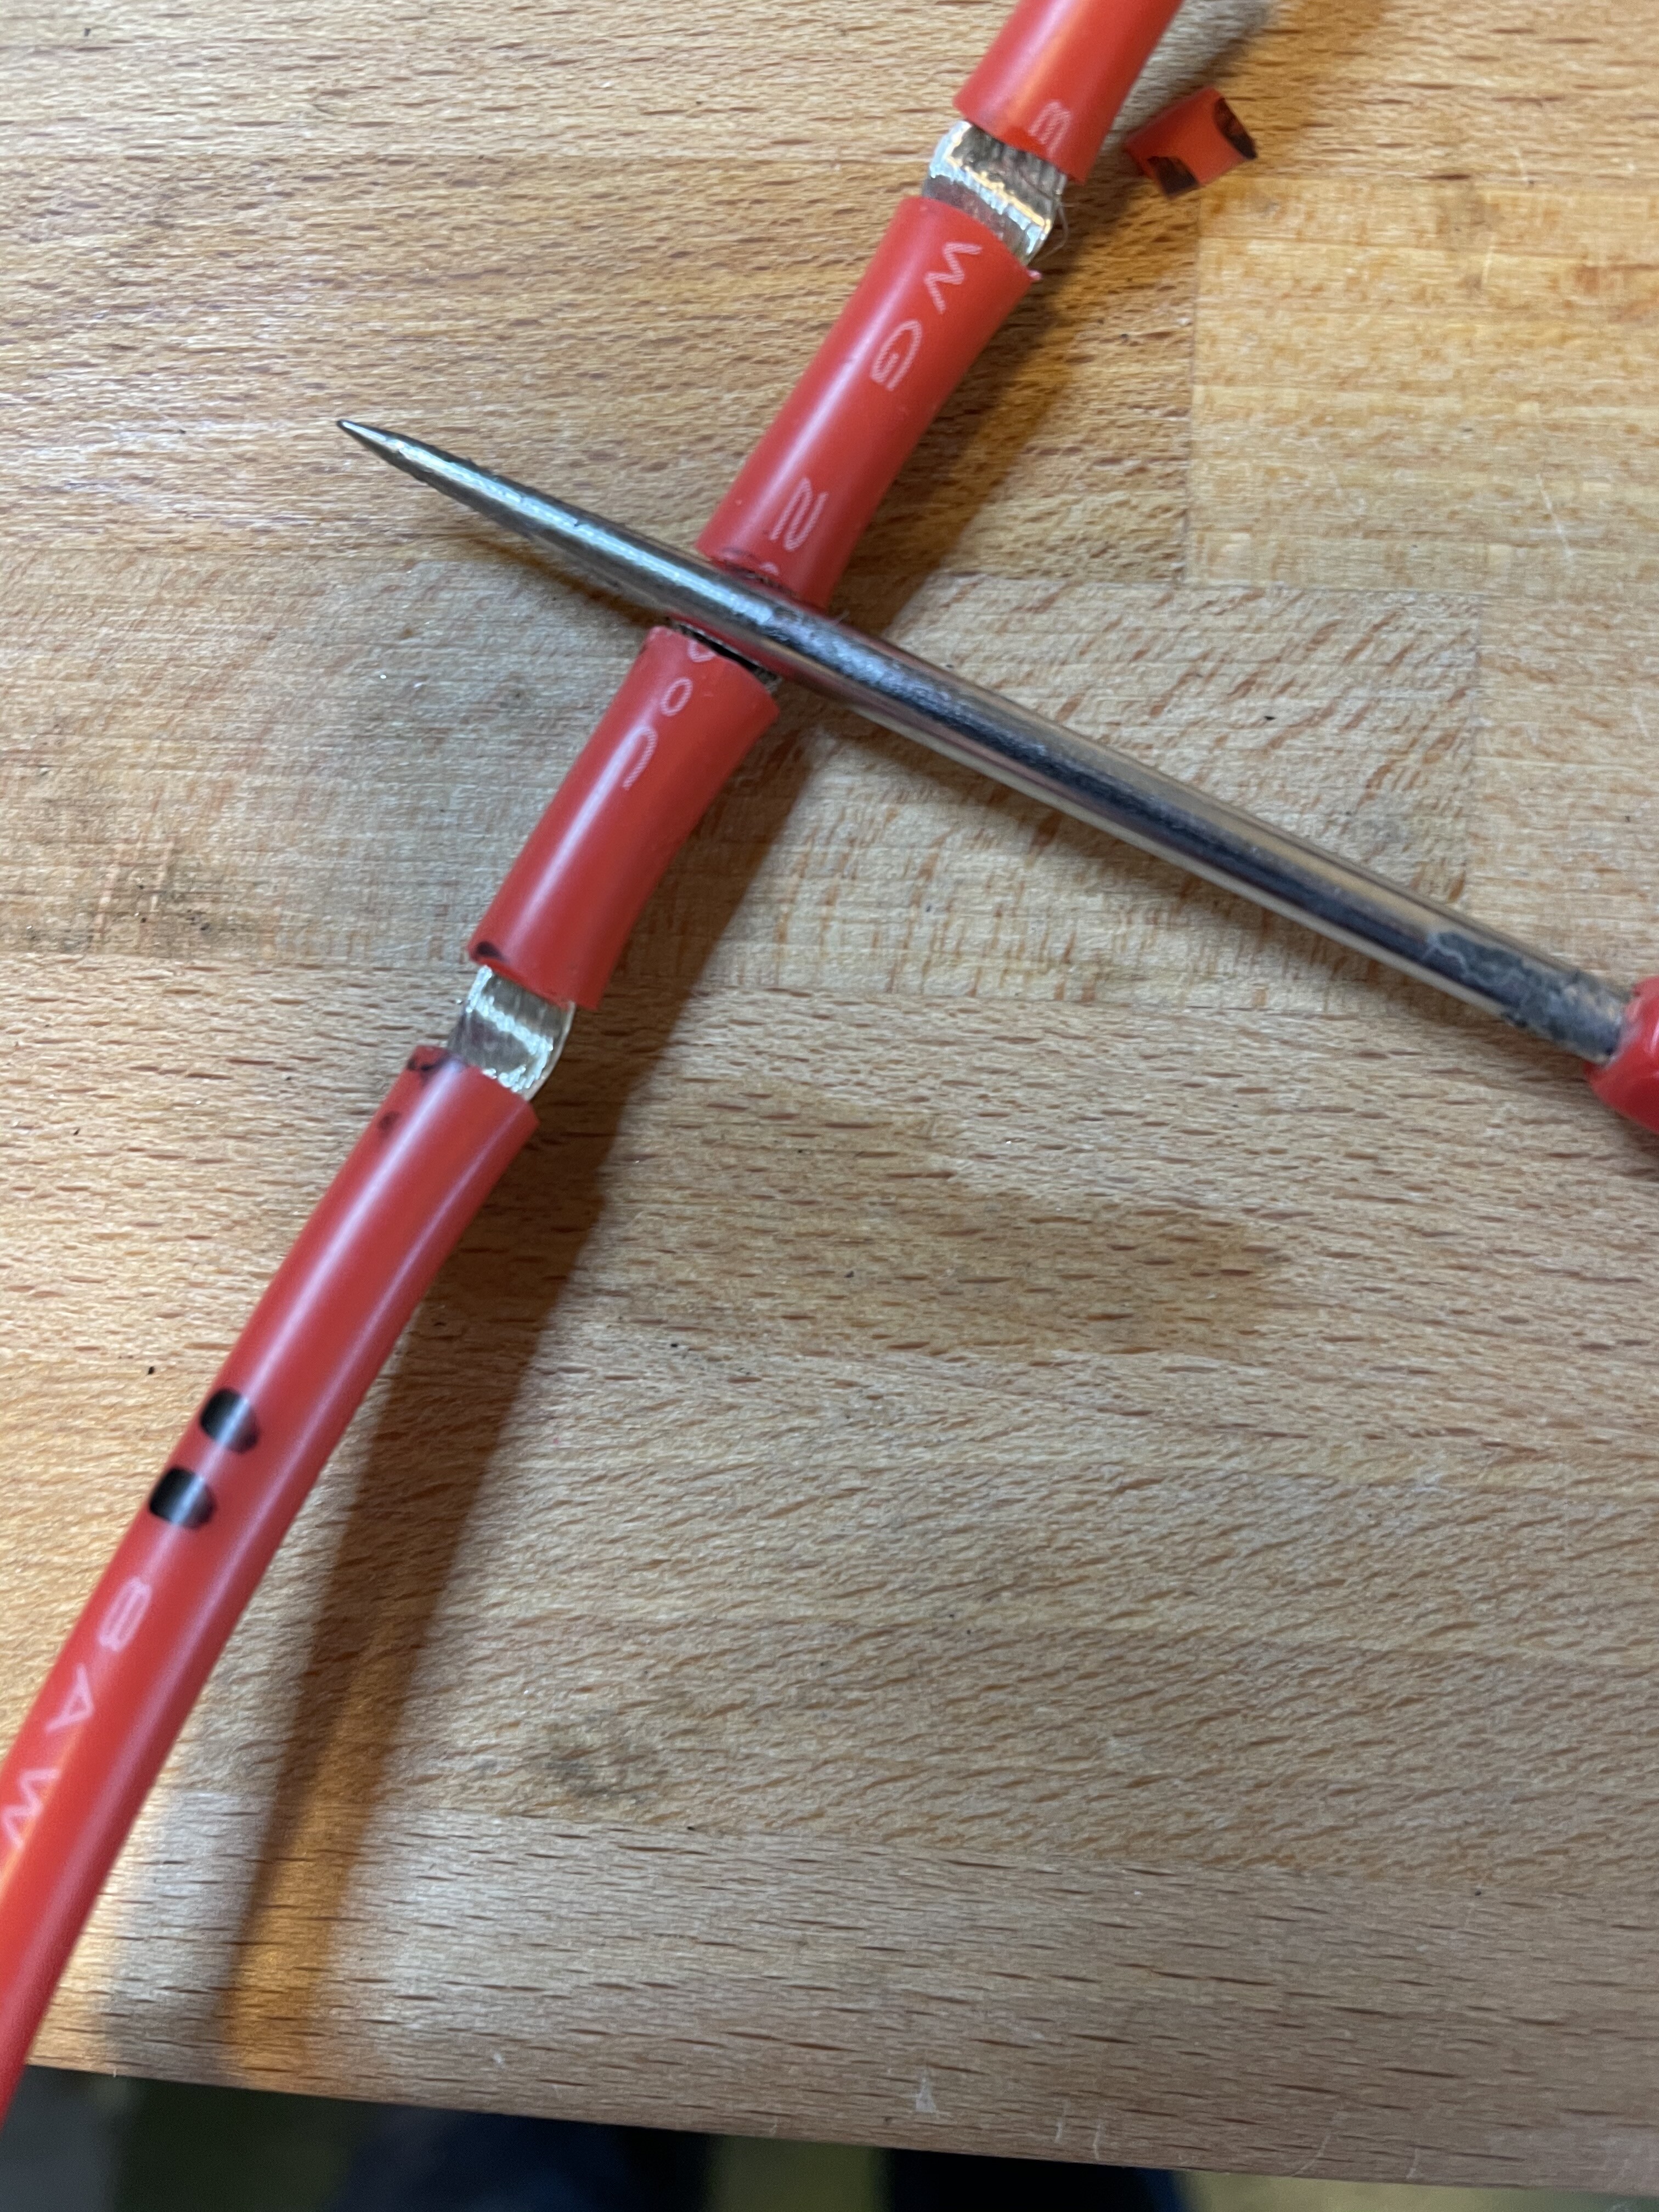

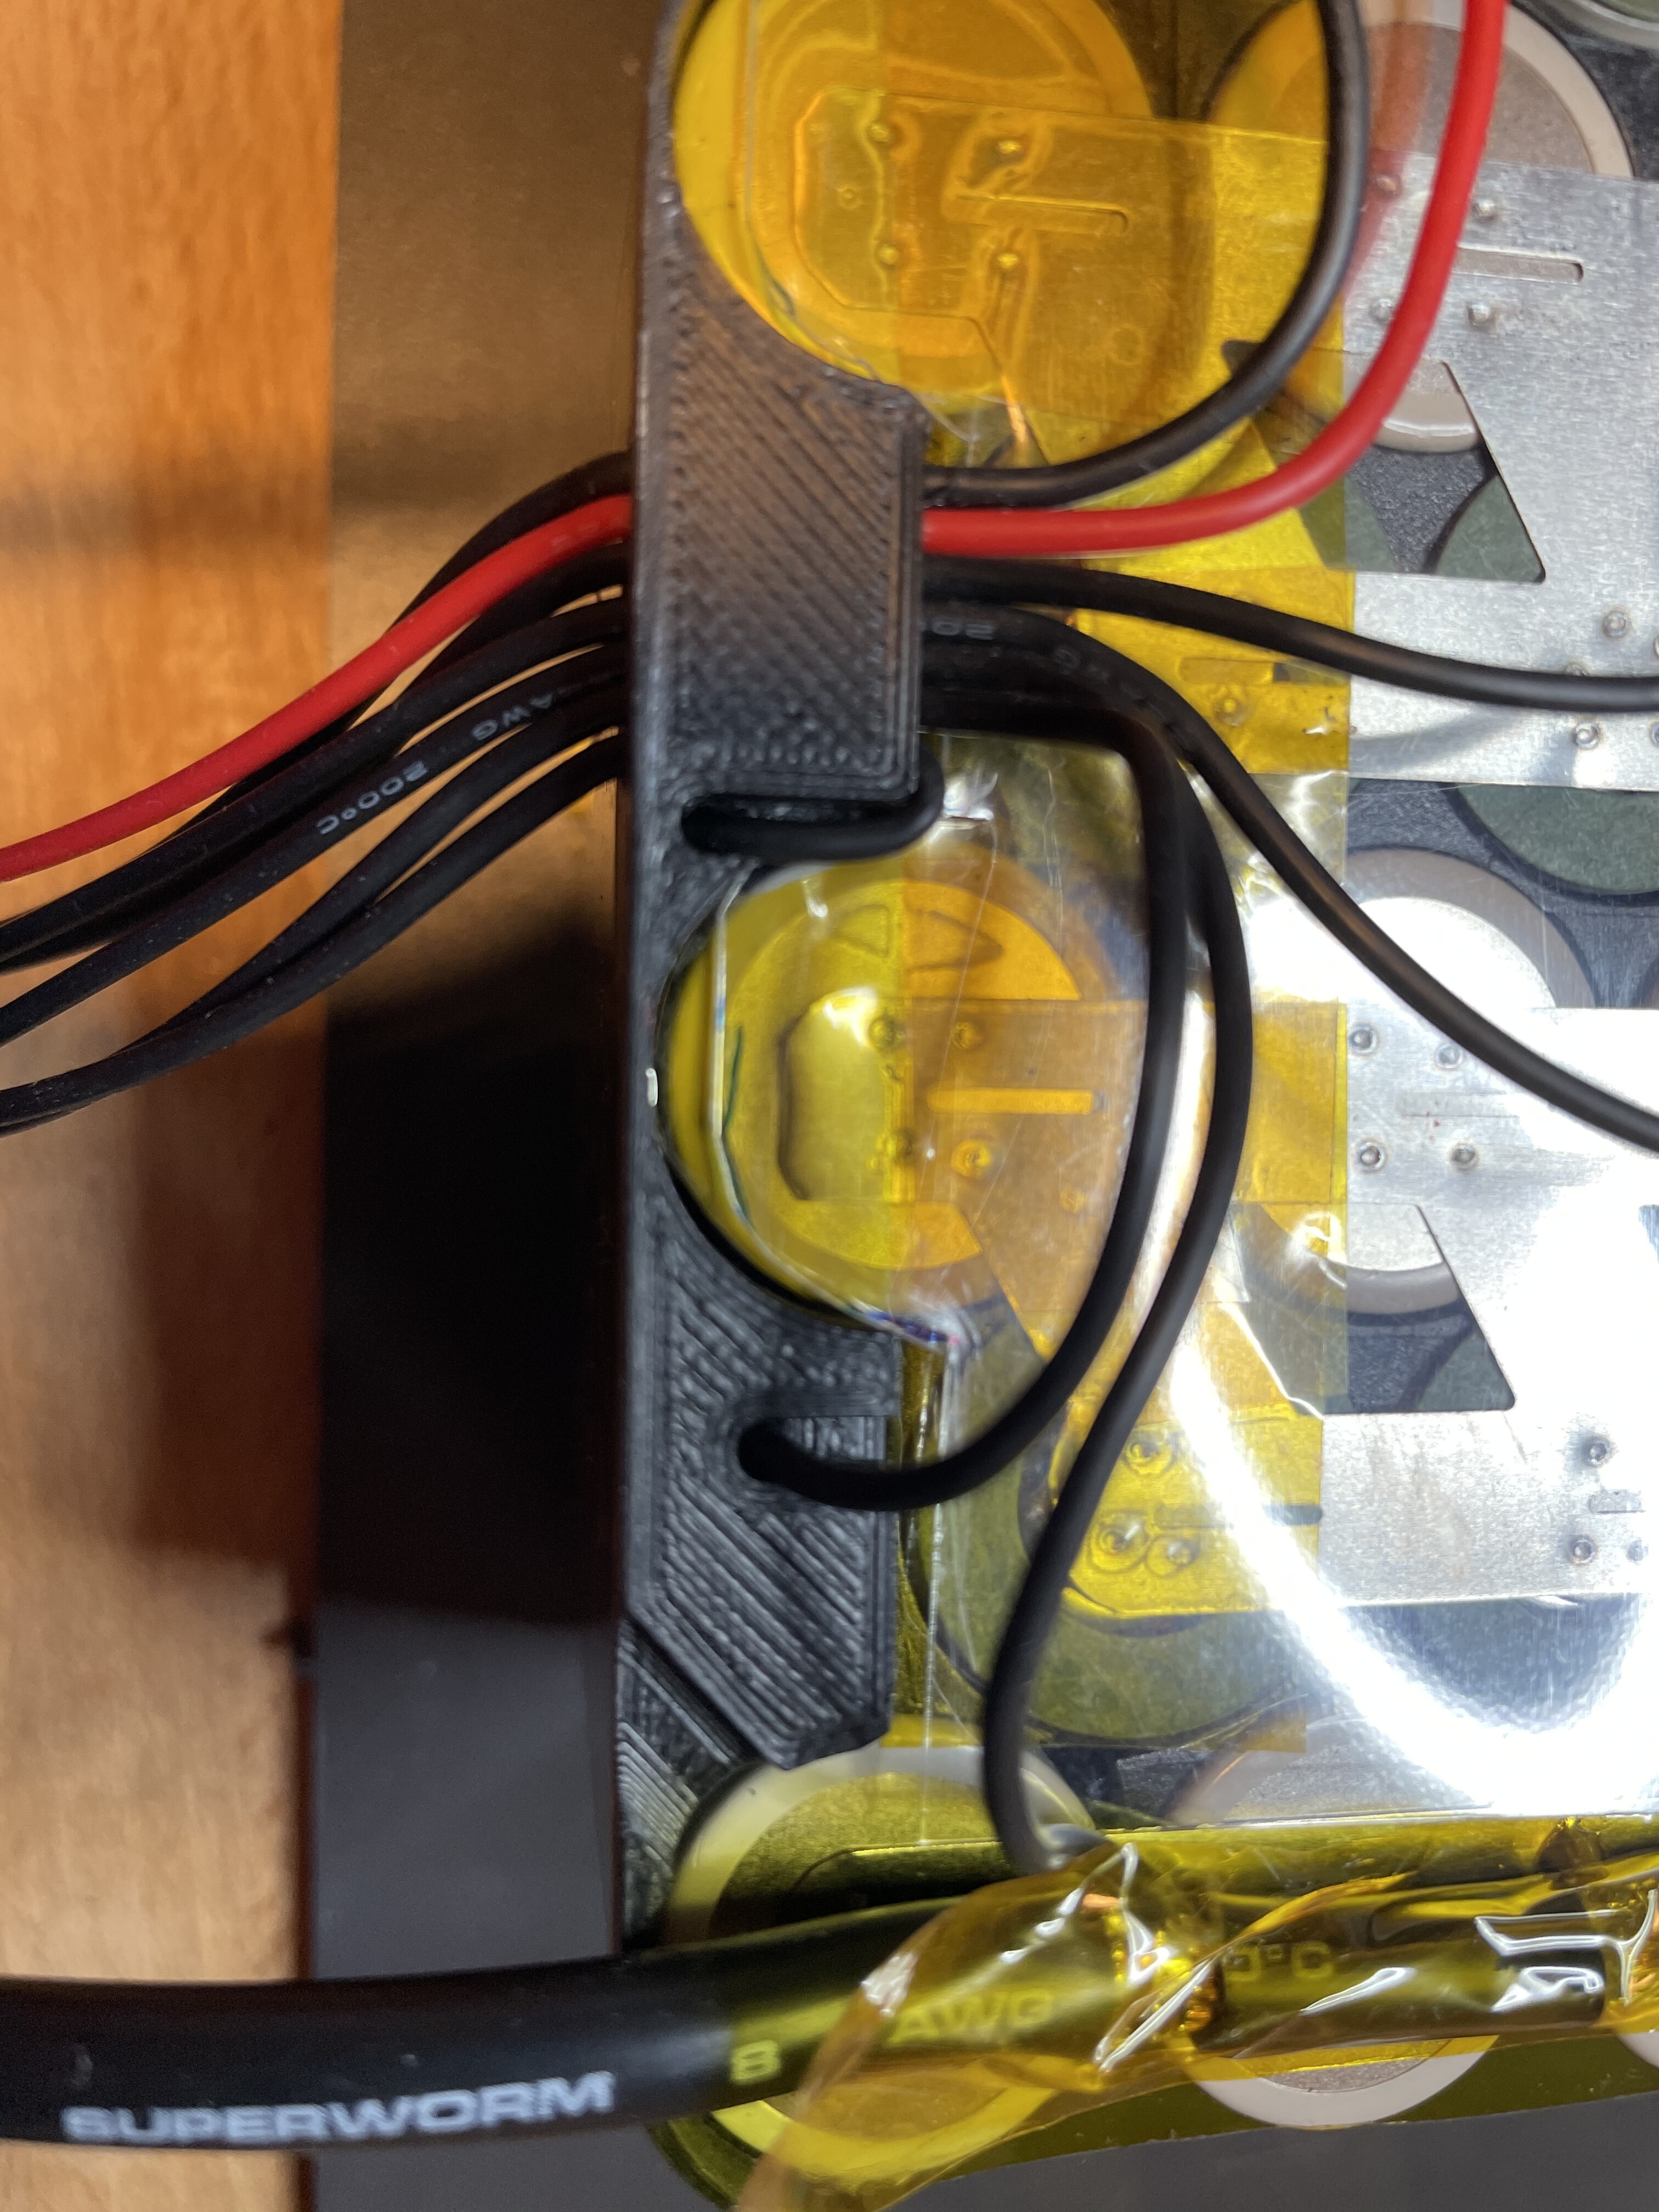
It was a bit tricky to solder the 8AWG wires to the strips (between the cells) but I had to minimise the size to fit them through the hatch.

I tried to route the balancing cables in a way they do not cross each other or other P-rows as the ones they are attached to. Where I had to cross, I added extra insulation (0.3mm plastic sheet). Used holes in the end caps to route the balancing cables to the bottom to keep them away from cells.
Transparent shrinking for easy inspection.
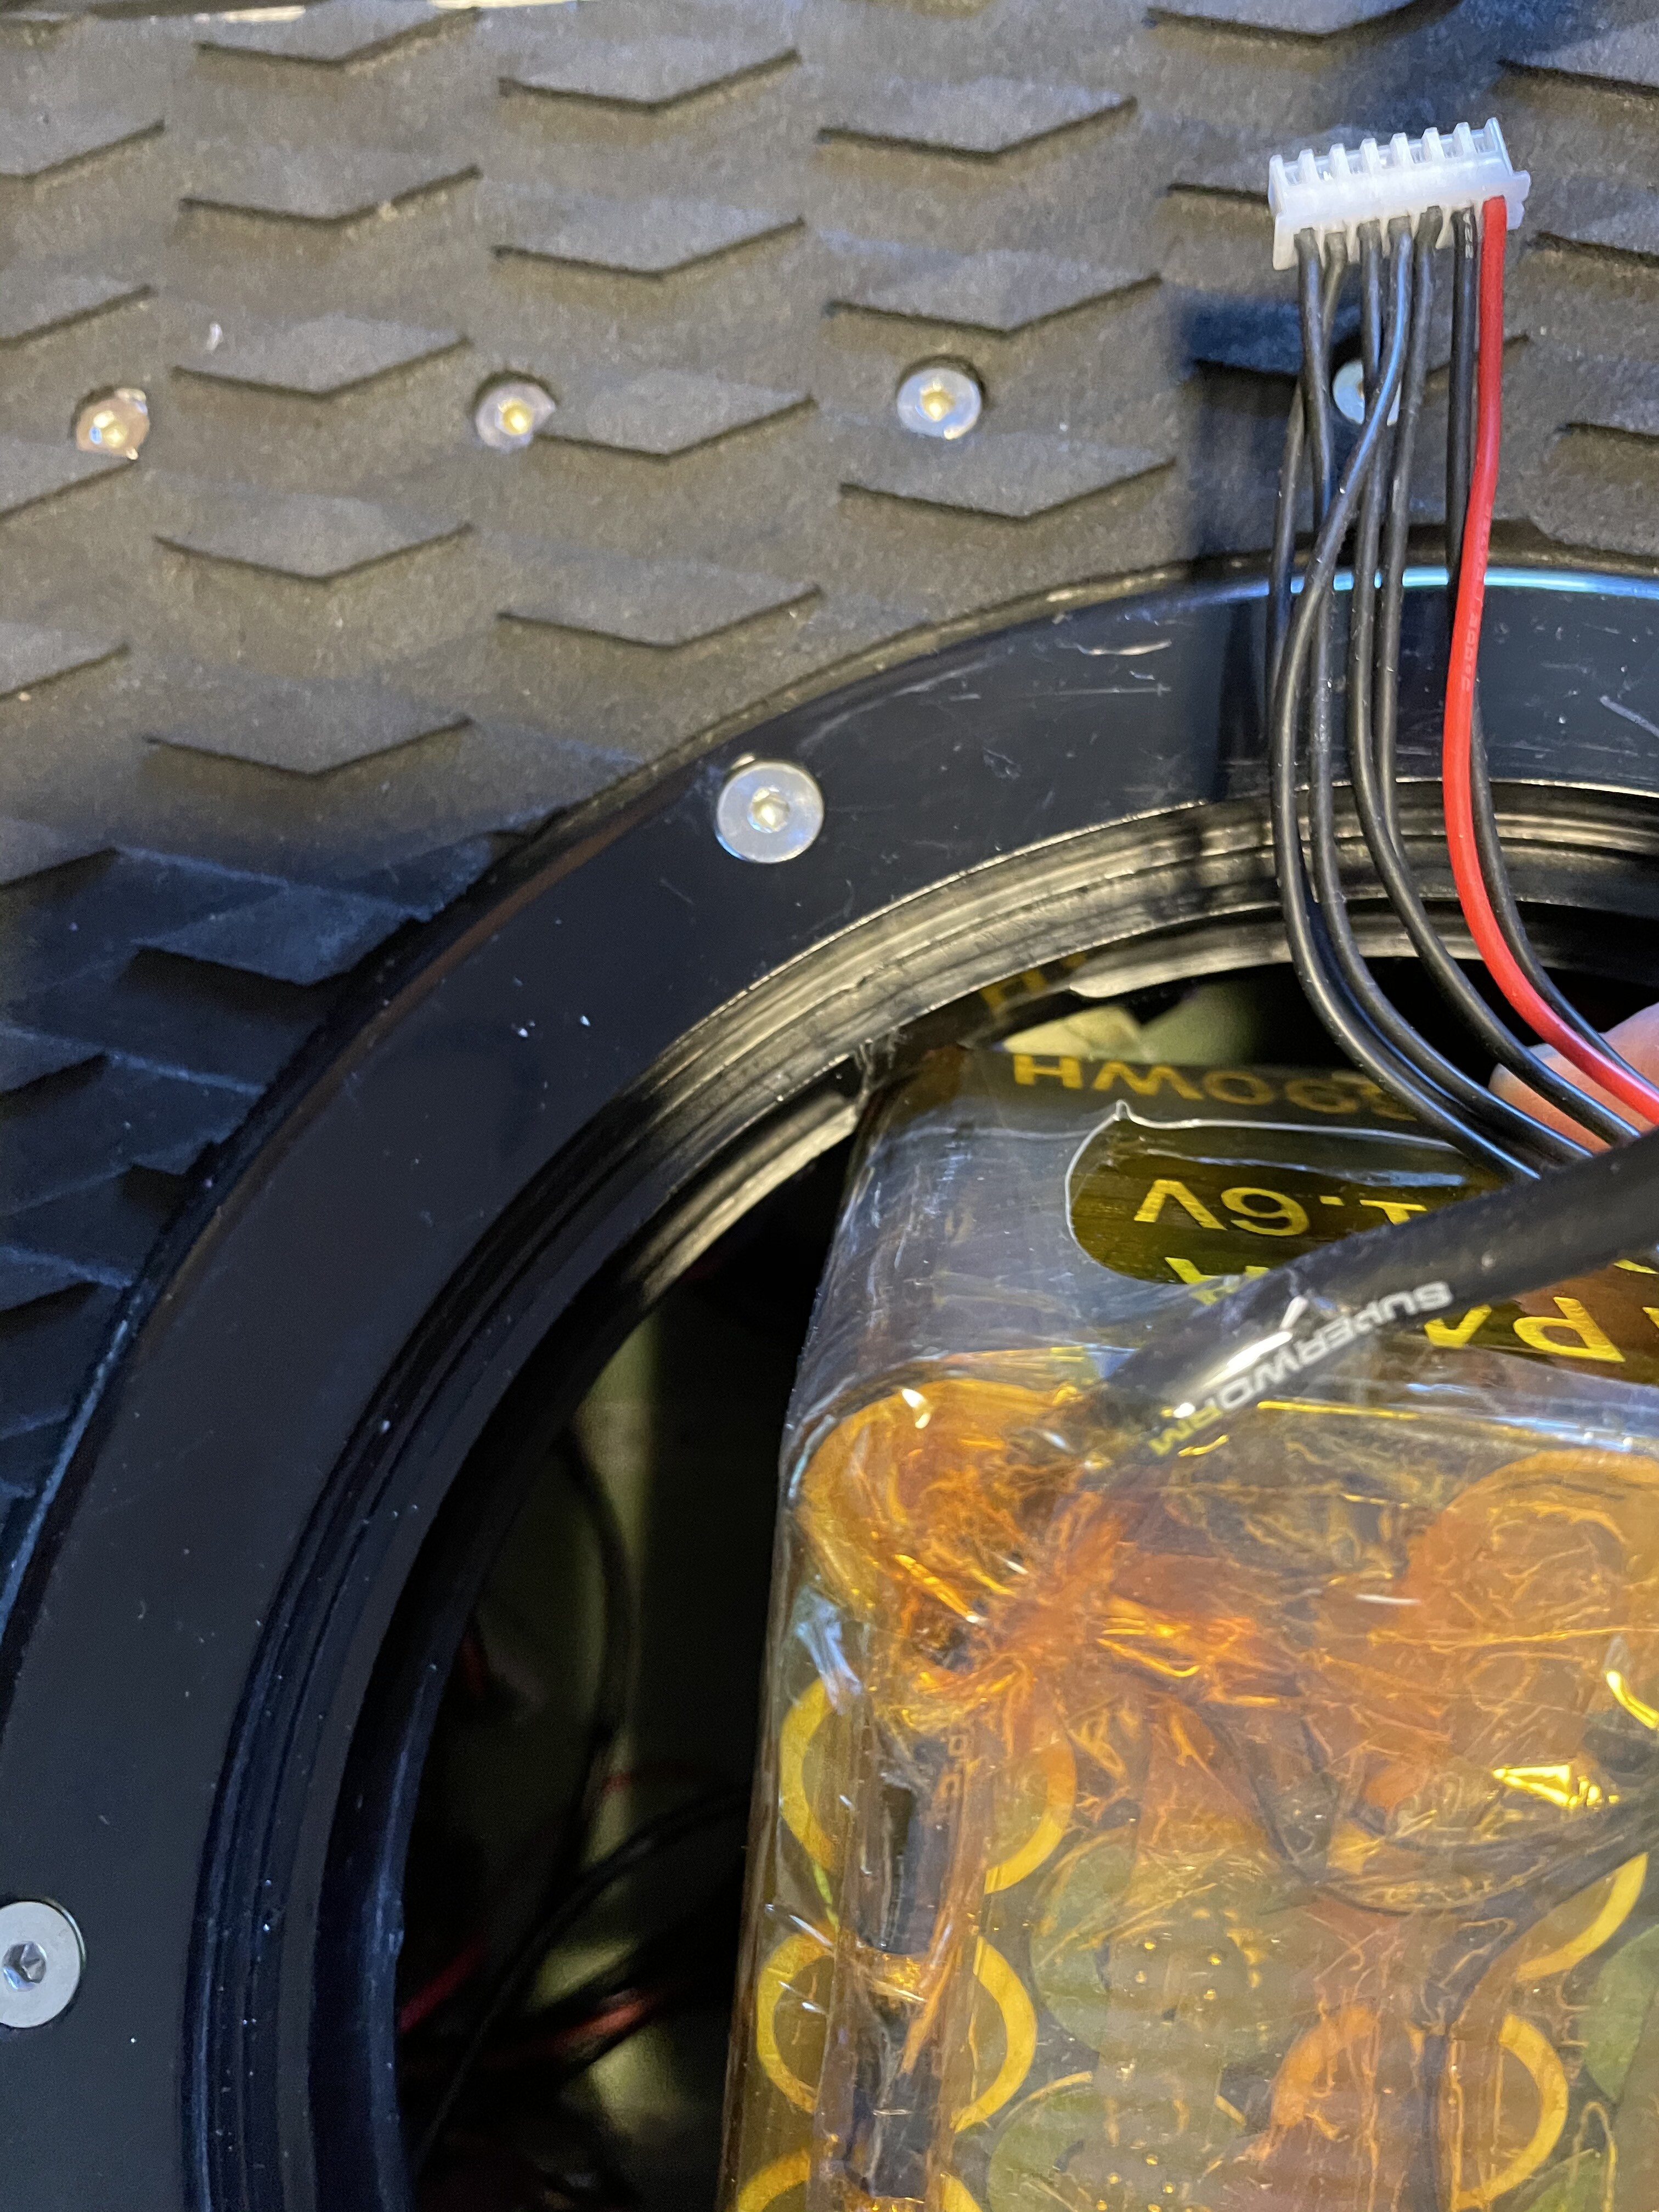
They just fit in.
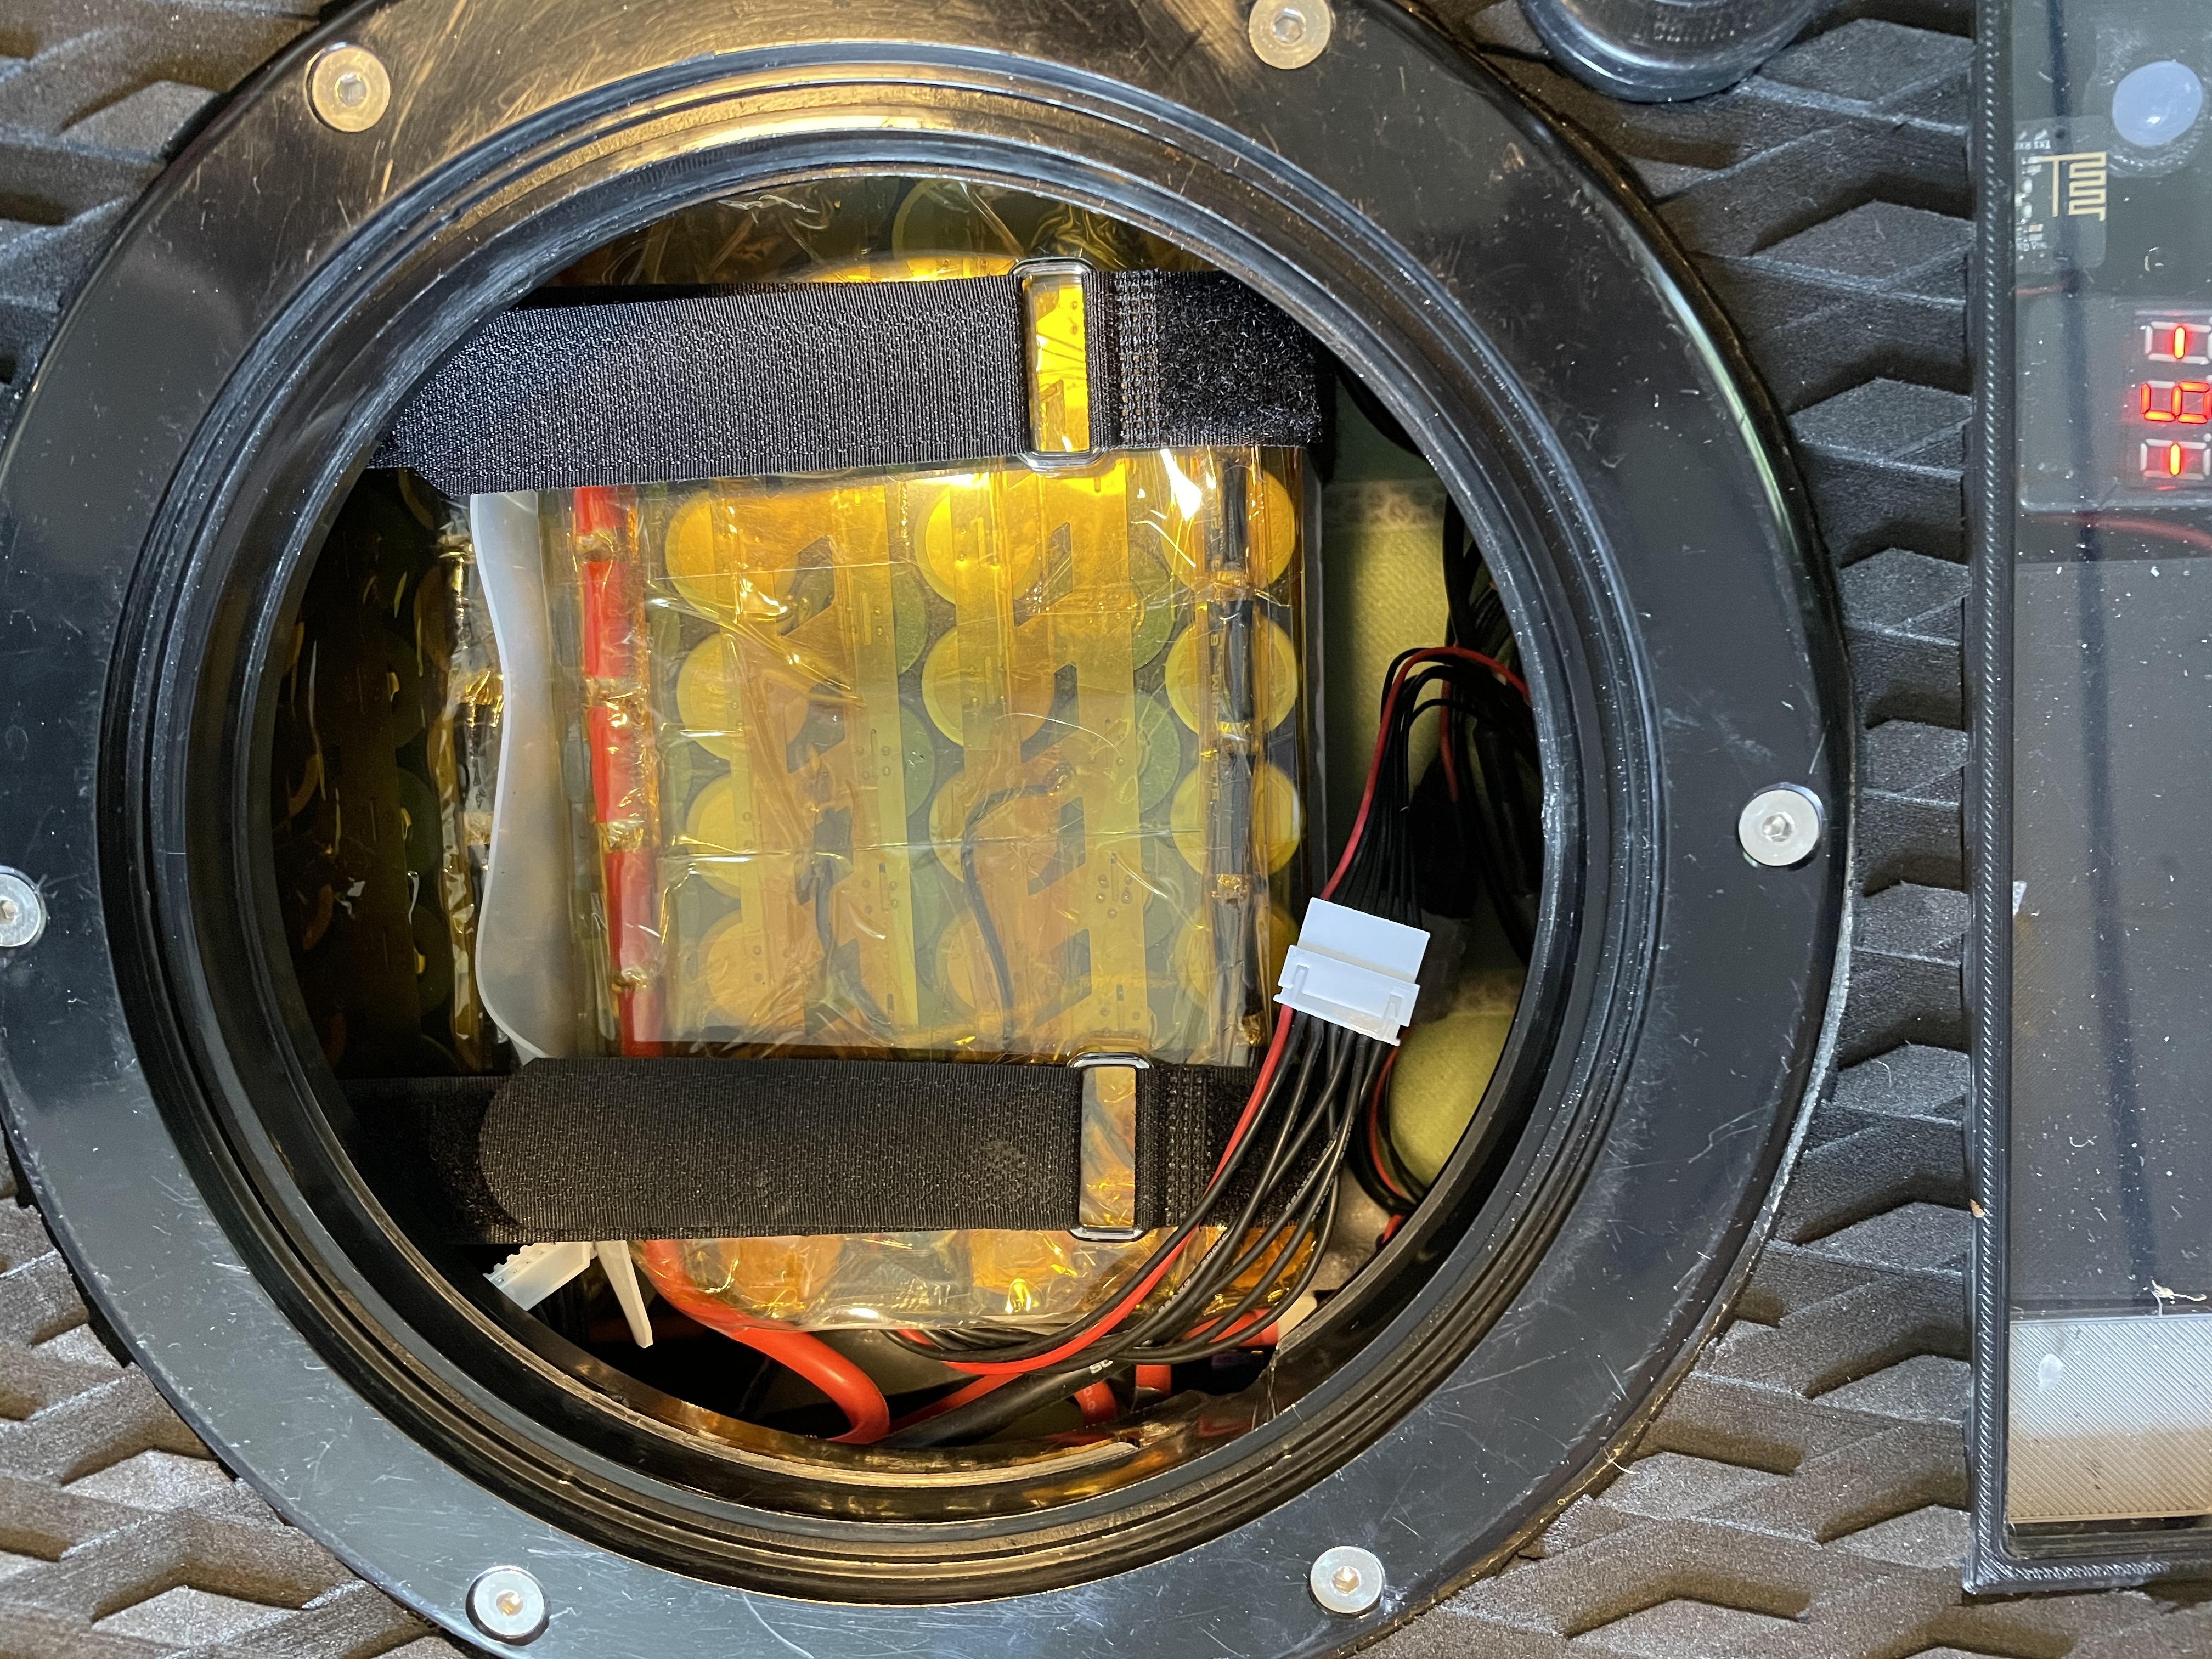
Thanks @kotnascher for inspiration and advice
14 Likes
This is great!
20char
Nice! Did you mill it yourself basis Toto’s design?
The black plastic cover/reducing adapter between the end of the motor bell and the prop was designed by @Toto44. There are a lot of slots to cover and this part perfetly fits, although it was initially designed for an SLA printer (printed it on an FDM printer with ASA-X). I lathed the shaft to attach the prop from aluminium based on a hand sketch.
1 Like
Hi Daniel thanks for the details! Would you mind sharing @Toto44 's design for the adapter?
Thanks, Marc